How to manage canned responses in Service Desk
Click 'Staff Panel' > 'Knowledgebase' > 'Canned Responses'
- Canned responses are saved answers to common problems that your staff can quickly paste into a ticket.
- Canned responses need to be enabled in 'Admin Panel' > 'Settings' > 'Knowledgebase'.
- You can automatically send a canned response in reply to certain tickets. You can set this behavior at 'Admin Panel' > 'Manage' > 'Ticket Filters'.
- See this wiki if you want to read more about ticket filters at this stage.
Use the following links for more help with canned responses:
- Enable canned responses
- The canned responses interface
- Create a new canned response
- Edit a canned response
- Remove a canned response
- Further reading
Enable canned responses in Service Desk
- Login to Comodo One / Dragon
- Click 'Applications' > 'Service Desk'
- Open the admin panel (see the last link on the left)
- Click 'Settings' > 'Knowledgebase’

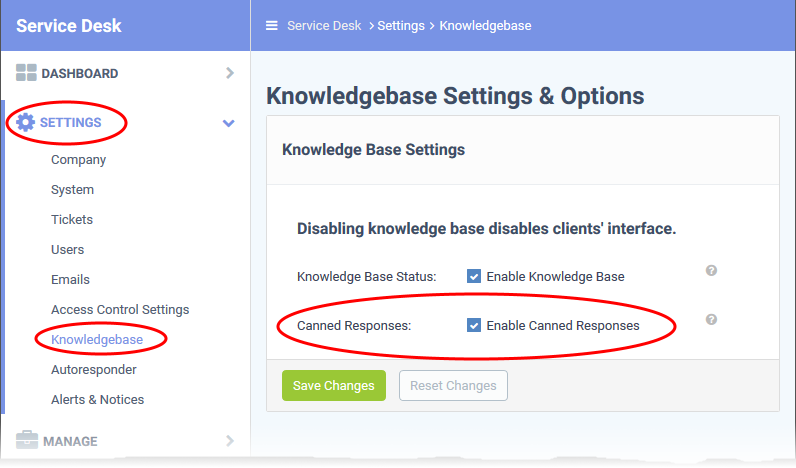
- Select 'Enable Canned Responses'
- Click 'Save Changes' for your settings to take effect
The canned responses interface
- Open the staff panel (see the last link on the left)
- Click 'Knowledgebase' > 'Canned Responses'

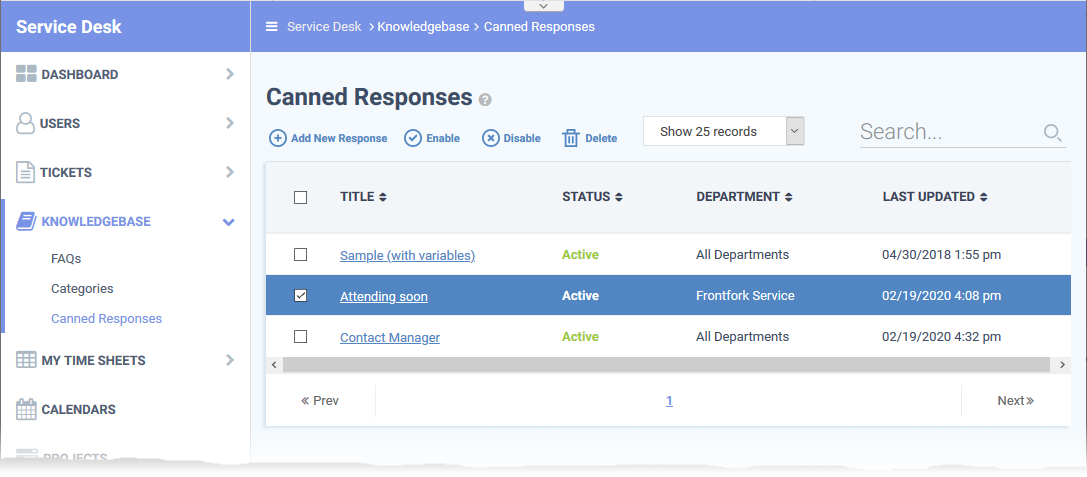
- Title: The name of the response.
- Click the name of a canned response to update it. See Edit a canned response if you need help with this.
- Click the name of a canned response to update it. See Edit a canned response if you need help with this.
- Status: Indicates whether the response is active or disabled. Staff can only view and use ‘active’ responses when answering a ticket.
- Department: The Service Desk department to which the canned response is assigned. The response is only available for use on tickets assigned to this department.
- Last Updated: Date and time the response was most recently edited.
- Open the staff panel (see the last link on the left)
- Click 'Knowledgebase' > 'Canned Responses'
- Click 'Add New Response'

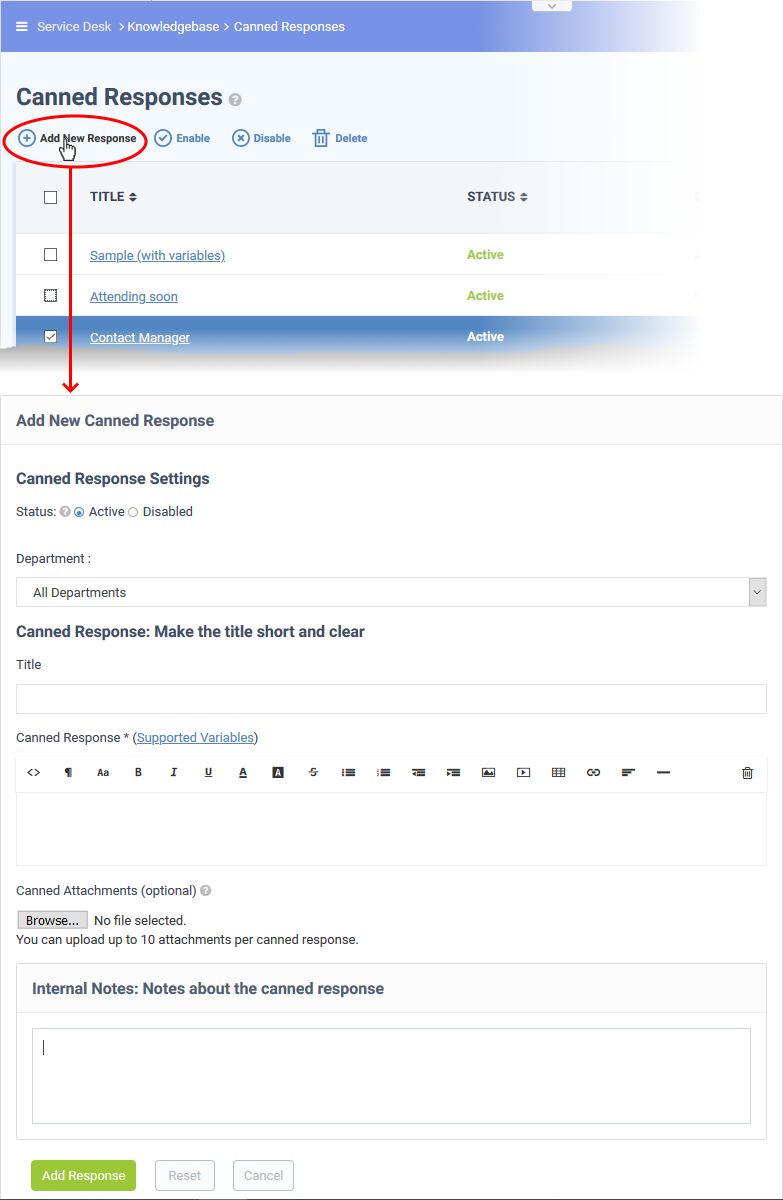
- Status:
- Active: The canned response is available for staff to use when responding to a ticket.
- Disabled: The canned response is not available to staff.
- Active: The canned response is available for staff to use when responding to a ticket.
- Department: Assign the response to a specific Service Desk department. The response is only available for use on tickets assigned to this department. Choose 'All Departments' to make it available to all.
- Title: Enter a brief description of the canned response. This should tell staff members about the contents of the actual response.
- Canned Response: Enter the reply text in the space provided. You can also insert variables into the text to fetch relevant information from the database.
- See Variables available for use in a message for help to view the list of variables that can be used in a message.
- See Variables available for use in a message for help to view the list of variables that can be used in a message.
- Canned Attachments: Add attachments to the response. Please take care to reference the attachment in your response text. Click the 'Browse' button to upload your files. You can attach a maximum of 10 files per response.
- Internal Note: Add remarks about the response for internal purposes.
- Click the 'Add Response' button to save the reply text.
Variables available for use in a message
- Variables are dynamic fields which you can add to canned responses. The values of the variables are drawn from the ticket data and from your support portal.
For example: %{ticket.dept} - Inserts the name of the department to which the ticket is assigned.
- Place your mouse over 'Supported Variables' to view a list of variables you can use in the response content:
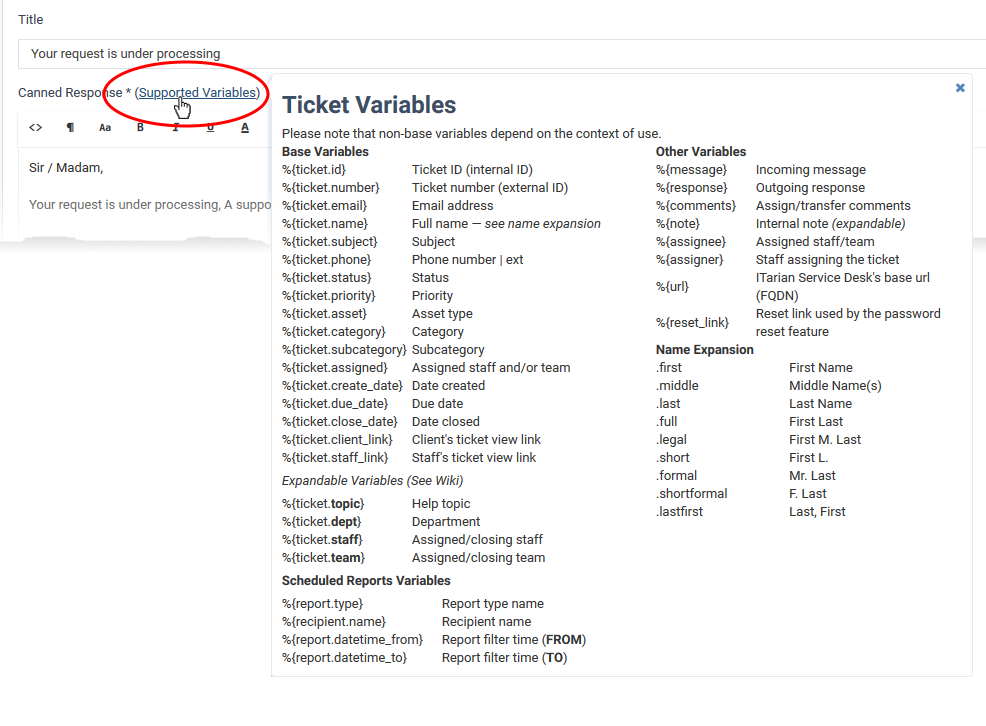
- Insert the variables into the content where required. For example ‘Your ticket has been assigned to %{ticket.assigned} in the %{ticket.dept} department.’
Expandable Variables:
- Expandable variables are variables to which you can add certain terms to fetch very specific information:
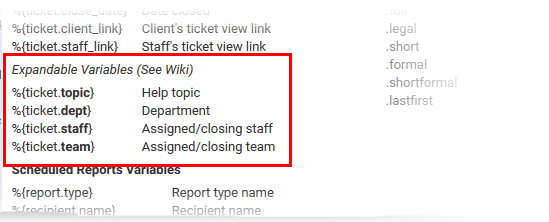
The possible extended variables are given below:
Topic
%{ticket.topic.name} – The ticket category to which the ticket belongs.
%{ticket.topic.parent} – The parent category to the category to which the ticket belongs.
Department
%{ticket.dept.name} - The department to which the ticket is assigned.
%{ticket.dept.manager} - The person-in-charge of the department to which the ticket is assigned.
%{ticket.dept.signature} - The signature message configured for the department.
%{ticket.dept.emailAddress} - The contact email address of the department to which the ticket is assigned.
Staff
%{ticket.staff.name} – The staff member or the admin to whom the ticket is assigned.
%{ticket.staff.dept} – The department to which the staff member belongs.
%{ticket.staff.TZoffset} – The date and time at which the ticket is assigned to the staff member
%{ticket.staff.email} – The email address of the staff member to whom the ticket is assigned.
%{ticket.staff.signature} – The signature message of the staff member
- Open the staff panel (see the last link on the left)
- Click 'Knowledgebase' > 'Canned Responses'
- Click the canned response you want to update

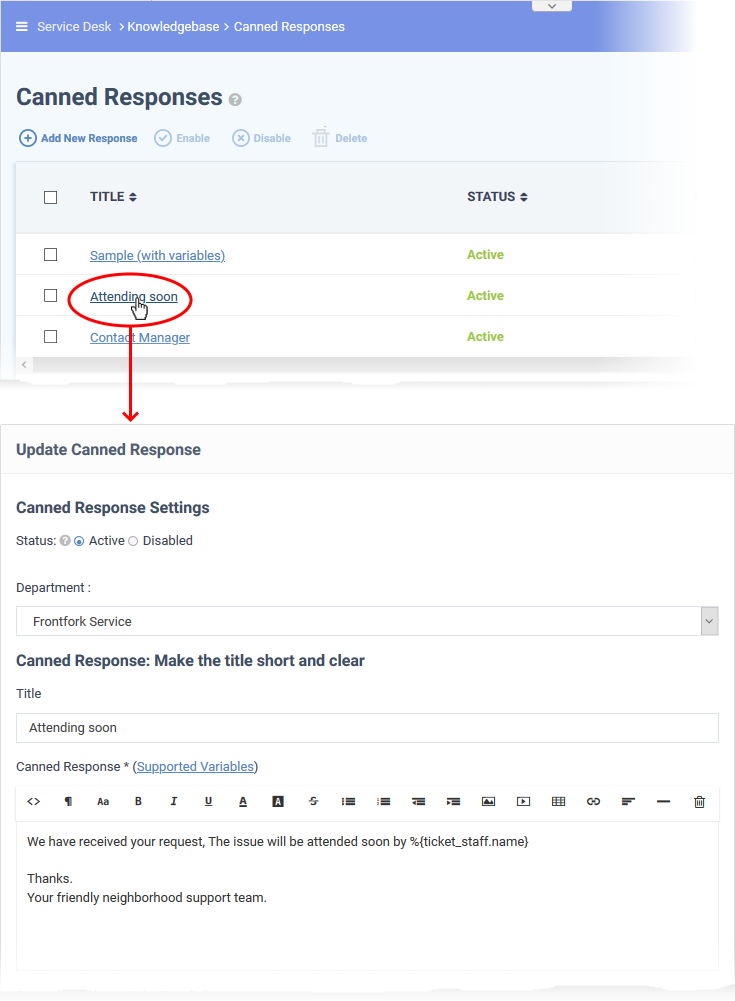
- Edit the parameters as required
- The 'Update Canned Response' screen is similar to the 'Add a New Canned Response' screen. See above for descriptions of the fields
- Click the 'Save Changes' button for your modifications to take effect.
Remove a canned response
Canned responses that are no longer of use, can be removed from Service Desk.
- Open the staff panel (see the last link on the left)
- Click 'Knowledgebase' > 'Canned Responses'
- Select the canned response you want to remove
- Click 'Delete' at the top

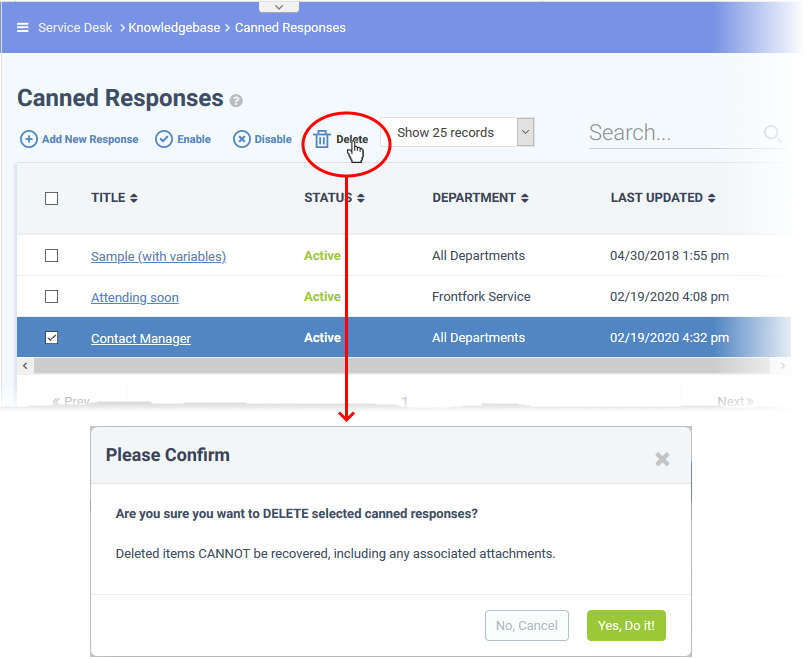
- Click 'Yes, Do it!' to confirm the removal
- How to view and take actions on a ticket - Read more on using canned responses when replying to tickets.


---