North America
How to close Service desk ticket with resolution
Views
2732 times
- The resolution field of a ticket a ticket indicates its current status in your workflow. It is a communication of ticket progress rather than a definitive ticket status like 'Closed', 'Open' etc.
- Example resolutions:
- 'Resolved' - a fix has been found, implemented, and is ready to be tested.
- 'Unresolved – a fix has not yet been found. Staff are currently working on the issue.
- 'Won't fix' – there are no plans to fix this issue.
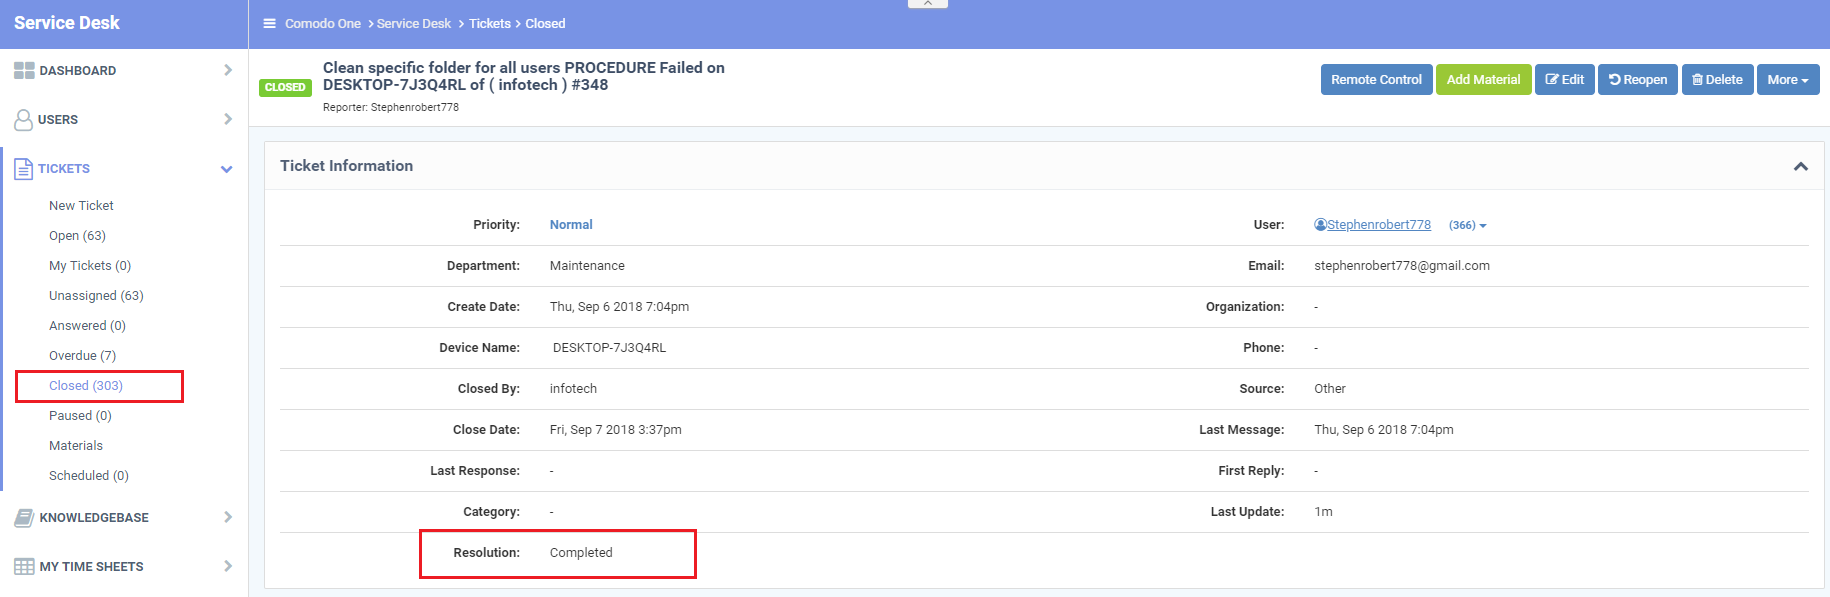
- For example, a ticket status of 'Closed' means the issue resolution has been verified and no further action will be taken on the ticket.
- Staff can type a resolution status when they close, modify, reply, or post a note to a ticket.
- Admins can also set a default resolution status for tickets that are auto-closed because they are overdue.
Processes in brief:
1. Staff
- Login to C1
- Click ‘Applications’ > ‘Service Desk’ > 'Staff Panel'
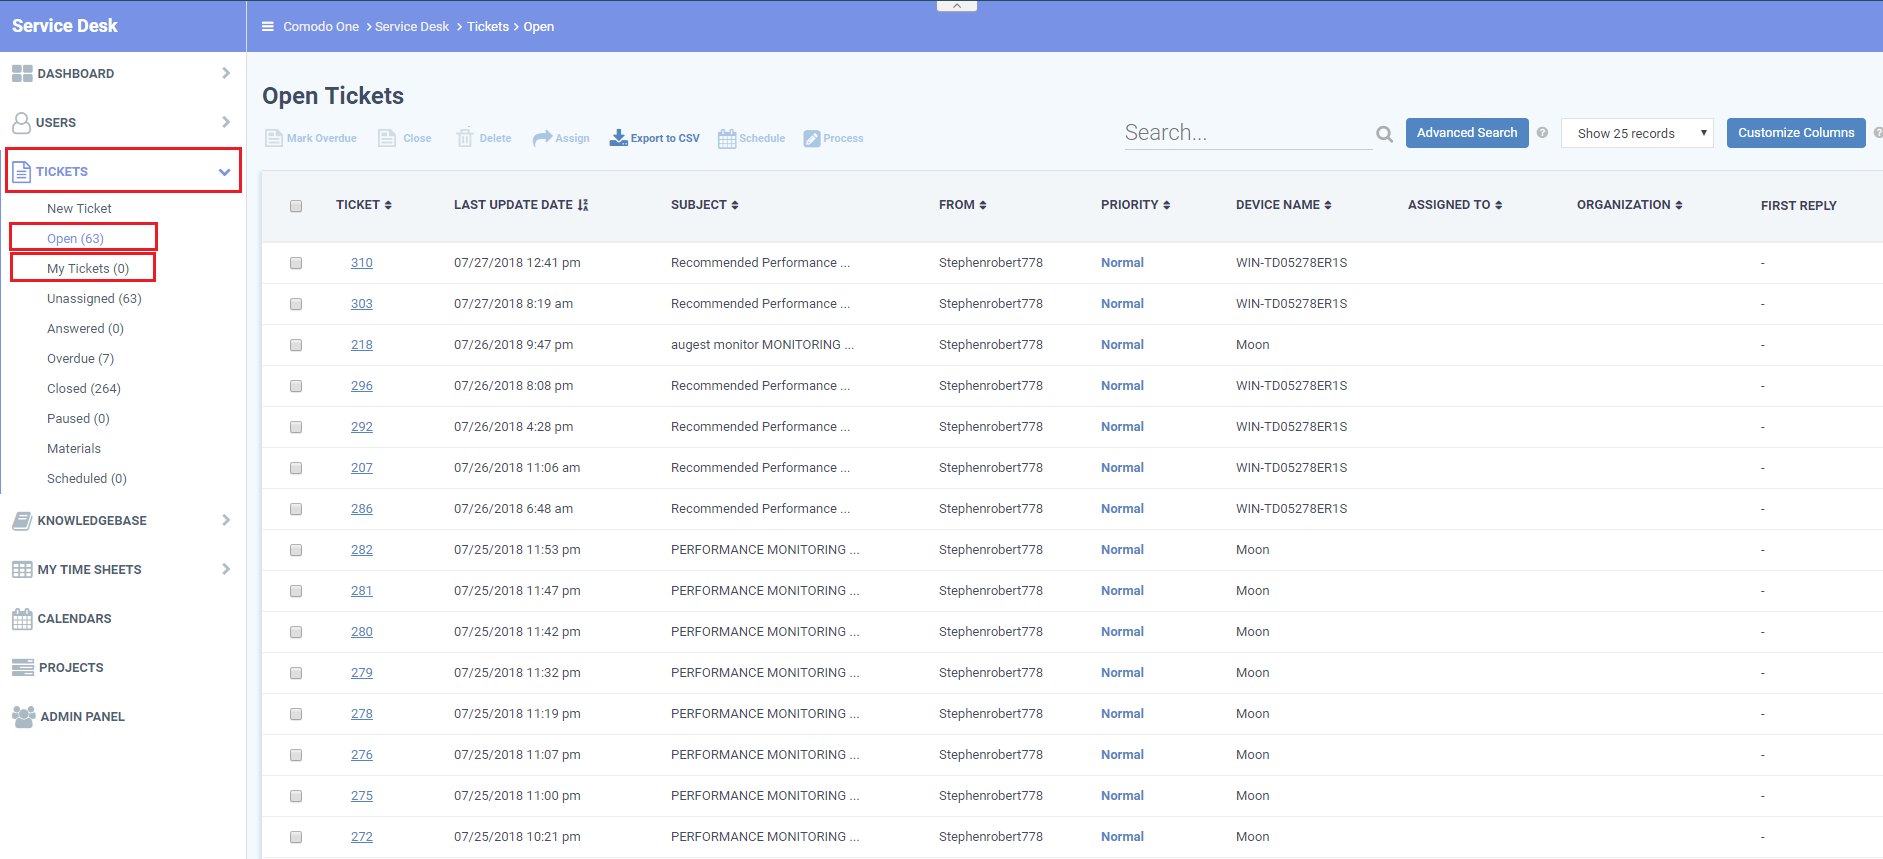
- Click ‘Tickets’ > 'Open' / 'My Tickets'
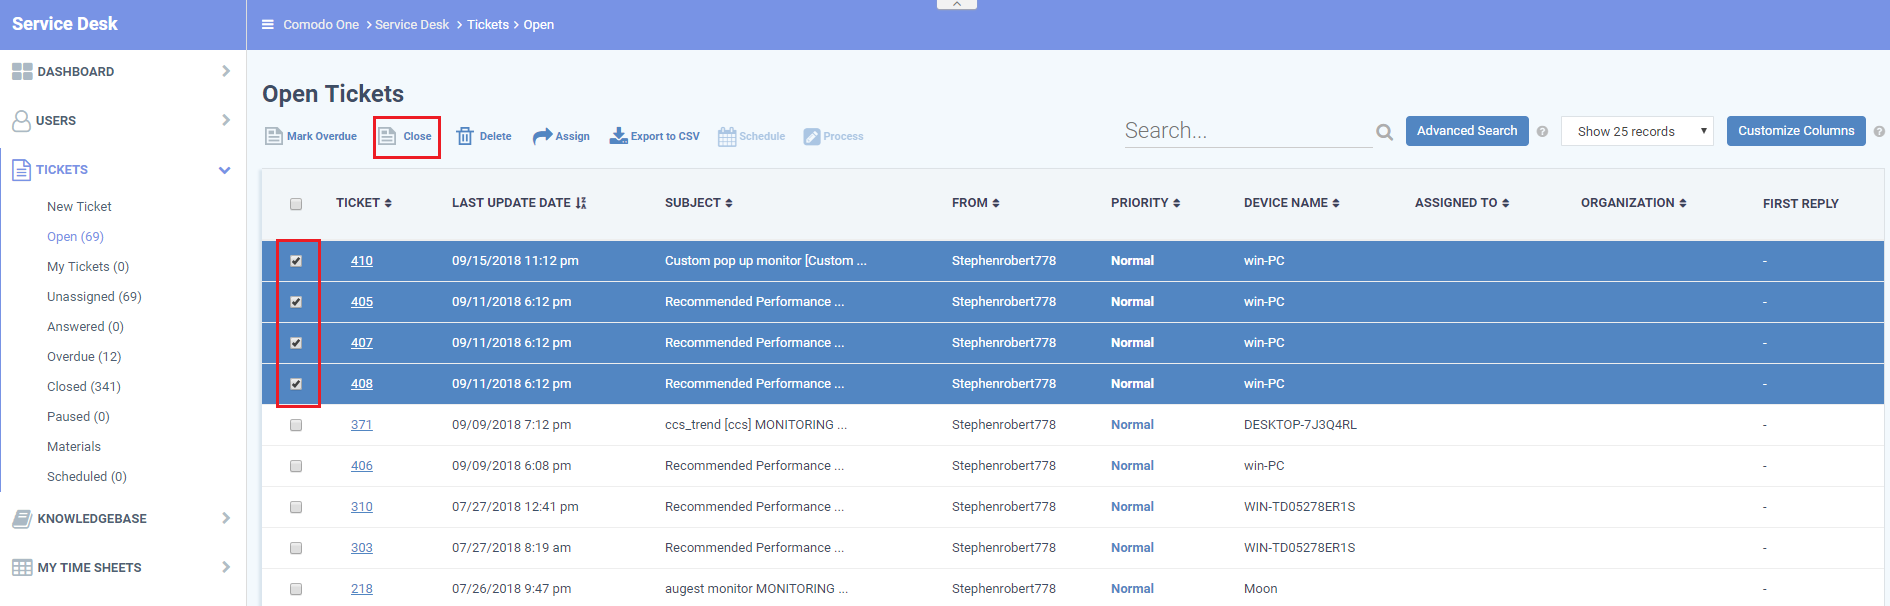
- Select a ticket or tickets that you want to close
- Click the 'Close' button
- Type your resolution text in the confirmation dialog
- Example messages - 'Resolved', 'Completed', 'Won't fix' etc
2. Admins
- Login to C1, click 'Admin Panel' > 'Settings' > 'Tickets
- Scroll to the 'Auto-close resolution' box
- Type a default resolution status for tickets that are auto-closed because they are over-due
- Click 'Save Changes'
In more detail
1. Staff
Resolve on close:
- Open Comodo One > Click 'Applications' > 'Service Desk'
- Click ‘Tickets’ > 'Open' / 'My Tickets'

- Select a ticket or tickets that you want to close
- Click the 'Close' button:

- Type a resolution status in the confirmation dialog
- Examples = 'Resolved', 'Complete', 'Not Resolved', 'Won't fix'.


- Click 'Save'
- Click 'Tickets' > 'Closed' to check the resolution:

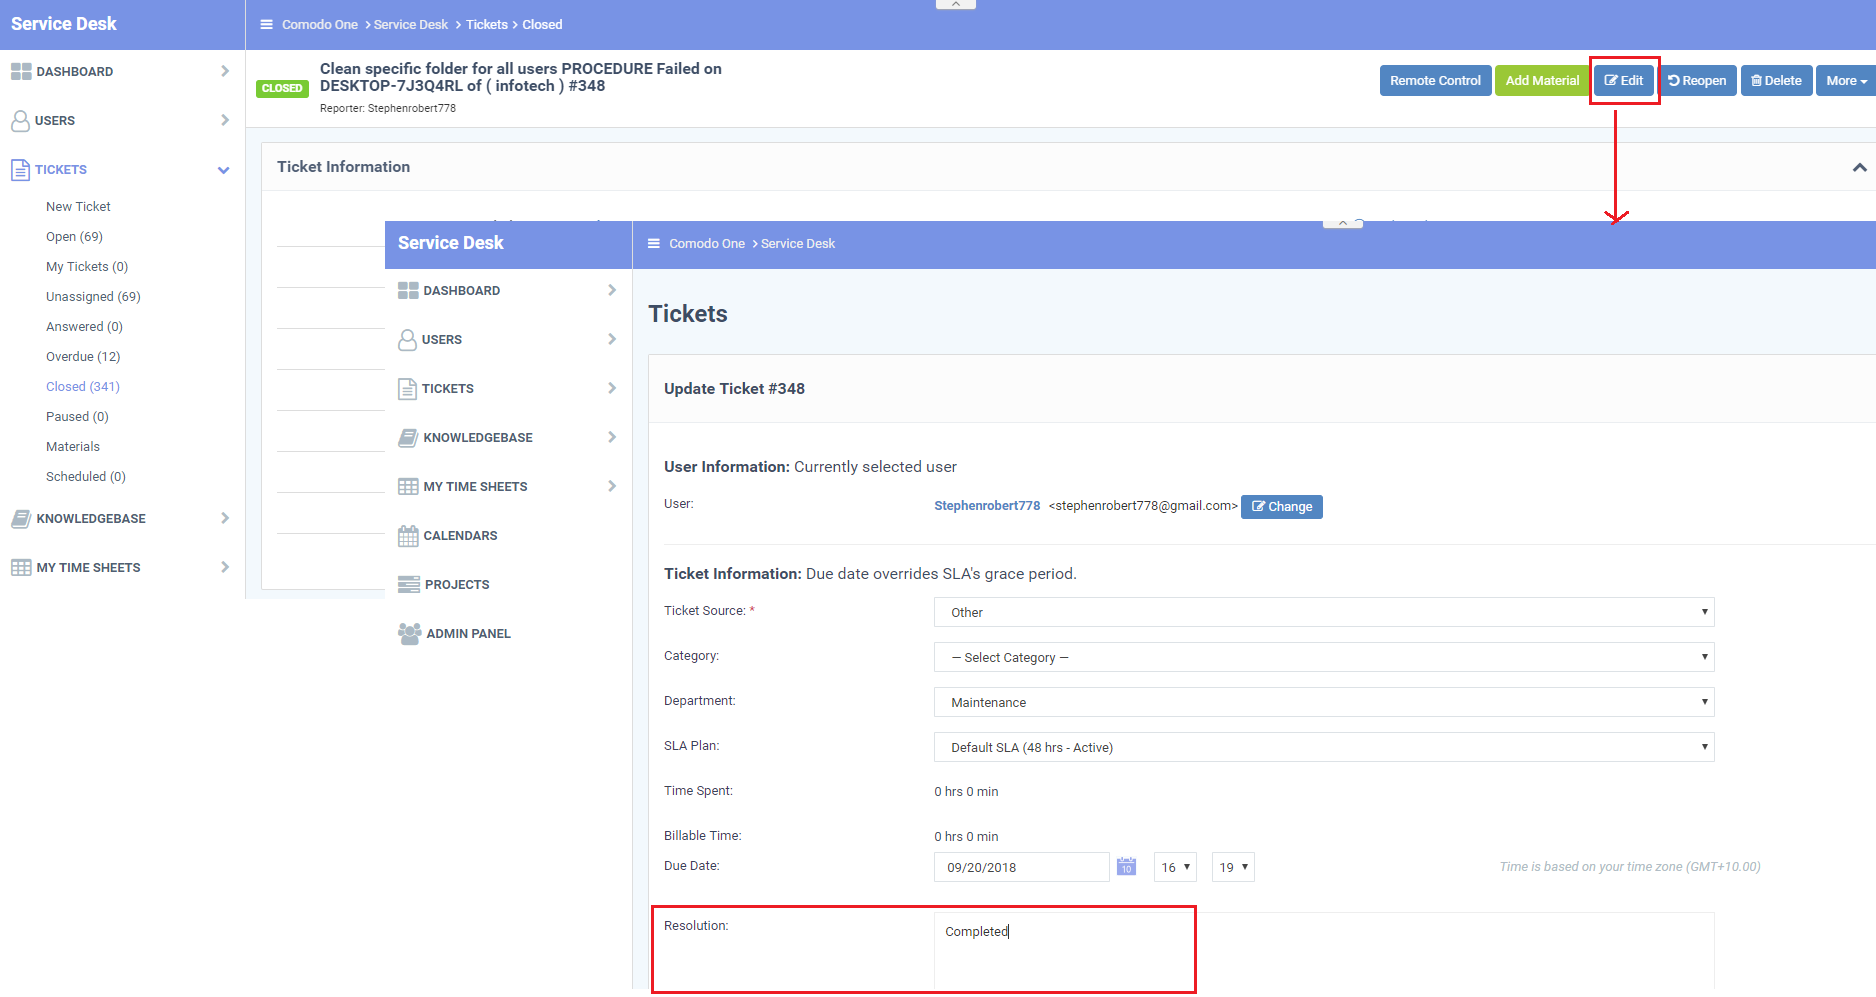
Modify resolution status:
- Click ‘Applications’ > Click ‘Applications’ > ‘Service Desk’
- Click ‘Tickets’ > 'Open' / 'My Tickets'
- Open the ticket whose resolution you want to modify
- Click the 'Edit' button:

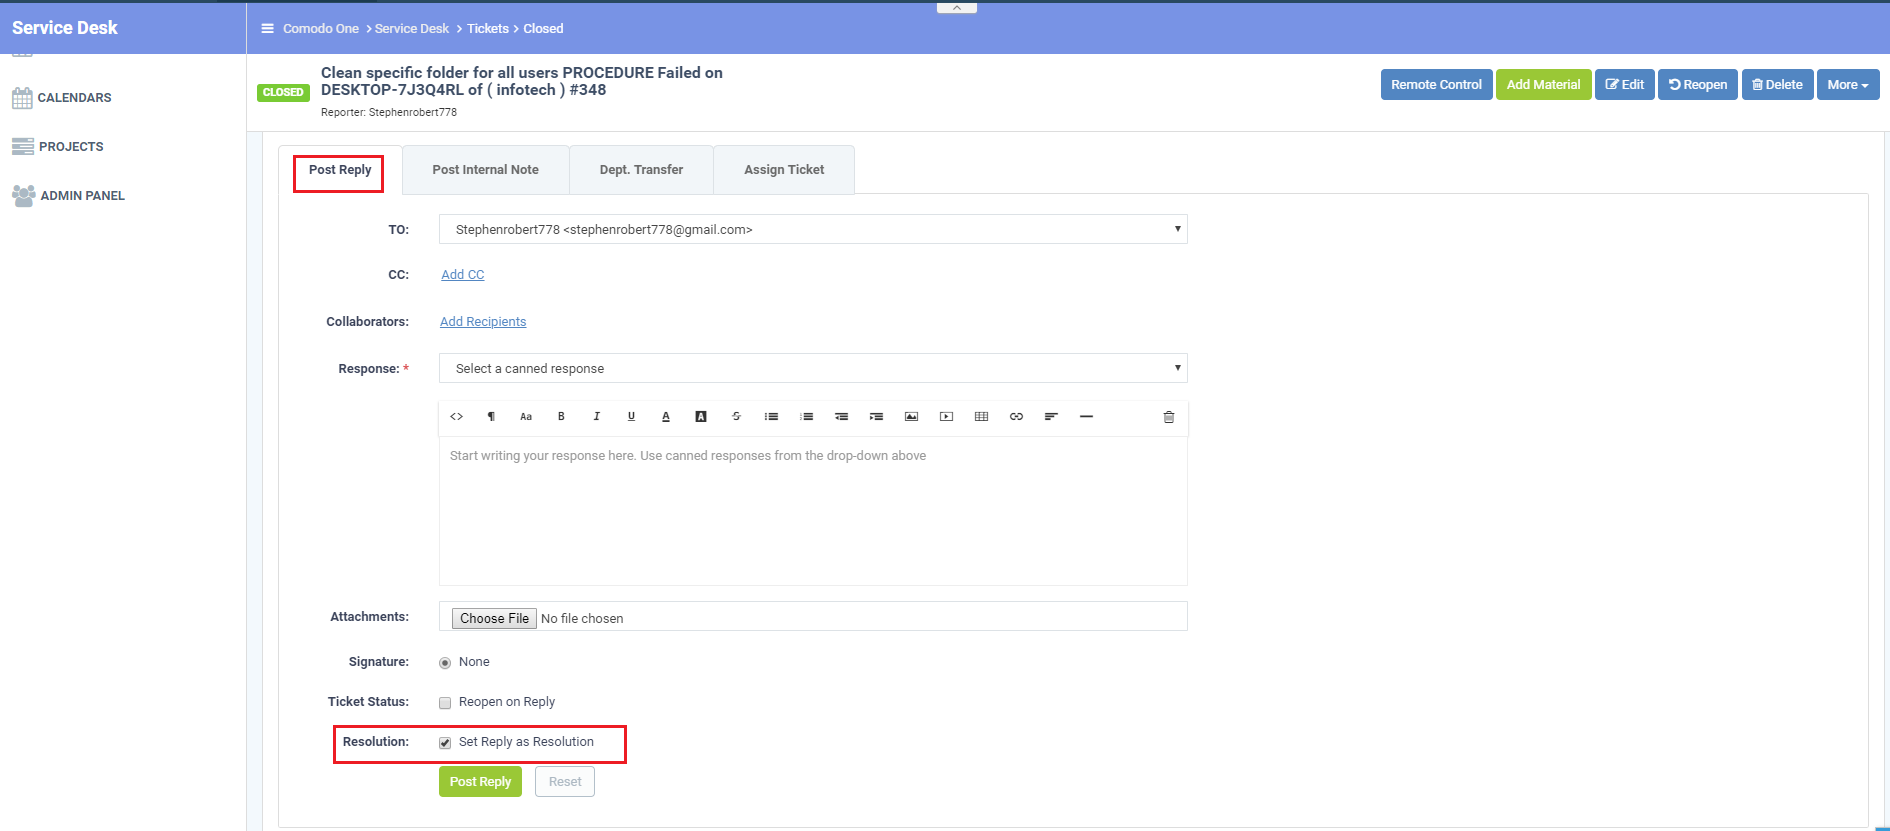
Set your reply as the resolution
- Click ‘Tickets’ > 'Open' / 'My Tickets'
- Open the ticket whose resolution you want to set
- Click the 'Post Reply' tab.
- Type your reply in the 'Response' field.
- Enable 'Set Reply as Resolution'.
- Whatever you type as the response will become the stated 'Resolution' of the ticket. Obviously, this works best if the response is short. For example, 'Closed', 'Resolved' etc.

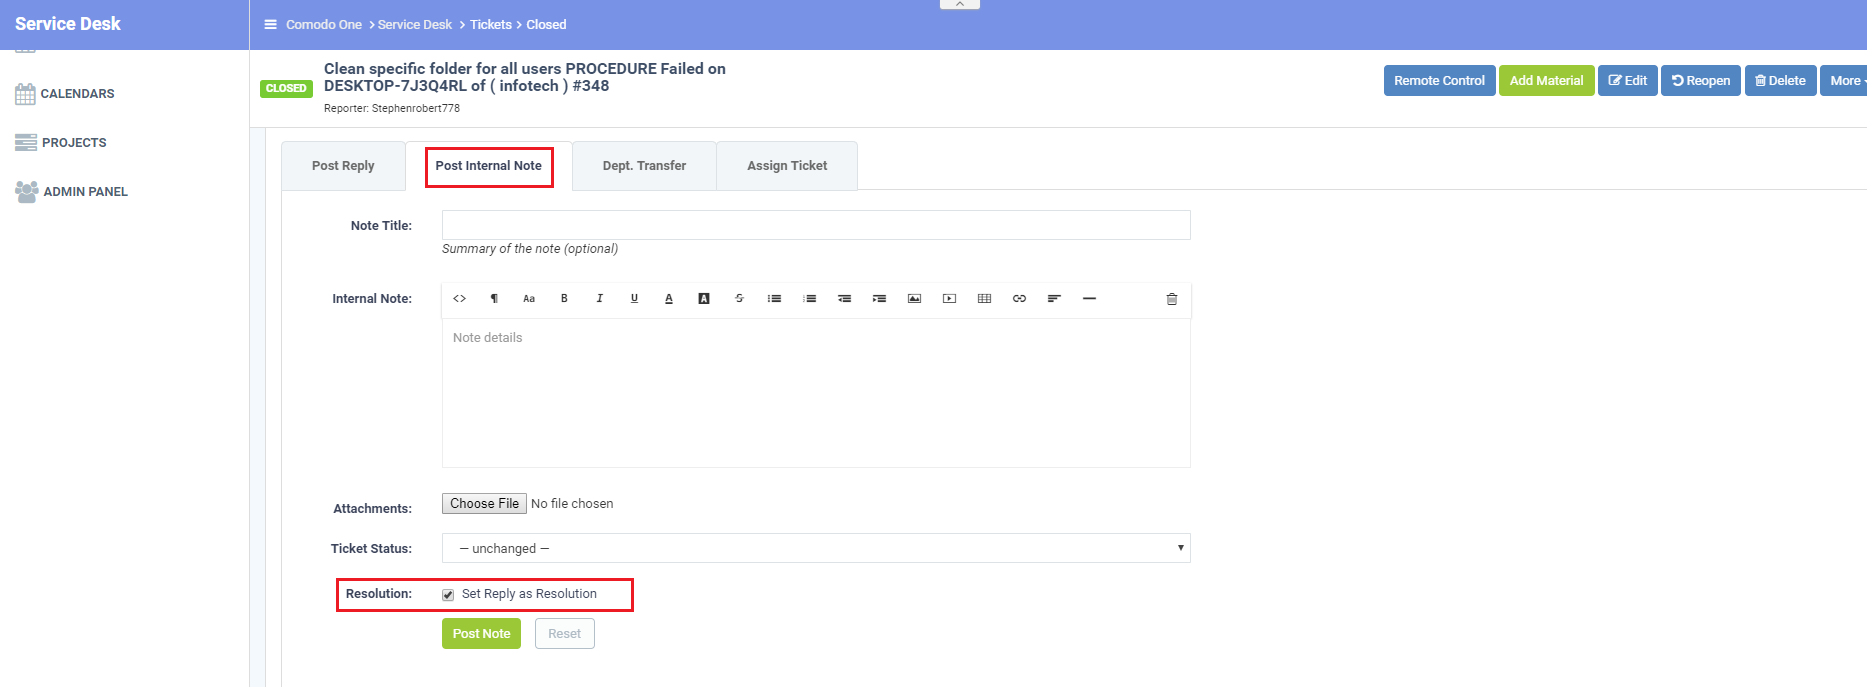
Set reply as resolution while posting an internal note
- Click ‘Tickets’ > 'Open' / 'My Tickets'
- Open the ticket whose resolution you want to set
- Click the 'Post Internal Note' tab
- Type your message in the 'Internal Note' field.
- Enable 'Set Reply as Resolution'.
- Whatever you type for the note will become the stated 'Resolution' of the ticket. Obviously, this works best if the note is short. For example, 'Closed', 'Resolved' etc.

2. Admins
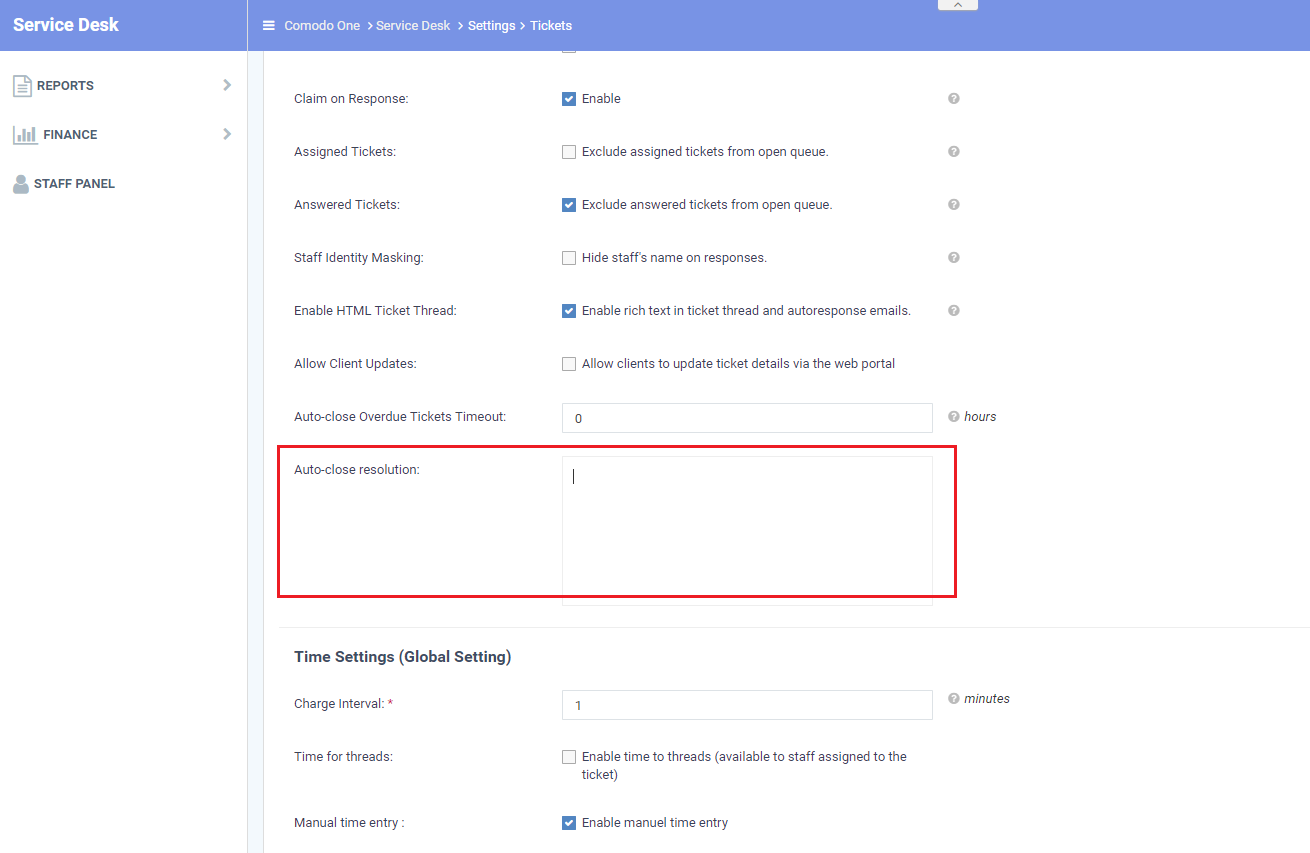
Set auto-close ticket with resolution
- Click 'Admin Panel' > 'Settings' > 'Tickets
- Scroll down to the 'Auto-close Overdue tickets Timeout' field
- Enter the number of hours after due-date that Service Desk should wait before auto-closing tickets.
- Tip. '0' = No auto-close. Overdue tickets will remain open until manually closed
- If you entered a time > 0, type a default resolution status for auto-closed tickets
- Click 'Save Changes'
- The setting above will apply to all tickets which are auto-closed.


CONTACT US
Call now!  (973) 859 4000 ext 3025
---