How to configure antivirus settings on Windows Profiles
The guide allows how the user to configure Antivirus Settings through a profile. The settings include all low-level details to be parameterized from Endpoint Manager hence the Realtime Scan (at the time of threats encountered), Scans (when the user invoke scan explicitly) and Exclusions (excludes specific paths, applications, and built-in groups) are executed as per the user conditions and expectations.
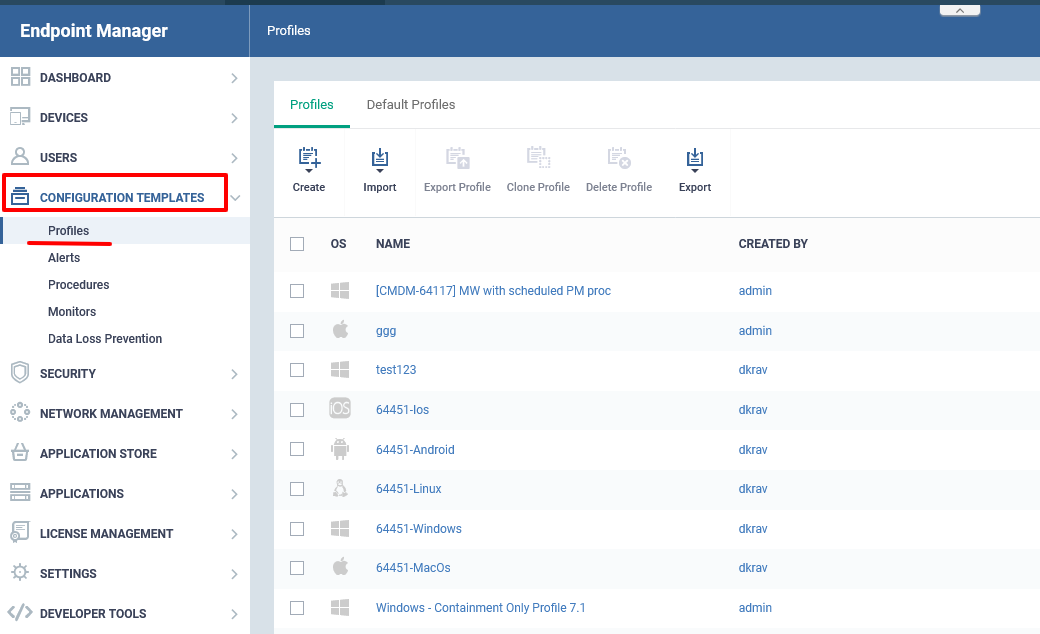
Step [1]: Go to Endpoint Manager > CONFIGURATION TEMPLATES > Profiles
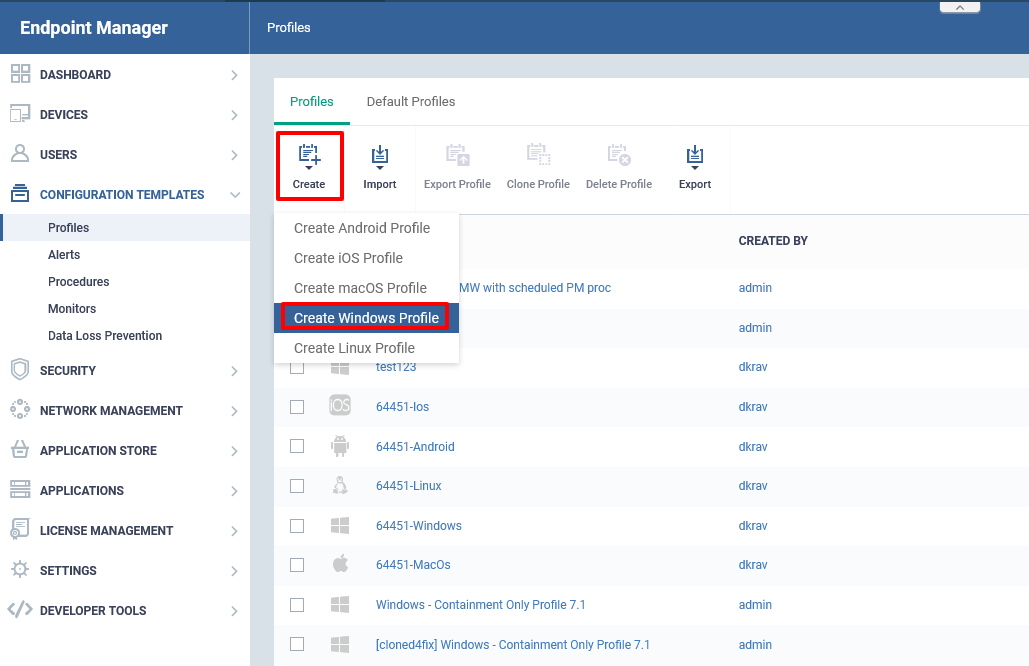
Step [2]: Click Create icon and Choose the Create Windows Profile from the drop down me
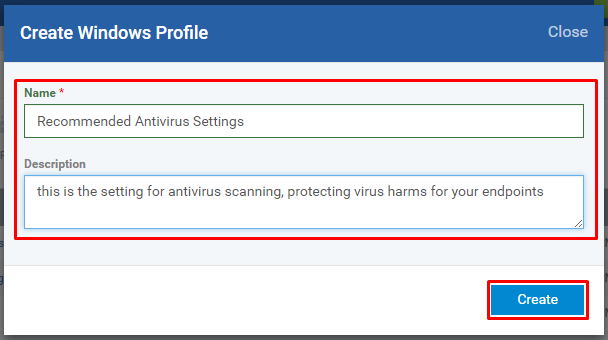
Step [3]: Fill the form with Name, Description of the profile and Click Create button
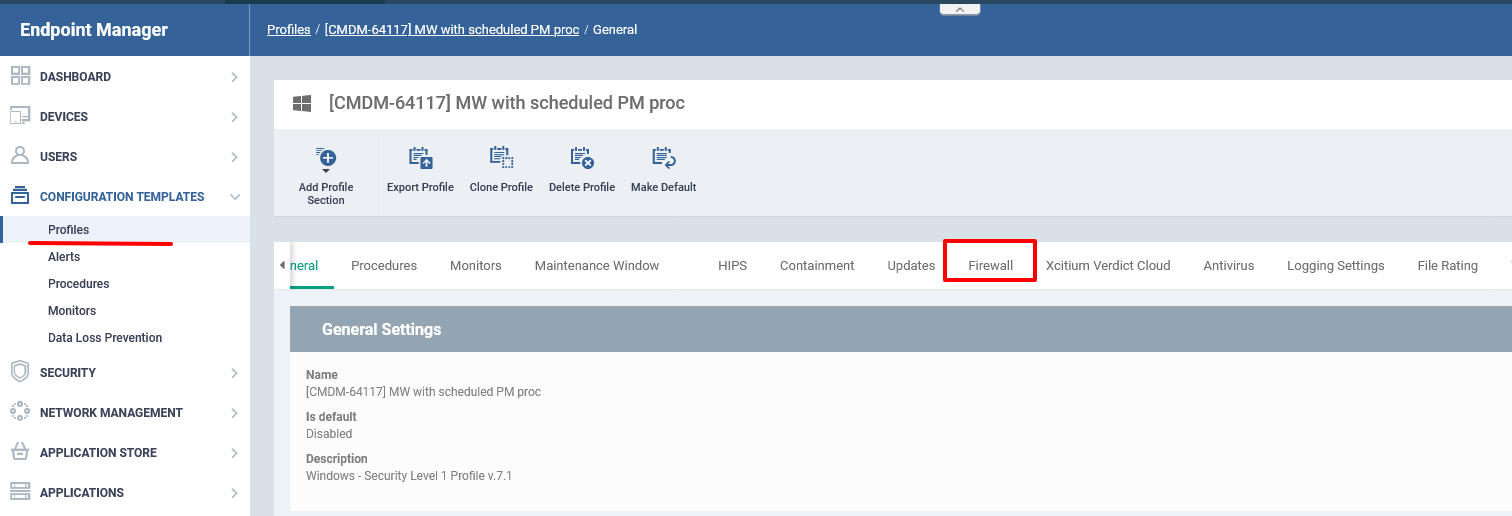
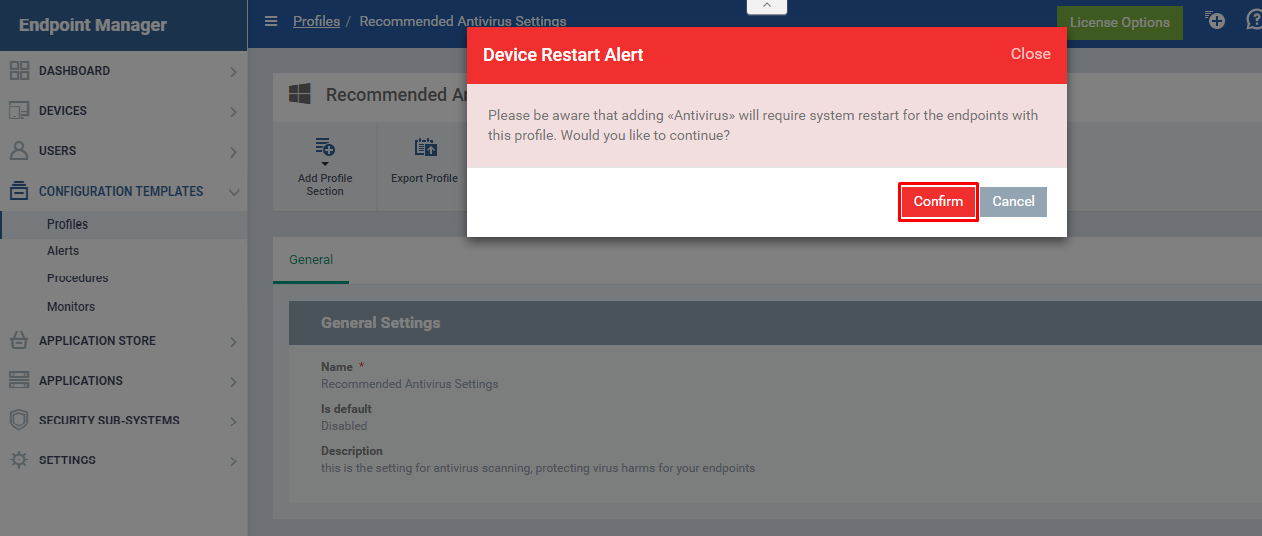
Step [4]: Click Add Profile Section icon and Choose Antivirus from the drop down menu
Step [5]: Click Confirm button to Confirm the Device Restart Alert
Note: Wait for few seconds to get the Antivirus tab on the page - There are important parameters are available to complete the setup such as Realtime Scan,Scansand Exclusions.
Step [6]: Let us have a look at Realtime Scan
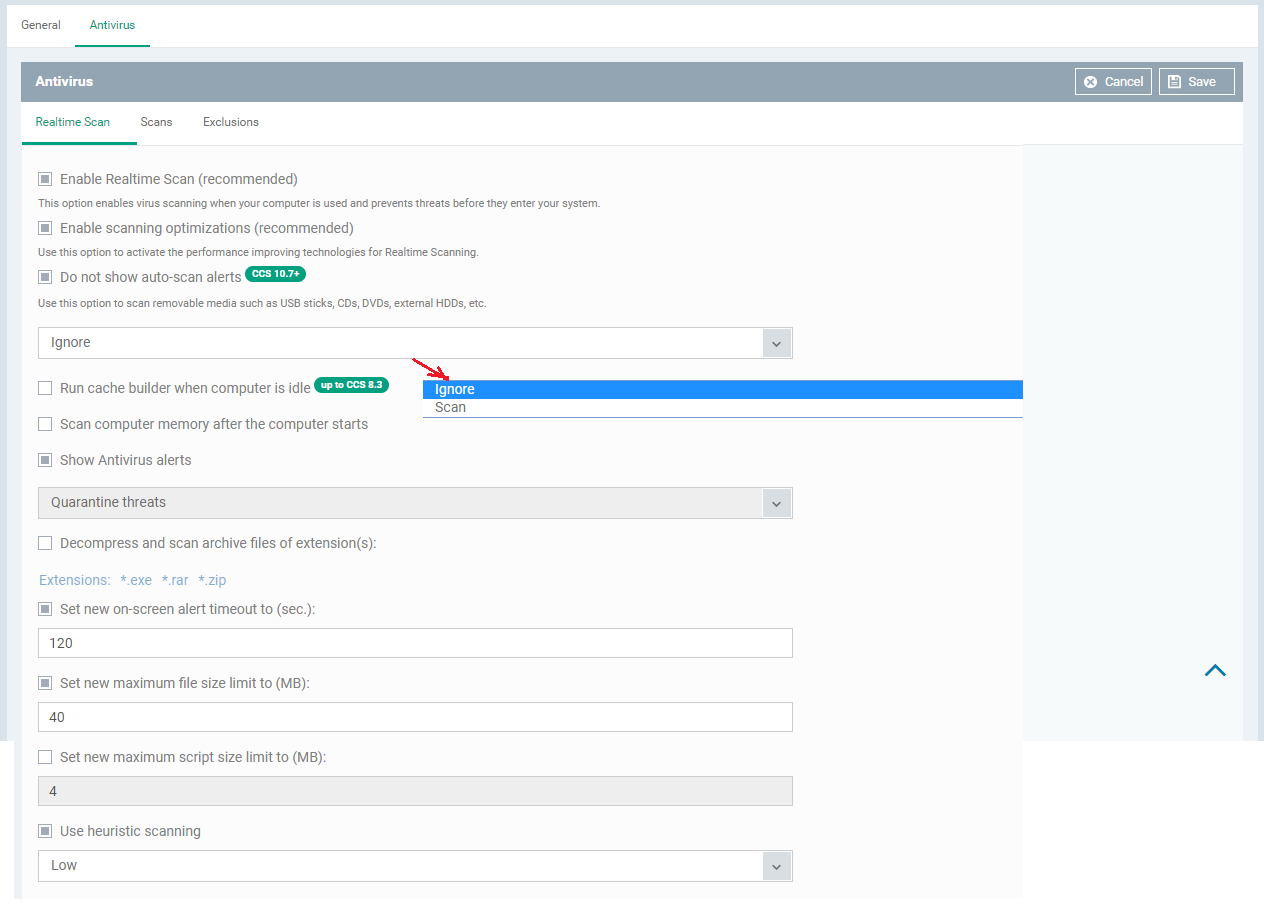
Options with the explanation:
Enable Realtime Scan (recommended) - This option enables virus scanning when your computer is used and prevents threats before they enter your system.
Enable scanning optimizations (recommended) - Use this option to activate the performance improving technologies for Realtime Scanning.
Run cache builder when the computer is idle - To boost the scanning, Endpoint Manager runs the Cache Builder when the computer is idle.
Scan computer memory after the computer starts - Scans the computer memory when the computer starts up
Show Antivirus alerts - Antivirus shows alerts when malware is encountered, if not selected then Antivirus does not show the alert
'Quarantine threats' or 'Block threats' - If 'Quarantine threats' is selected then threats are quarantined. If 'Block threats' is selected then threats are blocked directly
Do not show auto-scan alerts -- This option allows admin to disable/enable the auto scan alerts.
For example: Auto scan alerts for external devices like USB sticks,HDDs,CDs,DVDs.
Ignore -- Set this option to disable the auto scan for external devices.
Scan -- Set this option to enable the auto scan for external devices.

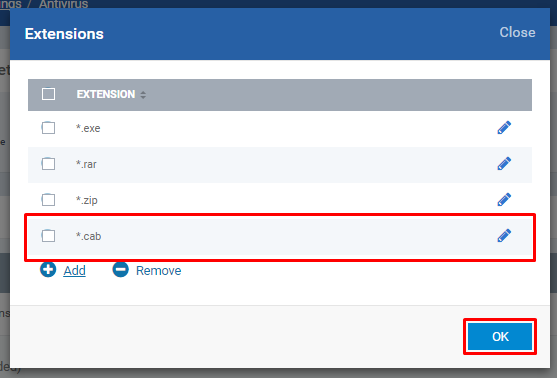
Decompress and scan archive files of extension(s) - decompresses and scans the files which are in the defined extensions

Click Add button from the pop-up form
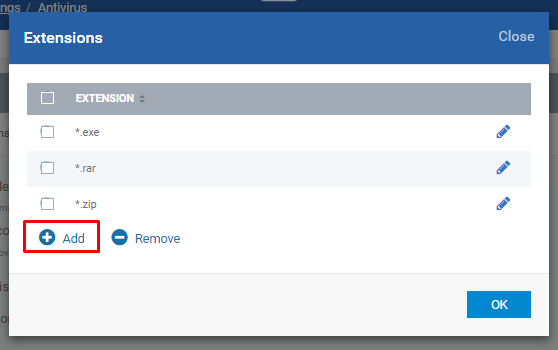
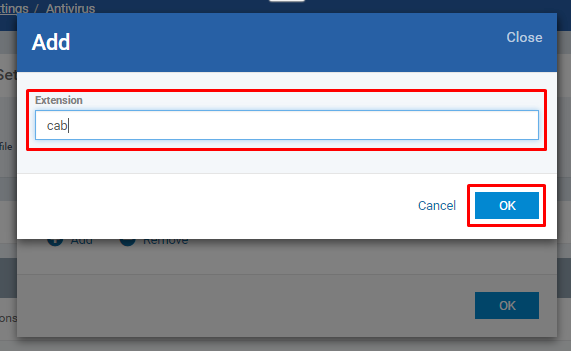
Enter the Extension only without '.' (DOT) and '*' (Asterix) and Click OK button
Check whether the given extension is created in the pop-up table and then click OK button if you finish adding extension
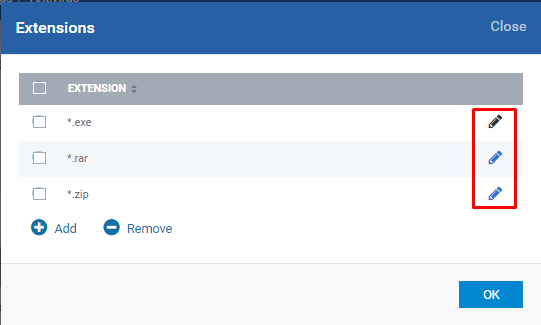
Edit:
Click over the link Extensions: value1, value2, ..., valueN

Use the Edit icon on the pop-up form
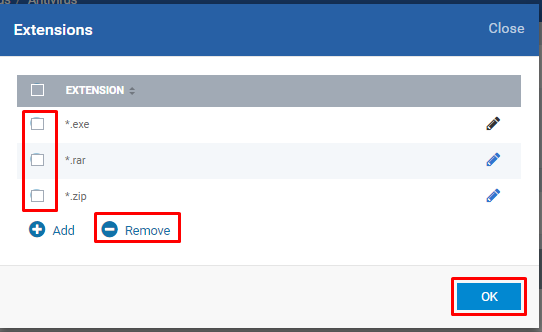
Remove:
Click over the link Extensions: value1, value2, ..., valueN

Select appropriate check box of the extension and Click Remove icon then click OK button
Set new on-screen alert timeout to (sec.) - number of seconds the alert stays on the screen
Set new maximum file size limit to (MB) - number of files within the limit is set to be scanned on access
Set new maximum script size limit to (MB) - number of script files within the limit is set to be scanned on access
Use heuristic scanning - level of sensitivity of detecting unknown threats [Low - fewest false positive, Medium - false positive more than low level and High - possible false postive]

Step [7]: Select the tab Scans
Options with the explanation:
Check you have desired profiles from the table to enable it. if not, you can create a new profile and enable the profile for scans.
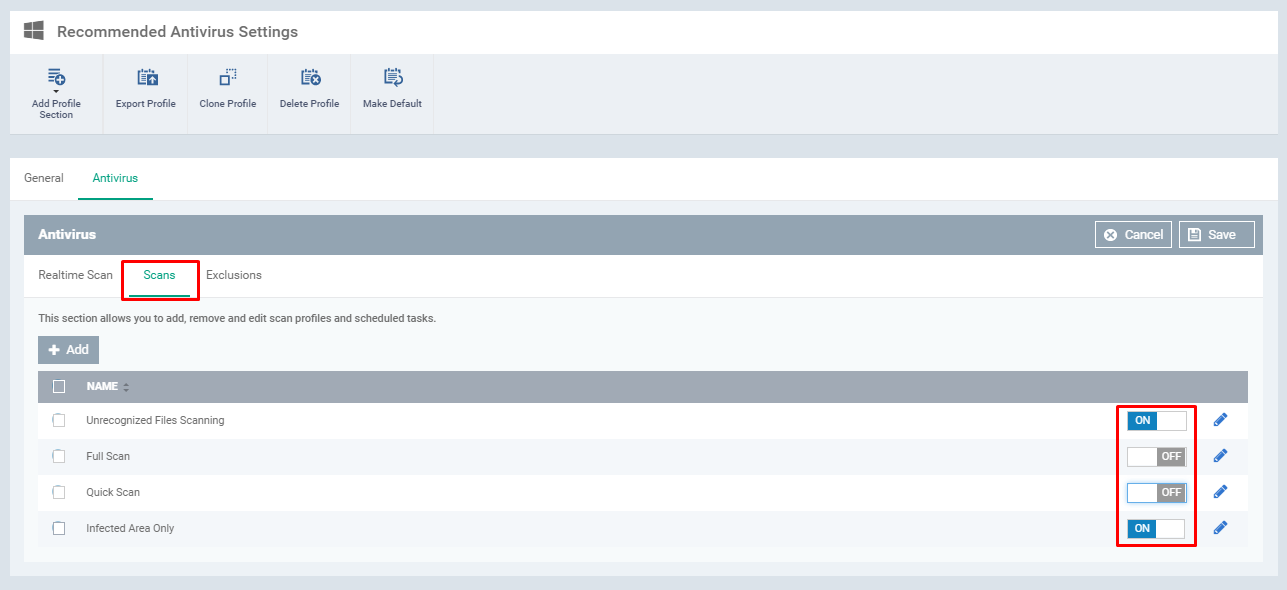
Items-
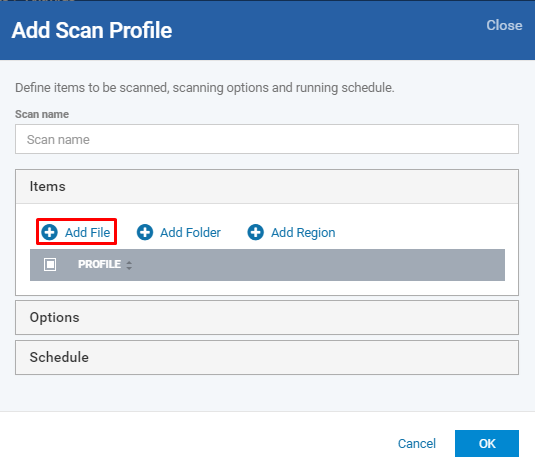
Add:
Click Add button
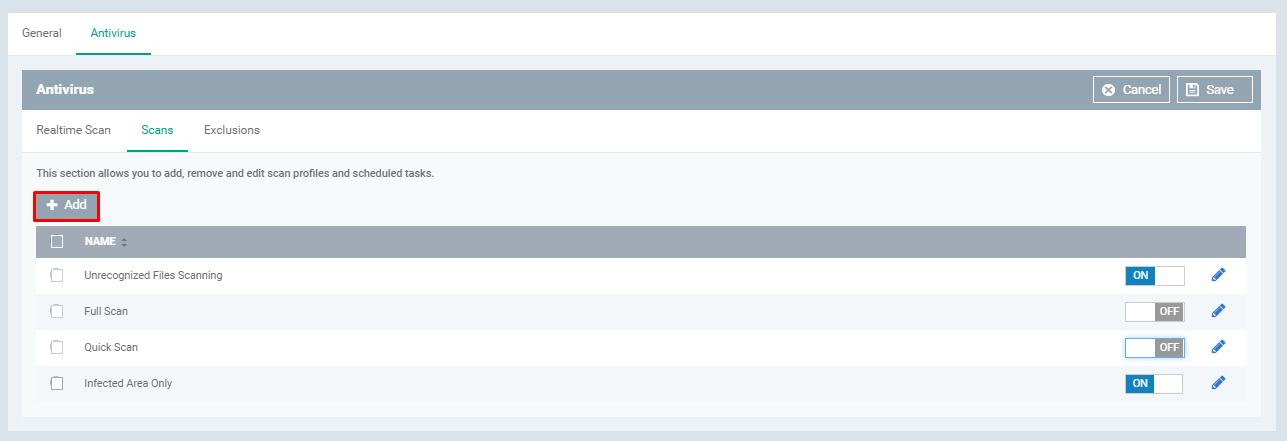
User can add files, folders, and region to be scanned
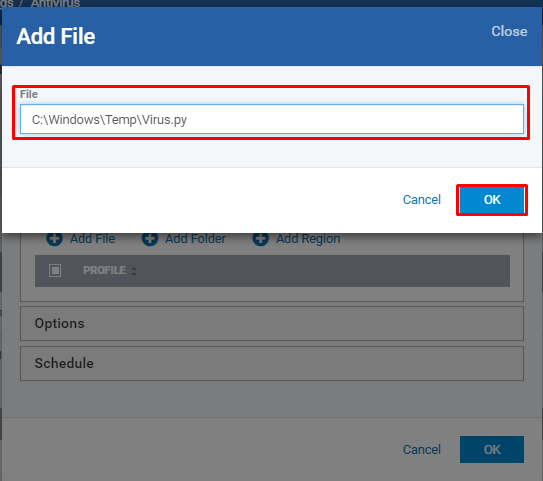
Add File:
Click Add File icon
Enter the full path of the file and Click OK button
Add Folder:
Click Add Region icon
Enter the path of the folder and Click OK button

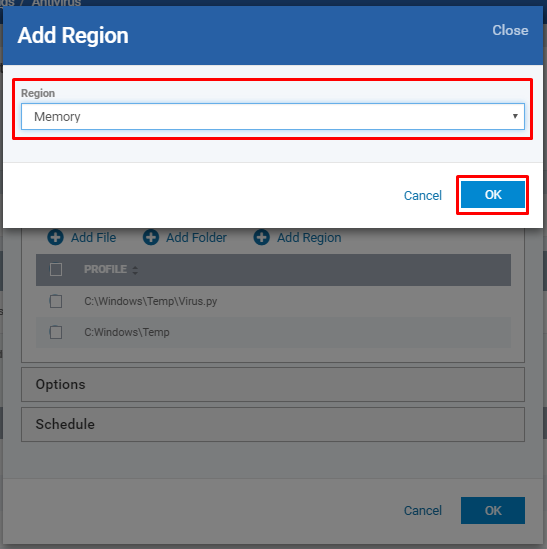
Add Region:
Click Add Region icon
Click Region drop down
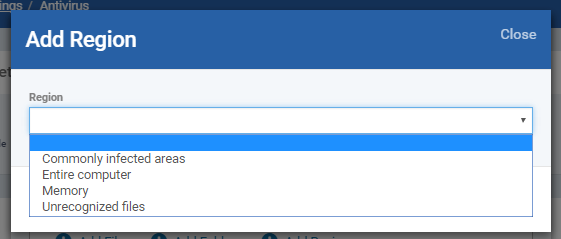
Select any value from the drop down then click OK button
Options-
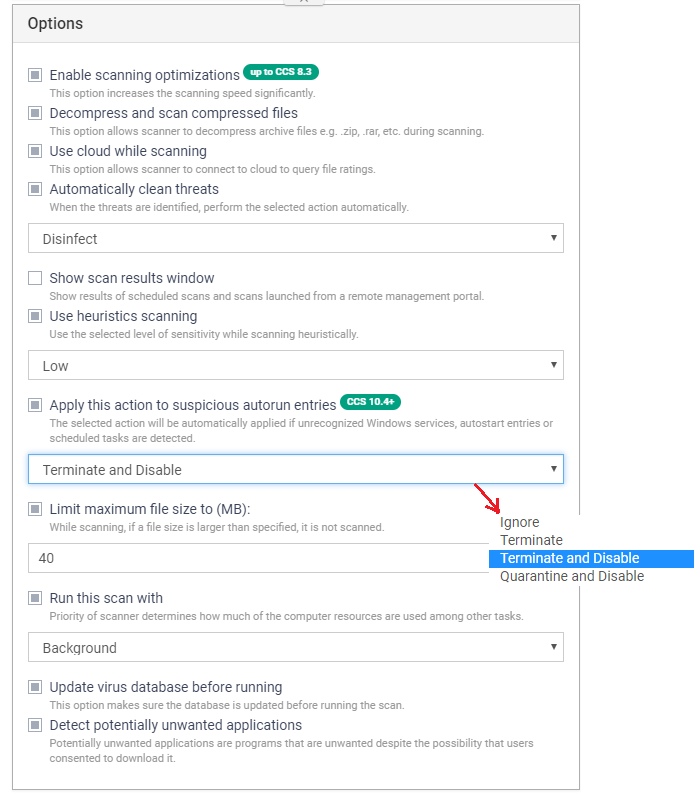
Enable scanning optimizations - This option increases the scanning speed significantly.
Decompress and scan compressed files - This option allows the scanner to decompress archive files e.g. .zip, .rar, etc. during scanning.
Use cloud while scanning - This option allows the scanner to connect to the cloud to query file ratings.
Automatically clean threats - When the threats are identified, perform the selected action automatically.
Show scan results window - Show results of scheduled scans and scans launched from a remote management portal.
Use heuristics scanning - Use the selected level of sensitivity while scanning heuristically.
Limit maximum file size to (MB) - While scanning, if a file size is larger than specified, it is not scanned.
Run this scan with - Priority of scanner determines how much of the computer resources are used among other tasks.
Update virus database before running - This option makes sure the database is updated before running the scan.
Detect potentially unwanted applications - Potentially unwanted applications are programs that are unwanted despite the possibility that users consented to download it.
Apply this action to suspicious autorun entries - This option allows following actions on unrecognized windows services, auto-start entries, scheduled tasks.
- Terminate: Shut-down the malicious/unrecognized service for this session.
- Terminate and Disable: Shut-down and switch-off the service permanently. An admin will need to re-enable the service if so required.
- Quarantine and Disable: Will terminate and disable as above, and place the file in Xcitium Client Security quarantine.
- Ignore: The detection will be logged but the file will be allowed to run normally.
Schedule-
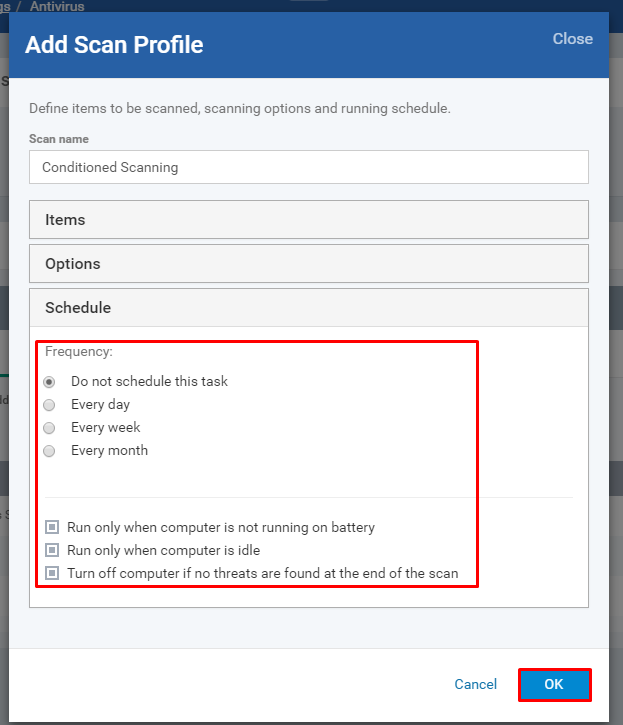
Frequency - Choose any option of Do not schedule this task, Every day, Every week and Every month
Run only when computer is not running on battery - If you want to save the battery power of laptops you can enable the option
Run only when computer is idle - If you want to do not disturb your (user) work, enable the option
Turn off the computer if no threats are found at the end of the scan - Enable the option when you want to shut down the computer once the scanning is complete.
Check whether you have the profile listed on the table which was created
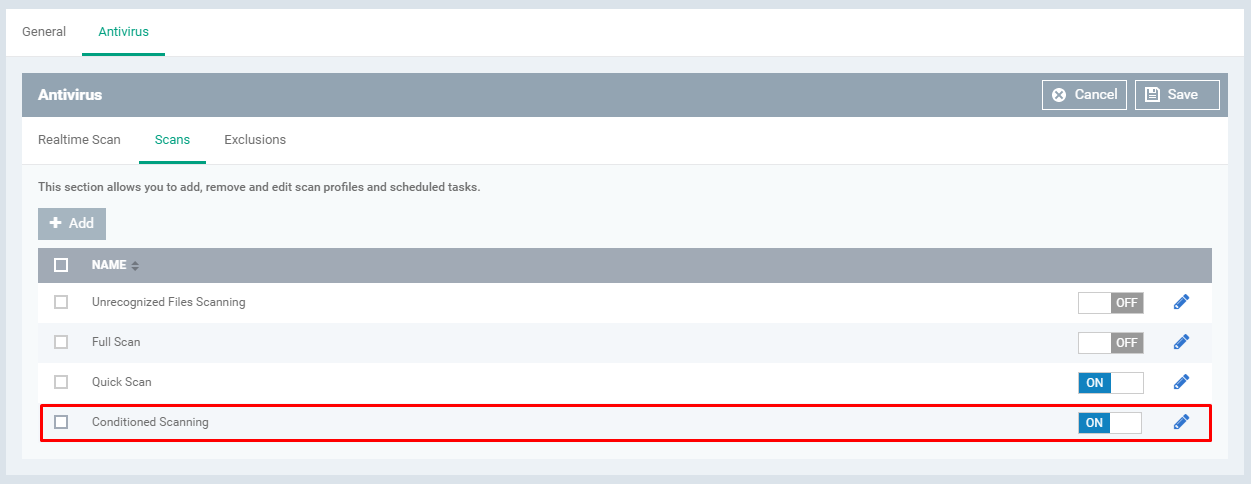
If you want to edit the specific profile then use the edit icons from the table per profile

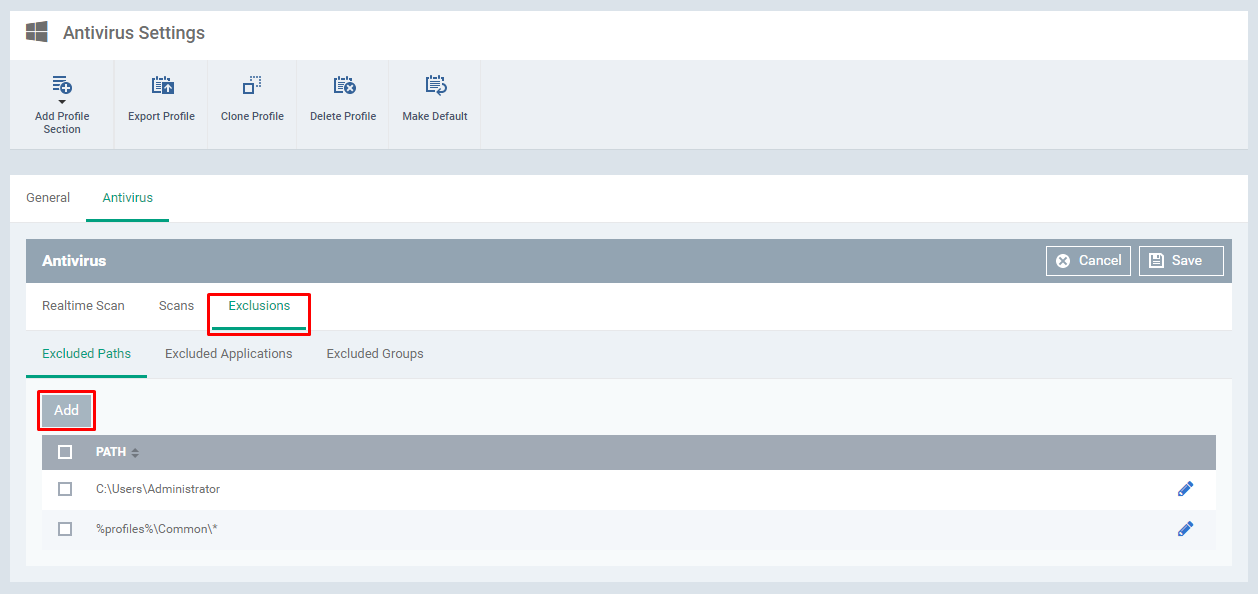
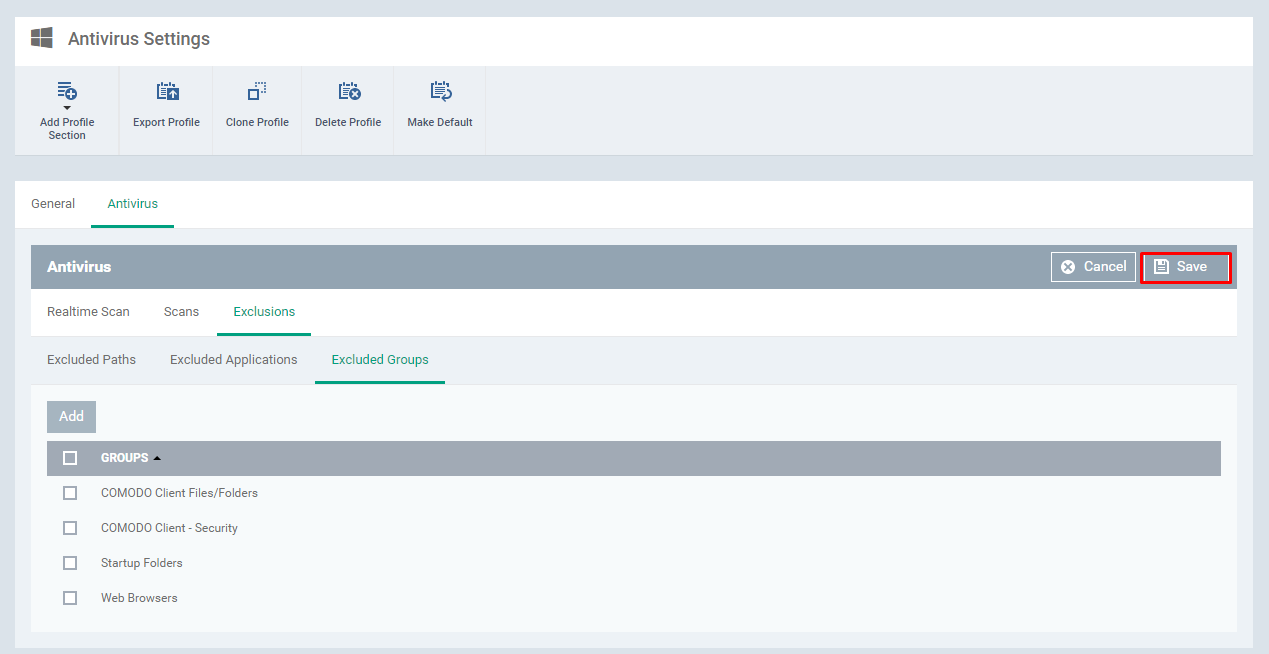
Step [8]: Select the Exclusions tab and Click Add button
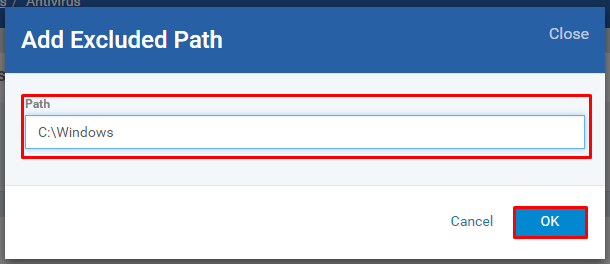
Enter the Path and Click OK button - To add more paths, repeat the steps
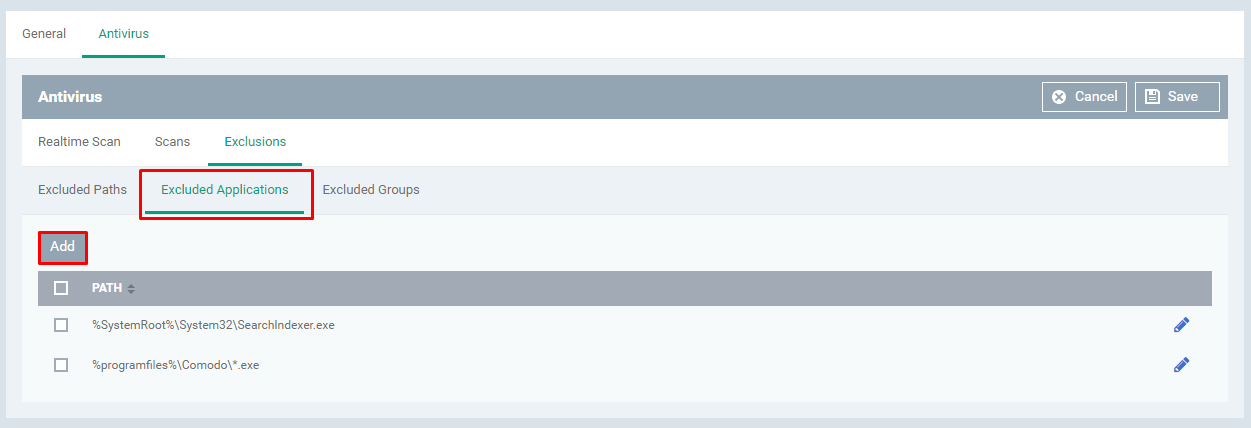
Select the Excluded Applications tab and Click the Add button
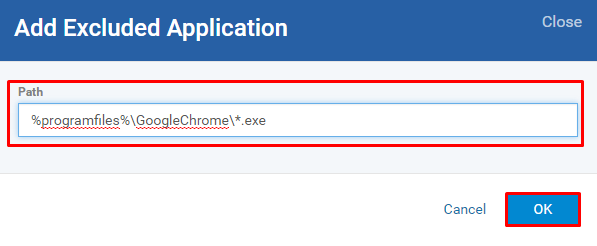
Enter the full path of the application installed and Click OK button - To add more applications, repeat the steps
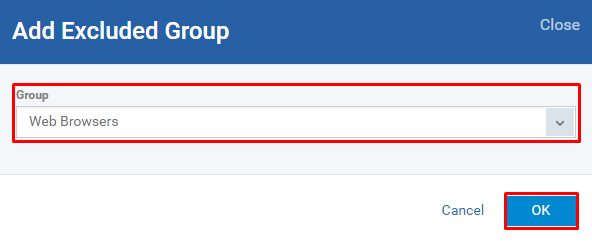
Select the Excluded Groups tab and Click the Add button

Click on the field 'Group' drop-down

Select any value from the drop down then Click OK button
Step [9]: Click Save button to save all the parameter' setup
Step [10]: Once the information is saved then click Profiles menu and Check whether the name of the profile is available on the table


---