How to configure multiple remote sessions to same endpoint in Remote Control
- Remote Control lets you take over Windows and Mac OS devices to solve issues, install third-party software and run system maintenance.
- You can transfer files and folders between your computer and the remote computer (Windows devices only).
- ‘Remote Control by ITarian’ now supports multiple remote sessions to the same endpoint and can be connected via different local devices.
Perquisites
- The user must have logged into the ITarian.
- The user should have a device that can be connected to the local devices.
- The user must have installed and logged the "Remote Control by ITarian" application on their local devices.
Process in detail:
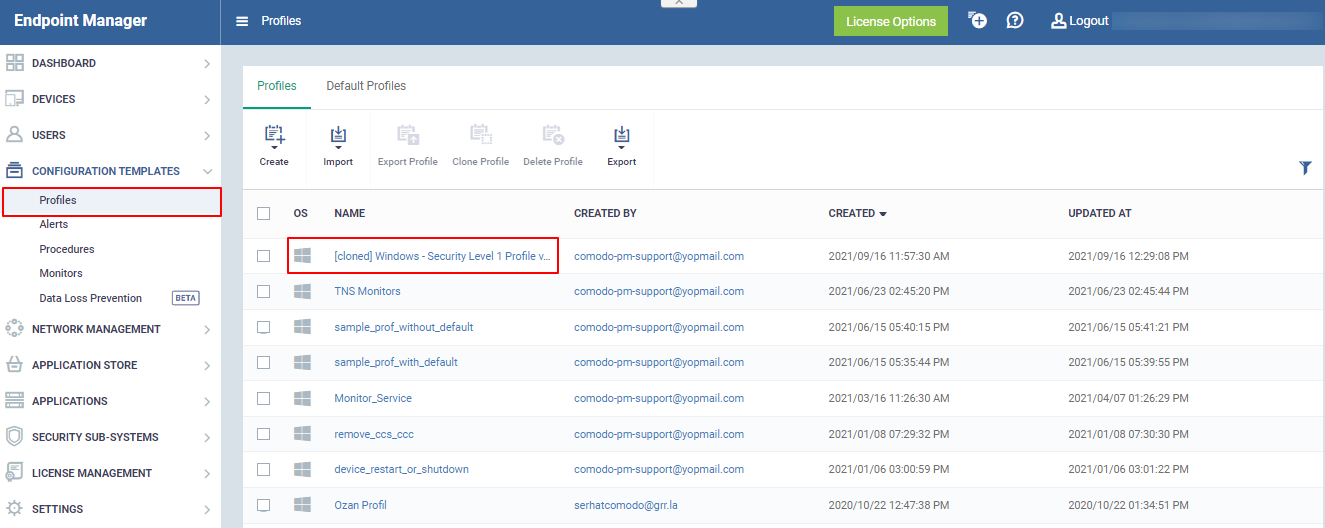
- Log into Comodo One / Dragon
- Click ‘Applications’ > ‘Endpoint Manager’
- Click ‘Configuration Templates’ > ‘Profiles’
- Open the Windows profile that you want to apply to your target endpoints
- Click the ‘Remote Control’ tab
Or
- Click ‘Add Profile Section’ > ‘Remote Control’, if it hasn’t yet been added
- Click the ‘Remote Control’ tab
- Click ‘Edit


There are two tabs, ‘Device Takeover’ and ‘File Transfer’. These two are independent of each other. You can disable device takeover and still enable file transfer operations.
- Enable Device Takeover gives you full control of the remote device'. Use the On/Off button to enable the device to take over the session
- Refer to this wiki https://wiki.comodo.com/frontend/web/topic/how-to-set-up-remote-control-for-end-user to configure the settings of ‘Remote Control’
Profile Configuration for Remote Control
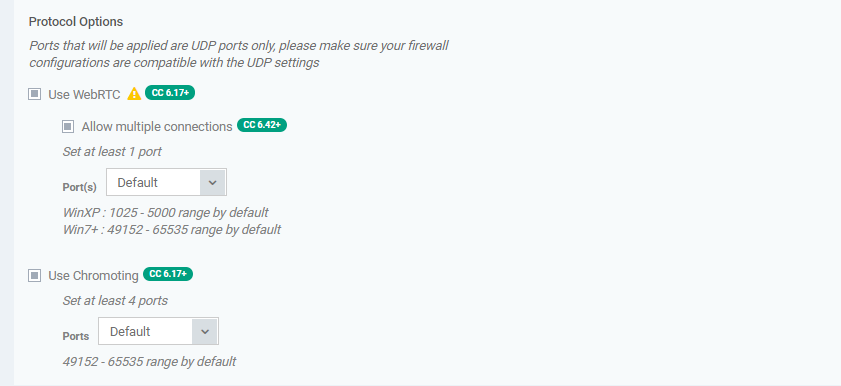
These options let you configure the protocol used for the remote session. These settings will apply to Remote Control version 6.17 and above.
- You can also specify custom ports to be used by the protocol for an additional layer of safety. This allows you to keep only the specified ports open and block other ports for security.
- Use WebRTC – RC will use WebRTC protocol to connect to the device. This option is mandatory and cannot be deselected.
- Allow multiple connections - The user should enable the "Allow multiple connections" option to allow access to multiple remote sessions for the same endpoint
- Clicking on this option allows you to connect multiple remote sessions to the same endpoint.
- Ports – Select the port type to be used by WebRTC protocol and specify the ports. The available options are:
- Custom Range - This allows you to specify a port range to be used by WebRTC
- Custom – This allows you to specify a single custom port to be used by WebRTC
- Default – WebRTC will use port range 1025 - 5000 for Windows XP and port range 49152 – 65535 for Windows 7 and later versions
- Custom Range - This allows you to specify a port range to be used by WebRTC
- Use Chromoting - Chromoting provides a better quality of remote control and experience and is supported only by Windows 7 and later
- If selected, RC uses Chromoting to connecting to devices Windows 7 and later and use WebRTC for Windows XP devices.
- If not selected, RC will use only WebRTC to connect to devices with any Windows version.
- If selected, RC uses Chromoting to connecting to devices Windows 7 and later and use WebRTC for Windows XP devices.
- Ports – Select the port type to be used by Chromoting protocol and specify the ports. The available options are:
- Default – Chromoting will use the port range 49152 – 65535
- Custom Range - This allows you to specify a port range to be used by Chromoting. Enter a range covering at least 4 ports
- Default – Chromoting will use the port range 49152 – 65535
- Clicking on this option allows you to connect multiple remote sessions to the same endpoint.
- Use WebRTC – RC will use WebRTC protocol to connect to the device. This option is mandatory and cannot be deselected.
- Click 'Save' to apply your changes to the profile.

Log in and take control of multiple sessions in Remote Control
After configuring the settings, open the ‘Remote Control by ITarian’ application on your local devices.
- You can download the tool from the ITarian interface at ‘Tools’ > ‘Remote Control’
- Open the Remote Control tool on your PC/laptop
- Log in to the Remote Control application with your username and password

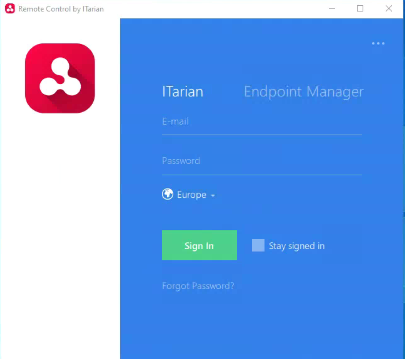
- Click 'Sign-in
- If 'Two-Factor Authentication' is enabled for your account, then you have to enter the authentication code generated in the 'Google Authenticator' app on your mobile device.
After login, You can view the list of enrolled Windows devices here.

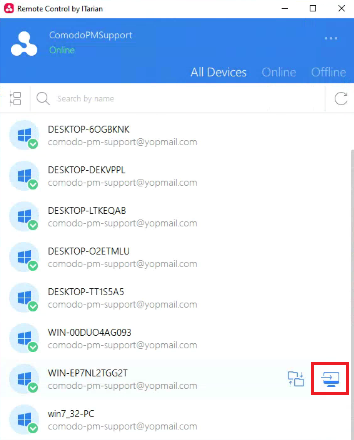
- Move your mouse over the device you want to control then click the 'desktop take over' icon on the right:
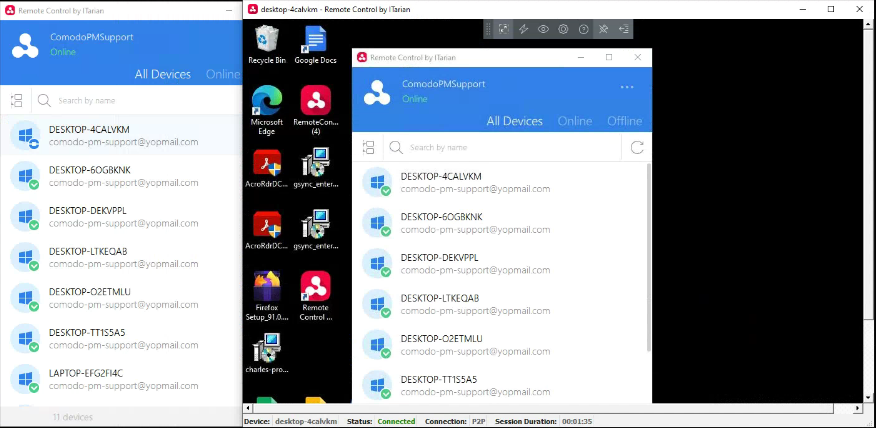
- Select the device where the corresponding profile is applied and click the 'Start takeover Session' button on the first device.
- The system launches the first device take-over session. The user can view and control the remote device screen from the first device.

- The user browses the device to which the corresponding profile is applied and clicks on the "Start Takeover Session" button on the second device.

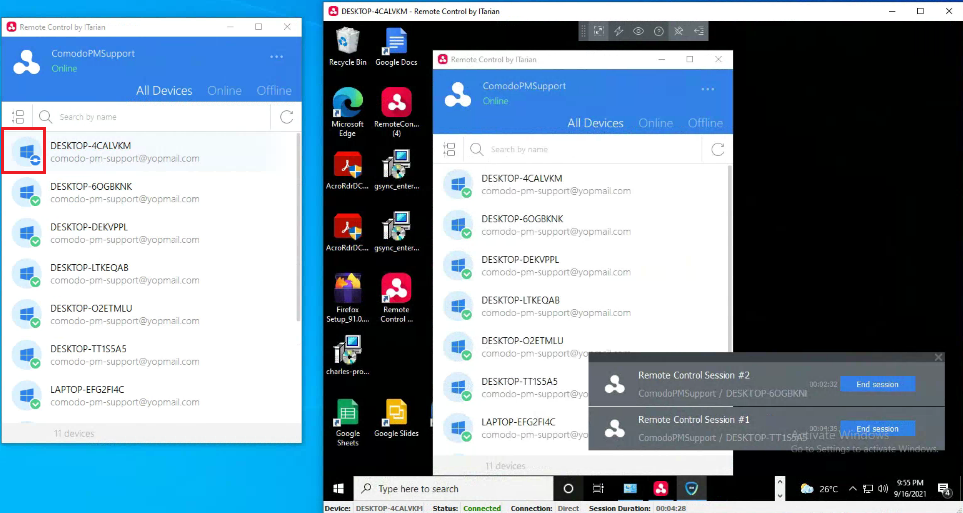
- The system launches the second device's take-over session. The user can now view the screen of the remote device from both of their local devices.

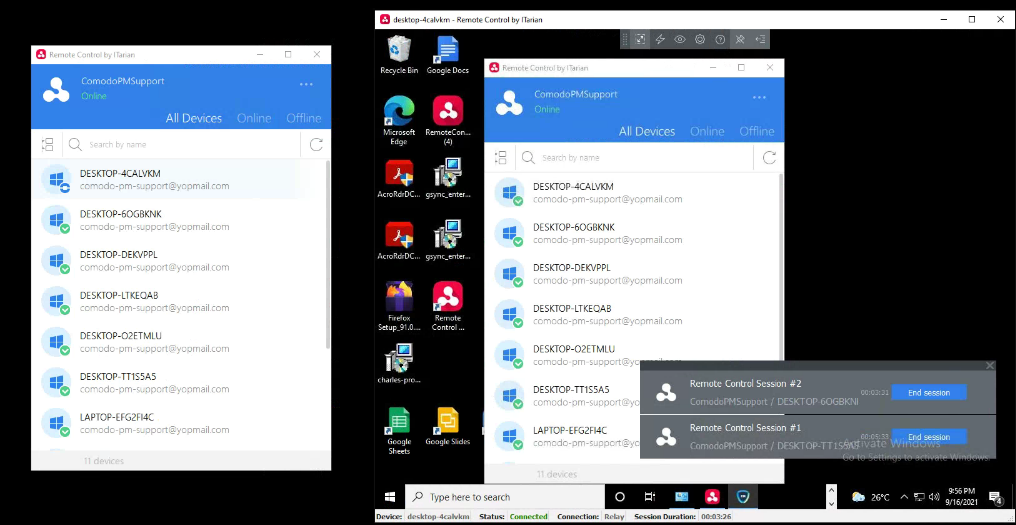
You can now set up multiple takeovers with Remote Control by ITarian in the same endpoint using two different local devices.


---