North America
How to configure protected COM Groups in a Windows profile
Views
2939 times
- The HIPS section of a Windows profile lets you protect component object model (COM) interfaces against unauthorized access by processes and services.
- COM interfaces are used by Windows to define how objects interact within a single application, or between applications.
- COM is used as the basis of Active X and OLE - two items which are often attacked by hackers and malware.
- A COM group is a collection of these COM interfaces. This tutorial explains how to create a new COM group, then protect it in the HIPS section of a profile.
Process in brief:
- Login to Comodo One / Dragon
- Click 'Applications' > 'Endpoint Manager'
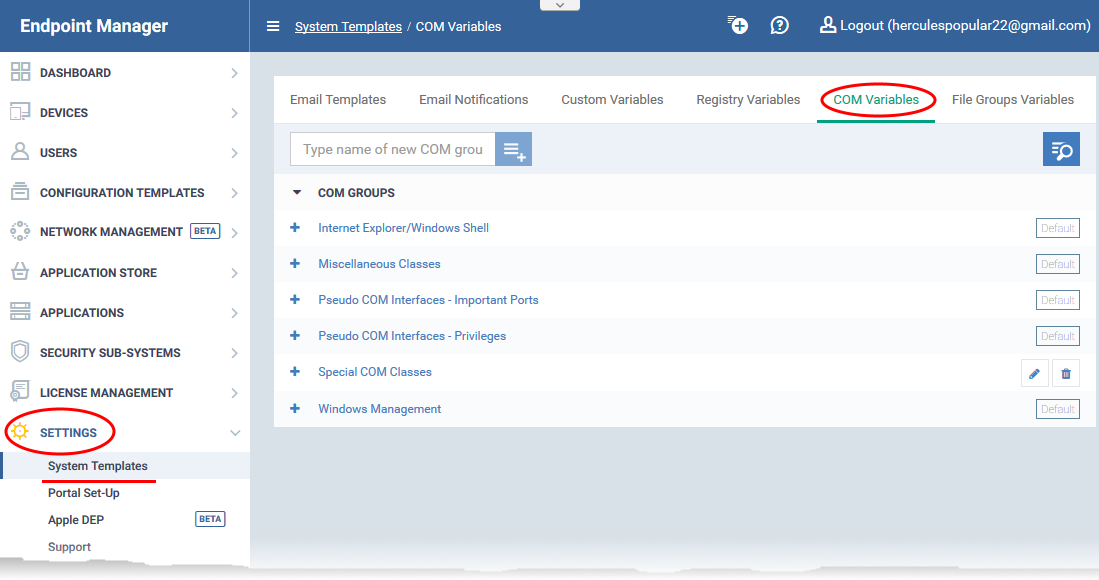
- Click 'Settings' > 'System Templates'
- Select the 'COM Variables' tab
- Create a COM group containing the interfaces you want to manage
- Click ‘Configuration Templates’ > ‘Profiles’
- Open the Windows profile which is applied to your target devices
- Open the 'HIPS' tab if it has already been added to the profile
OR
- Click 'Add Profile Section' > 'HIPS' if it hasn't yet been added
- Open the 'HIPS' tab if it has already been added to the profile
- Click the 'Protected Objects' tab
- Select 'COM Interfaces' in the 'Show' drop-down.
- Select 'Groups List' in the 'By' drop-down
- Select 'COM Interfaces' in the 'Show' drop-down.
- Click 'Add COM Group' > Select your new group from the list
- Click 'Save'
Process in detail
- Step 1 - Create a COM group containing the COM interfaces you want to protect
- Step 2 – Add the COM group to 'Protected Objects' in the HIPS section of a profile
Step 1 - Create a COM group containing the COM interfaces your want to protect
- Endpoint Manager ships with a set of COM Groups that you can add to ‘Protected Objects' in the HIPS section of a Windows profile.
- If none of the predefined groups cover your needs, then you can create a custom group of specific interfaces.
Create a COM group
- Login to Comodo One / Dragon
- Click 'Applications' > 'Endpoint Manager'
- Click 'Settings' > 'System Templates'
- Click the 'COM Variables' tab:

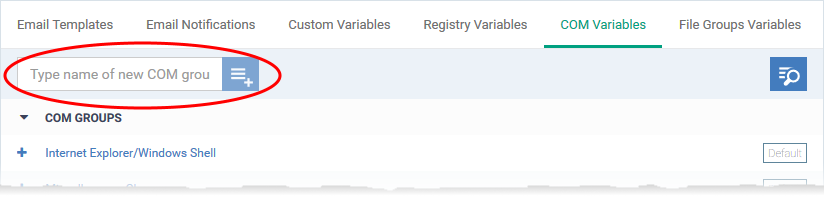
- Create a name for the COM group then click the
button
- The group name should ideally identify the members of the group.
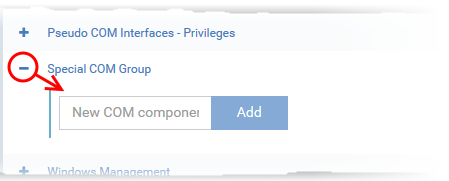
The COM group will be added to the list. The next step is to add COM interfaces to the group.
- Click the '+' button at the left of the group name:
- The group name should ideally identify the members of the group.
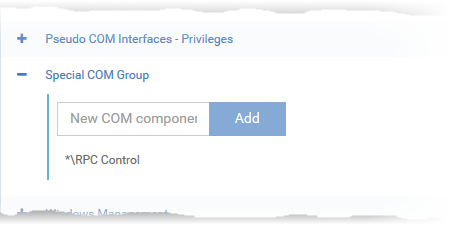
- Enter the COM classes you want to add then click the 'Add' button:
The COM class will be added to the group.
- Repeat the process to add more COM classes to the group.


Once added, the COM group will be available for selection in 'HIPS' > 'Protected Objects' > 'Groups List'.
Step 2 – Add the COM group to 'Protected Objects' in the HIPS section of a profile
The protected objects tab lets you protect COM interfaces or groups against modification by malicious processes.
- Click ‘Configuration Templates’ > ‘Profiles’
- Open the Windows profile applied to your target devices
- Open the 'HIPS' tab if it has already been added to the profile
OR
- Click 'Add Profile Section' > 'HIPS' if it hasn't yet been added
- Open the 'HIPS' tab if it has already been added to the profile
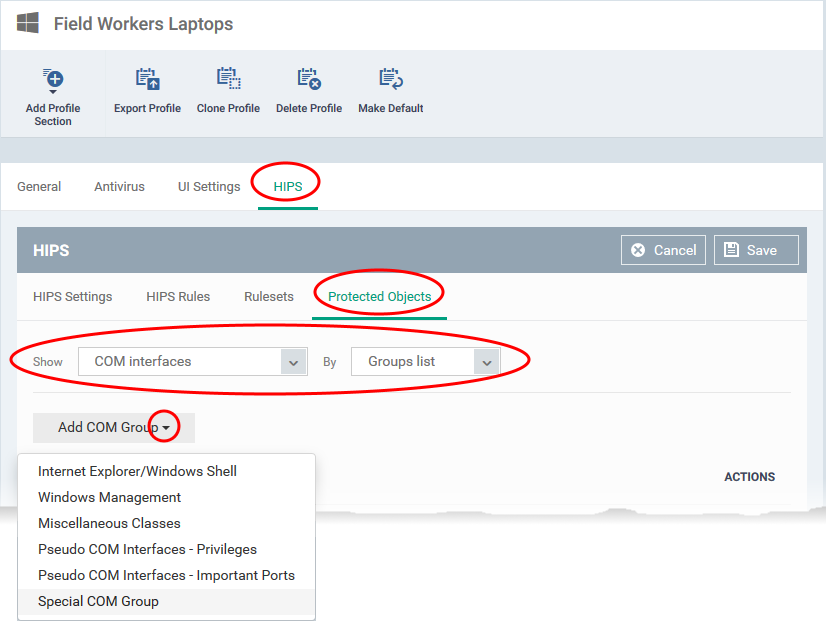
- Click the 'Protected Objects' tab. Then:
- Select 'COM interfaces' in the 'Show' drop-down
- Select 'Groups list' in the 'By' drop-down
- Select 'COM interfaces' in the 'Show' drop-down
- Click ‘Add COM group’ and choose your new group from the list:
- Click ‘Save’ to apply your settings


CONTACT US
Call now!  (973) 859 4000 ext 3025
---