How to configure the virus scope in a profile
Introduction:-
This section explains as how to modify VirusScope
-
VirusScope monitors the behavior of running processes to detect and block malicious activities. VirusScope can also undo any changes made by the malware.
-
You can set VirusScope to take one of the following actions if it finds a threat:
-
Generate an alert. The user can decide whether to allow or block it.
OR -
Automatically quarantine the threat and reverse any actions that it took.
-
-
By default, VirusScope only monitors processes which are running in the container. You can enable whole-host protection if required.
-
VirusScope is a feature of CCS, and can be configured as part of a security profile.
Process in brief
-
Log into ITarian then click ‘Applications’ > ‘Endpoint Manager’
-
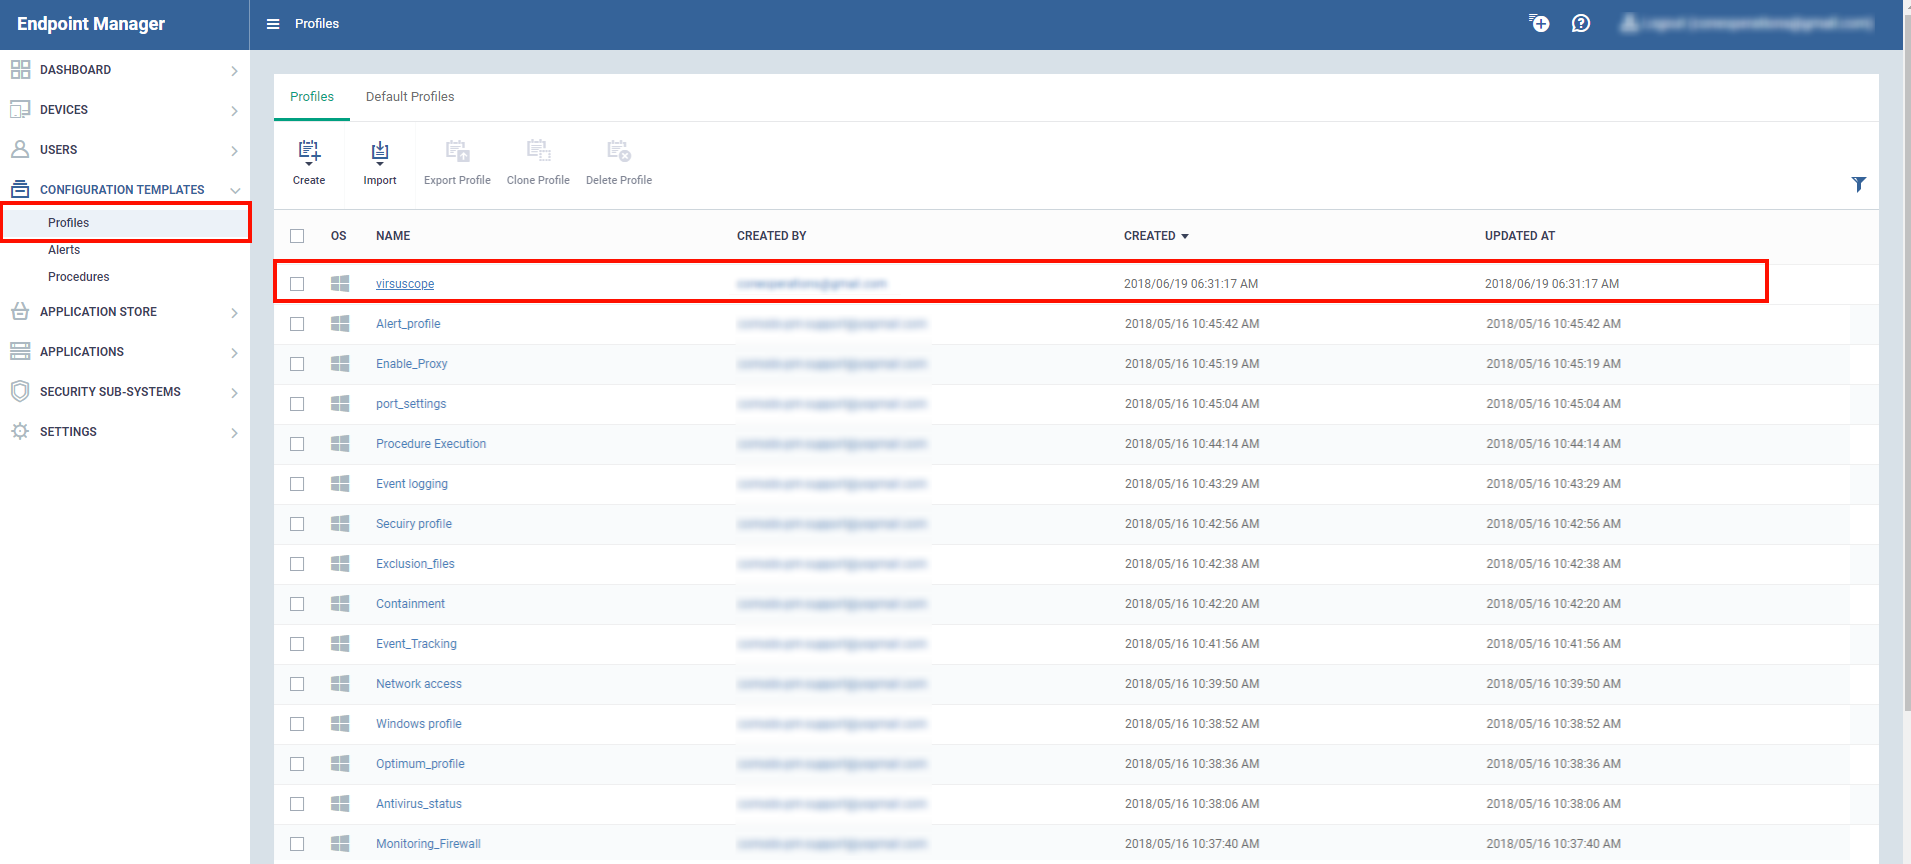
Click 'Configuration Templates' > 'Profiles'
-
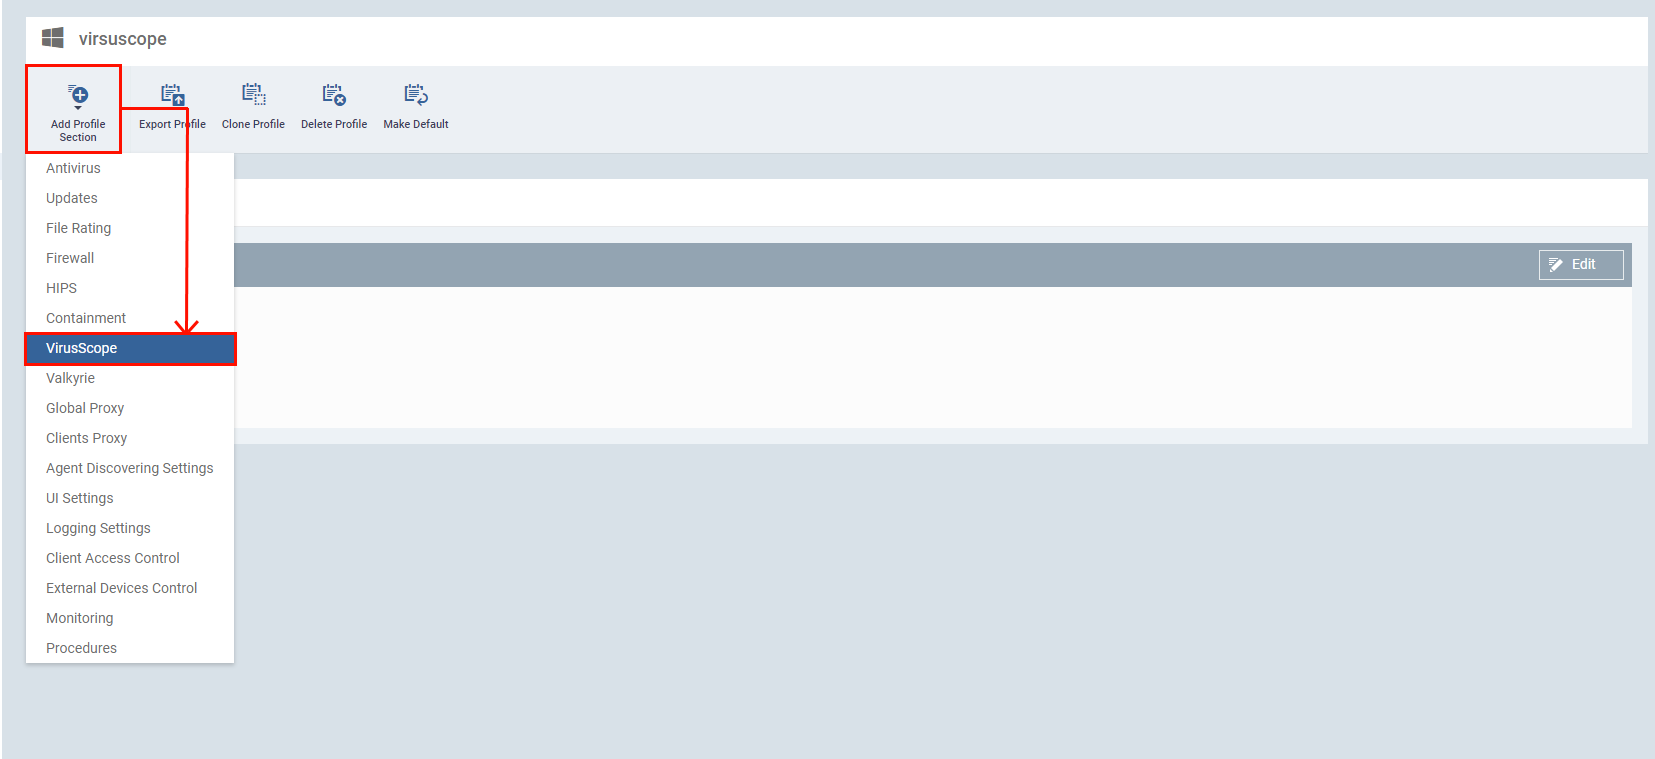
Click on the name of the Windows profile that you want to configure, then:
-
Click the 'VirusScope' tab if it has already been added to the profile
OR -
Click 'Add Profile Section' > 'VirusScope'
-
-
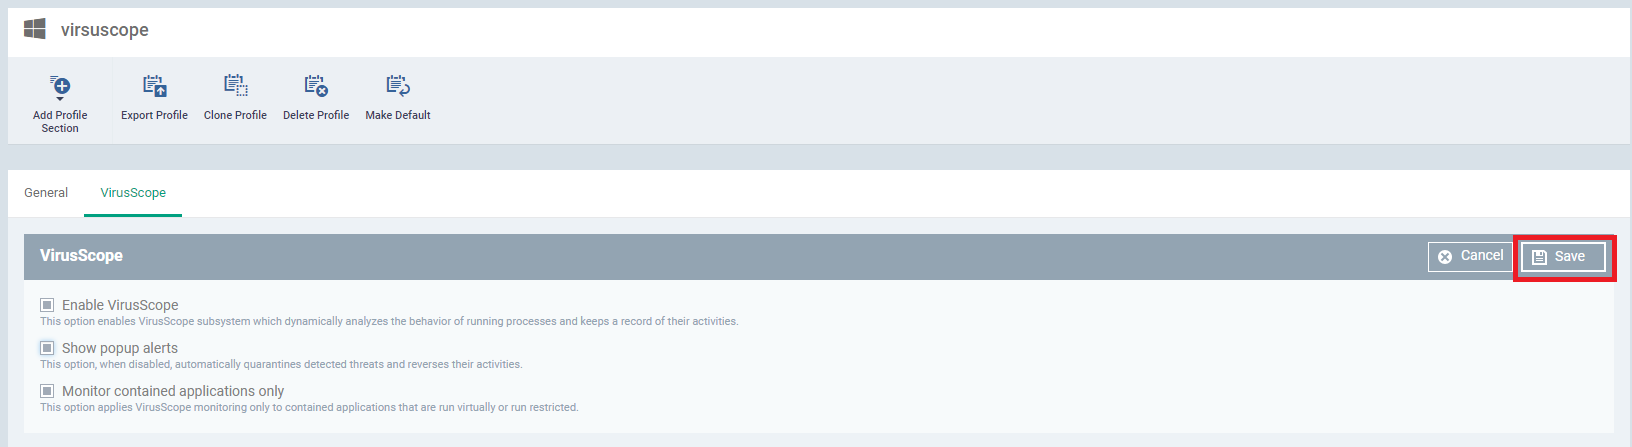
You can set the following options:
-
-
Enable VirusScope - Switch the feature on or off
-
Show popup alerts:
-
Enabled – VirusScope will show an alert on the endpoint when if finds a threat. This gives the end-user the option to block the threat or ignore it.
-
Disabled – No alert is shown on the endpoint. VirusScope will quarantine the threat and reverse any actions that were taken by it.
-
-
Monitor contained applications only:
-
Enabled – VirusScope only monitors processes running in the sandbox/container.
-
Disabled – VirusScope will monitor all running processes on the endpoint. Those inside the container, and those outside.
-
-
Process in detail
Step 1:
-
Open Endpoint Manager
-
Click 'Configuration Templates' > 'Profiles'
Step 2 :
-
Click the name of a Windows profile to open its detail page
-
Click the 'Add Profile Section' drop-down > Select 'VirusScope'
-
Configure the feature as required:
-
Enable VirusScope - Enable or disable VirusScope. If enabled, VirusScope monitors the activities of running processes and generates alerts if suspicious activity is detected.
-
Show popup alerts:
-
Enabled – VirusScope will show an alert on the endpoint when if finds a threat. This gives the end-user the option to block the threat, or ignore it.
-
Disabled – No alert is shown on the endpoint. VirusScope will quarantine the threat and reverse any actions that were taken by it.
-
-
Monitor contained applications only:
-
Enabled - VirusScope only monitors processes running in the container.
-
Disabled - VirusScope monitors all processes on the endpoint. Those inside the container, and those outside.
-
-
-
Click 'Save'.
VirusScope Alerts
-
If 'Show Popup Alerts' is enabled, end-users will see a notification each time VirusScope discovers a potential threat.
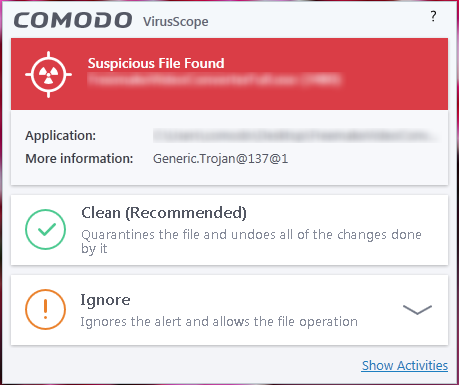
- Clean – Move the item to quarantine and reverse any changes that it made. Choose this if you are unsure about the application shown in the alert.
- Ignore – Allows the process to continue. You must then choose one of the following options.
- Ignore Once - The process is allowed to run this time only. Another alert will be generated if the process attempts to execute in future.
- Ignore and Add to Exclusions - The file is allowed to run and will not be contained in future. See Auto-Containment Rules for help to configure which types of files should be auto-contained.
- Ignore and Report as False Alert – The process is allowed to run and a false-positive report is sent to Xcitium. Select this if you think the file is safe. If it is verified as a false-positive it will be added to the global white list.


---