How to configure User Access Rights Verification in Xcitium Client Security
Use the following links to jump to the task you need help with:
Introduction
Some features of Xcitium Client Security requires elevated rights to perform certain actions. To perform these actions current users need to prove that they have sufficient rights to do so.
The admin or technician can set User Access Rights Verification to validate other user actions. To configure this User Access Rights Verification, please follow the below steps
User Access Rights Verification:
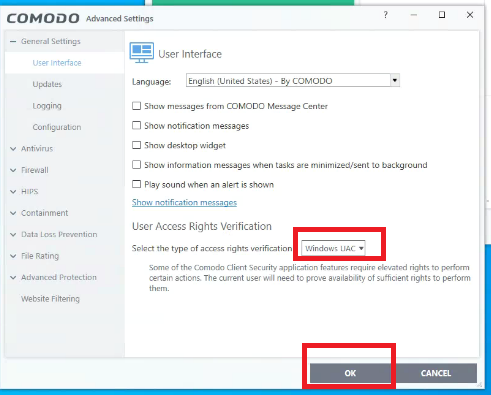
Go to Xcitium Client Security > Settings > General Settings > User Interface. In this section, the Admin or Technician user can configure user access rights verification.
This "User Access Rights Verification " prompts the end-user to provide the user access rights to perform certain actions on Xcitium Client Security
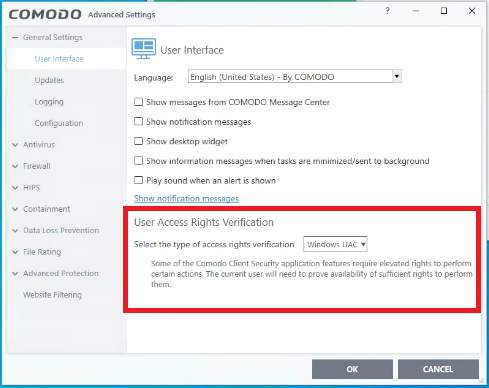
Setting the User Access Rights Verification
The Admin or Technician user can select the type of access rights verification based on his choice.
They are
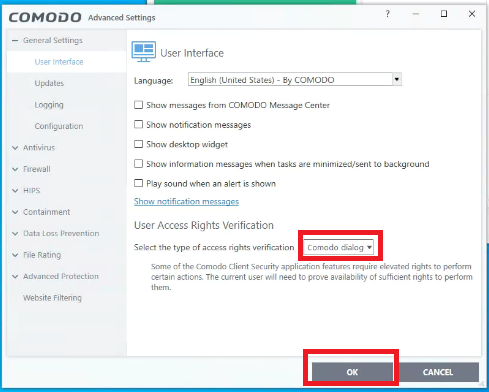
Step [a]: Selecting Xcitium dialog box
Select this "Xcitium dialog" option from the drop-down and then click "Ok".
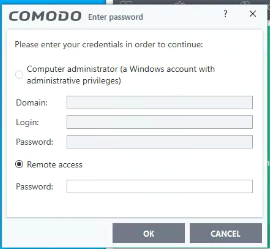
Now the "Xcitium dialog" is enabled as User access rights verification. When a user tries to perform some actions on Xcitium Client Security, it prompts a Xcitium dialog box to the current user at his endpoint. After entering the password by the current user, then only the user can perform his action on Xcitium Client Security.
For Example:
If a user wants to make changes in containment settings, then a Xcitium dialog box is prompted at the current user’s endpoint requires verification from that user.
A sample screenshot is given below
Note:
You can configure password for Xcitium Client Security from Endpoint Manager> ‘Configuration Templates’ > ‘Profiles’ > click the name of a Windows profile > 'Add Profile Section' > 'Client Access Control. See this wiki to know more.
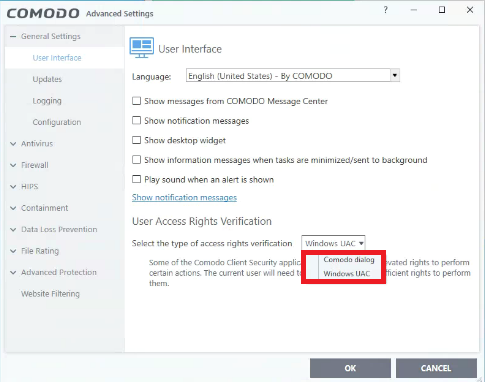
Step [b]: Selecting Windows UAC
Select this "Windows UAC" option from the drop-down and then click “Ok”.
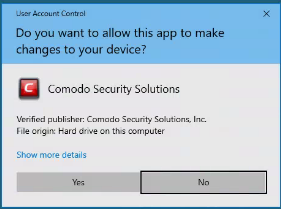
Now the "Windows UAC" is enabled as User access rights verification. When a user tries to perform some actions on Xcitium Client Security, it prompts a Windows UAC access to the current user at his endpoint. After providing access by the current user, then only the user can perform his action on Xcitium Client Security.
For Example:
If a user wants to enable or disable the HIPS of an end user. Then the "Windows UAC" access is prompted at the current user’s endpoint requires verification from that user.
A sample screenshot is given below


---