How to configure virtual desktop settings in a Windows profile
Click ‘Configuration Templates’ > ‘Profiles’ > open a Windows profile > Click ‘Add Profile Section’ > ‘Containment’
- The virtual desktop is a sandbox environment in which users can run programs and browse the internet without fear those activities will damage the host computer.
- Applications in the virtual desktop are isolated from other processes on the host computer, write to a virtual file system, and cannot access personal user data. Changes made to files and settings in the virtual desktop do not affect the originals on the host system.
- Because of this, any attacks by internet based malware cannot reach or compromise the host system. This makes the Virtual Desktop a highly secure environment for general workflows, and specifically for surfing the internet.
- The virtual desktop can run any Windows program, so could be used as the default login environment for employees and guests. You can set a password to lock users into the virtual desktop. Users will need to enter the password before they can exit the desktop.
- You can also white-label the virtual desktop with your own company branding.
- This article explains how to:
Configure the virtual desktop section of a profile
- Log into Comodo One / Dragon
- Click 'Applications’ > ‘Endpoint Manager’
- Click 'Configuration Templates' > 'Profiles'
- Open the Windows profile applied to your target devices
- Open the 'Containment' tab (if the section has been added to the profile)
OR
- Click 'Add Profile Section' > ''Containment' (if it hasn't yet been added)
- Open the 'Containment' tab (if the section has been added to the profile)
- Click the 'Virtual Desktop' tab
Automatically reset Virtual Desktop when session is terminated - All data saved in the virtual desktop is deleted when the desktop is closed. All changes are reversed. This includes any files downloaded from the internet and any system changes.

- End-users should save files in the 'Shared Space' folder when using the virtual desktop.
- You can also enable removable media (external storage devices) for use with the virtual desktop.
- See How to configure containment in a Windows profile for more help on containment settings.
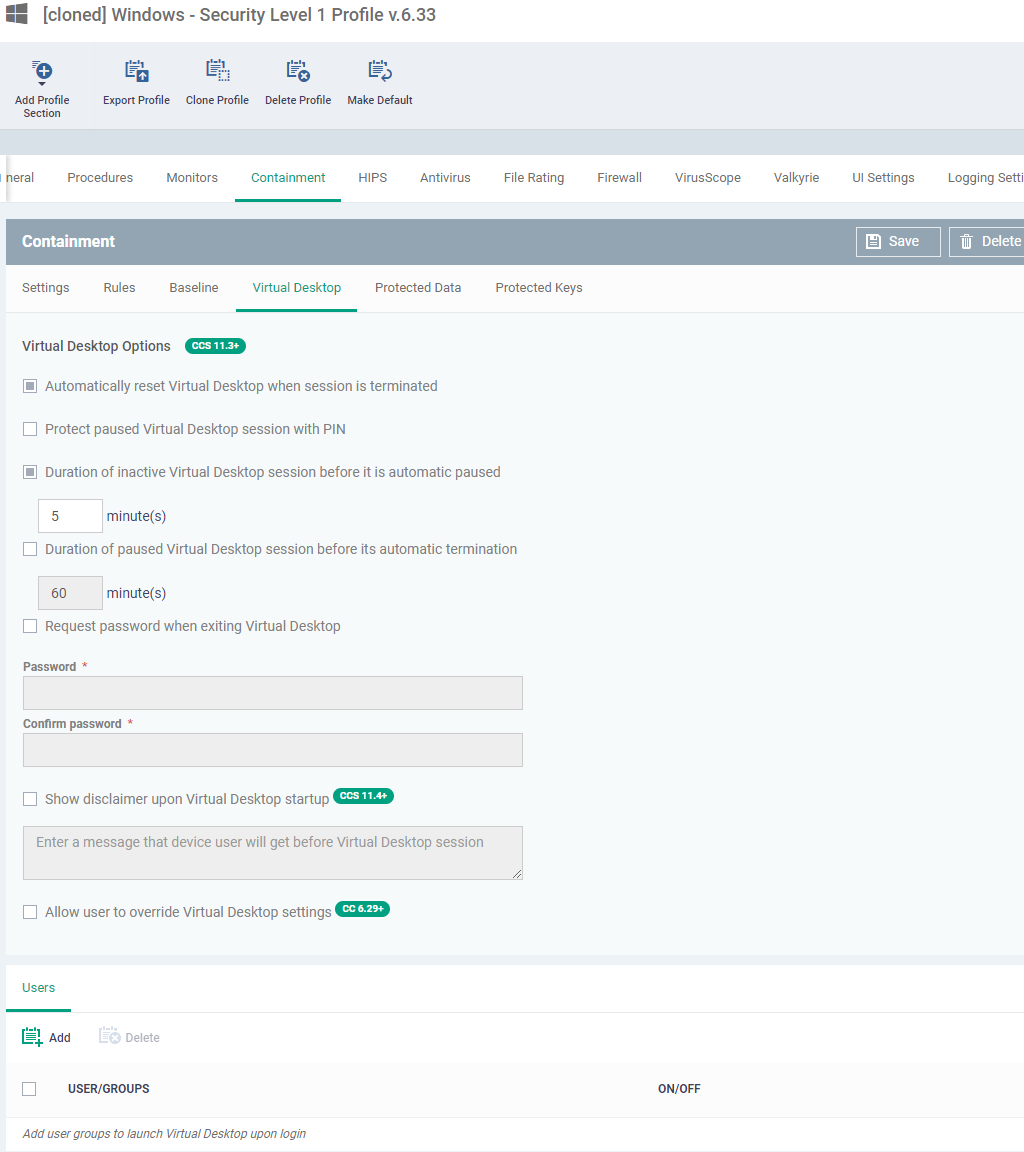
Protect paused Virtual Desktop session with PIN - Generates a session specific PIN number at virtual desktop startup. The PIN is required to resume the session from a paused state. This is useful on shared computers as it prevents other users from accessing the session.

- Users can view this number by clicking the PIN button
at the bottom-right of the virtual desktop

Duration of inactive Virtual Desktop session before it is automatic paused - Set the maximum time to auto-pause the Virtual Desktop session if the session is not activated in the given time period. The session gets automatically auto-pause when this period elapses.
Duration of paused Virtual Desktop session before its automatic termination - Set the maximum time that a virtual desktop session can be left in a paused state. The session gets automatically terminated when this period elapses.
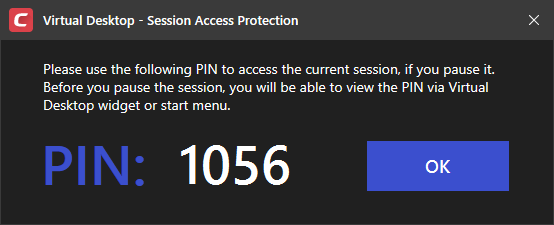
Request password when exiting Virtual Desktop - Create an 'exit' password for the virtual desktop.
- Users need to enter the password in order to close the virtual desktop, as shown below:

- This prevents users from closing the virtual desktop and accessing the host, potentially exposing the computer to danger.
- Type a password that cannot easily be guessed. Passwords must be 8-16 characters and contain a mix of upper case letters, lower case letters, numbers, and special characters.
- Re-enter the password for confirmation.
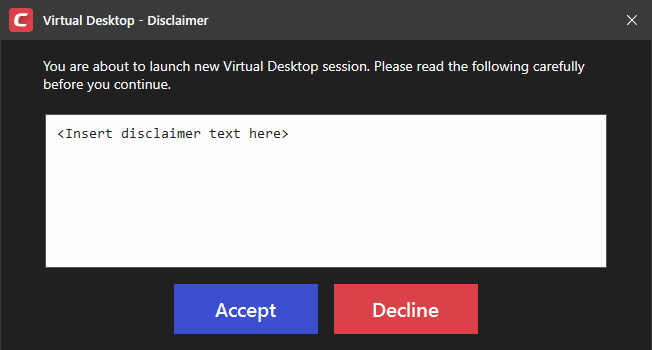
Show disclaimer upon Virtual Desktop startup - Create a legal disclaimer which is shown when the virtual desktop starts. Users must accept the disclaimer before they can access the virtual desktop.
Note - This setting is only of value if you are rebranding the virtual desktop. You can safely ignore this setting if you do not plan to rebrand.
- Enter the disclaimer message
- The message is shown when the virtual desktop starts.
- Users should read the disclaimer and click 'Accept'. An example is shown below:

Virtual desktop password and disclaimer options to be not modifiable by the user - Ability to disable the virtual desktop password and disclaimer options in CCS when “Allow user to override Virtual Desktop settings” setting is disabled on the portal.
- End-user would not able to disable the password and disclaimer options on the virtual desktop. They will be able to change the password if they know the original password. User can edit the disclaimer text. But won't be able to disable the Disclaimer.
Allow user to override Virtual Desktop settings - Changes to virtual desktop settings at the endpoint are not reversed by Endpoint Manager.
- By default, EM checks devices to see if the local CCS settings match those in the profile. It will re-implement the profile settings if it detects any deviation.
- Enabling this option stops the process described above. The EM profile does not apply any virtual desktop settings. Only the virtual desktop settings in CCS on the endpoint are applied to the device.
- See this wiki page for help to locally configure the virtual desktop in CCS.
- Note 1. This option complements the existing override option in the ‘Client Access Control’ section of a profile, which allows local changes to *every* CCS setting. You can allow local override of just the virtual desktop settings, while preventing changes to other CCS settings.
- Note 2. If you enable this option, you effectively cancel all Virtual Desktop settings that come from the profile. For example, ‘Exit Password’, ‘Reset Virtual Desktop’ and ‘Duration’ settings will not get applied.
- Note 1. This option complements the existing override option in the ‘Client Access Control’ section of a profile, which allows local changes to *every* CCS setting. You can allow local override of just the virtual desktop settings, while preventing changes to other CCS settings.
Specify user groups for whom the virtual desktop should start automatically after login. This means the virtual desktop is the users’ default environment, instead of the host operating system. This setting is especially useful for guest users and for public computers in libraries / class-rooms etc.
- Click 'Add' under the 'Users' section
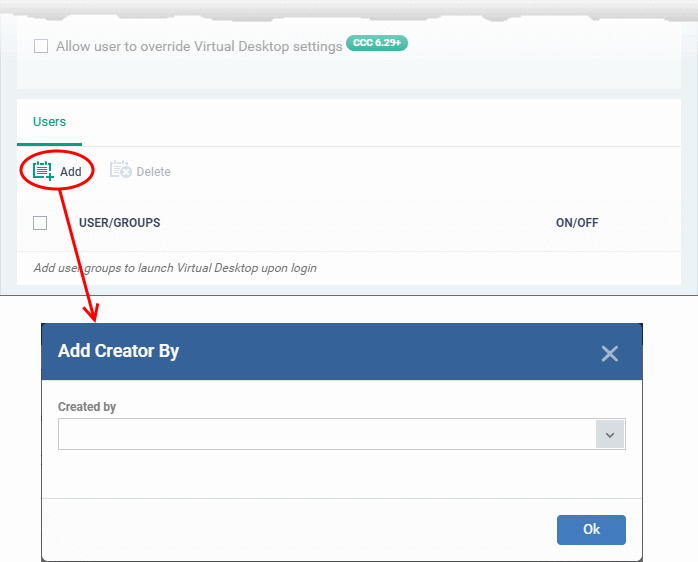

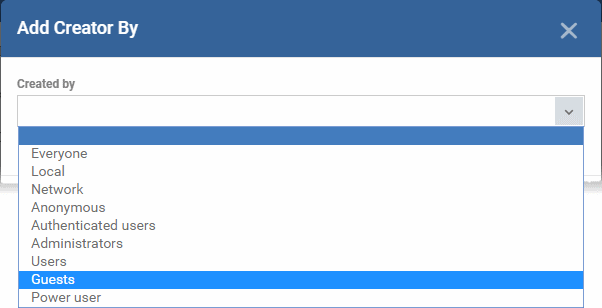
- Select a user group from the drop-down then click 'OK'.

The selected user group is added to the list:

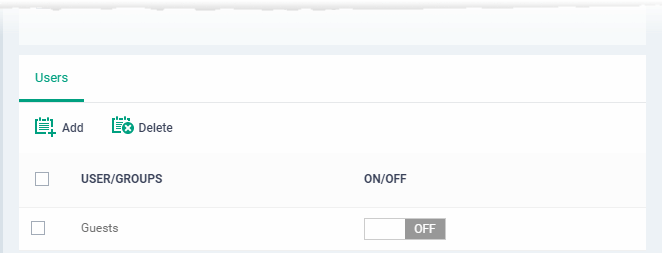
- Use the ‘ON/OFF' switches to enable or disable the feature for a particular group.
- Repeat the process to add more user groups
Click 'Save' to apply your changes to the profile.
You can white label virtual desktop with your own custom application name and brand logos. This is especially useful if you set the virtual desktop to launch automatically instead of the Windows desktop. See the 'users' section for more on this.
- Click 'Configuration Templates' > 'Profiles'
- Open the Windows profile applied to your target devices
- Open the 'UI Settings' tab and click 'Edit' (if the section has been added to the profile)
OR
- Click 'Add Profile Section' > ''UI Settings' (if it hasn't yet been added)
- Open the 'UI Settings' tab and click 'Edit' (if the section has been added to the profile)
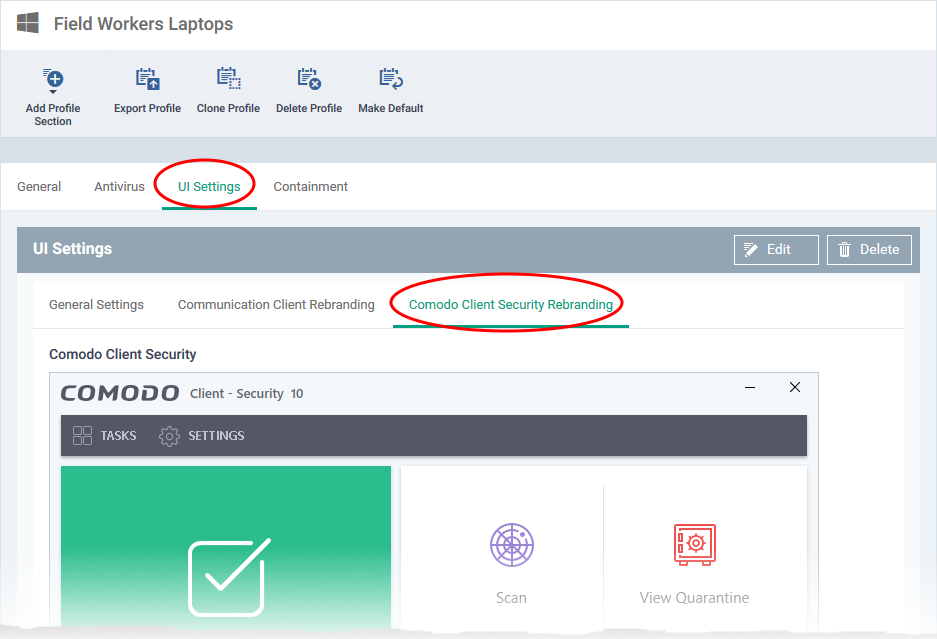
- Click the 'Comodo Client Security Rebranding' tab
- Scroll down to 'Comodo Virtual Desktop'
- Client Name - Enter a custom name for the application. This will be shown in the interface and will be used as the product name in the Windows 'Start' menu.


You can use letters, numbers and special characters. Maximum = 25 characters.
- Wallpaper icon - Shown on the virtual desktop main screen.
Accepted image size = 128 x 128 pixels
Accepted image file format = .png
- Wallpaper image – Shown as the desktop background for the virtual desktop.
Accepted image size = 1920 x 1200 pixels
Accepted image file format = .png
- Start menu icon - Windows start menu and shortcut icon.
Accepted image size = 32 x 32 pixels
Accepted image file format = .png
- Widget icon - Logo shown on the header of the virtual desktop widget.
Accepted image size = 24 x 24 pixels
Accepted image file format = .png
- Click 'Save' to apply your settings to the profile.
Show only virtual desktop settings on the device
You can configure the 'UI Settings' section of a profile to show only virtual desktop options, and block access to the rest of CCS.
- Click 'Configuration Templates' > 'Profiles'
- Open the Windows profile applied to your target devices
- Open the 'UI Settings' tab then click 'Edit'
OR
- Click 'Add Profile Section' > 'UI Settings' (if it hasn't yet been added)
- Open the 'UI Settings' tab then click 'Edit'
- Click the 'General Settings' tab
Enable 'Show Virtual Desktop settings only in security client interface'

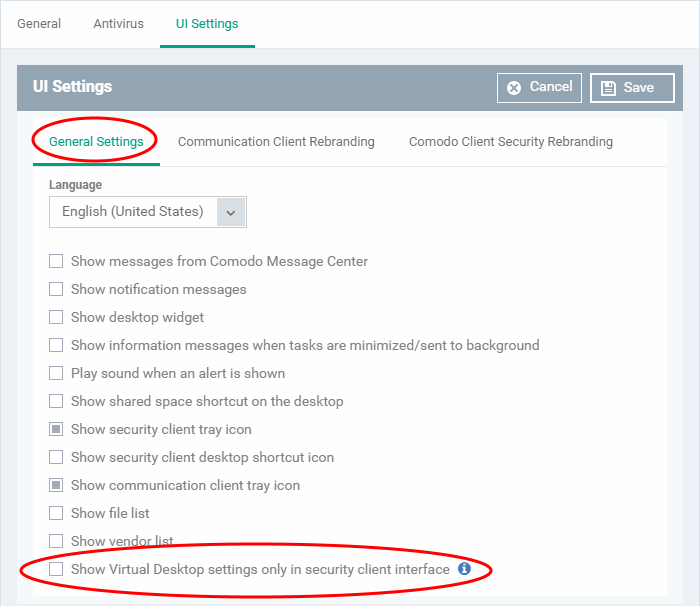
This means:
- The CCS tray icon and the widget are hidden on the endpoint.
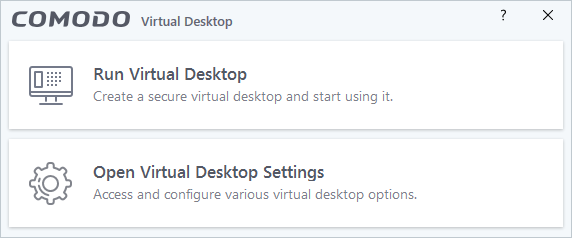
- The CCS desktop and start menu shortcuts only show virtual desktop options:
- Run Virtual Desktop - Opens the virtual desktop
- Open Virtual Desktop Settings – Opens the virtual desktop settings area in CCS ('Settings' > 'Containment' > 'Virtual Desktop')
- Run Virtual Desktop - Opens the virtual desktop
- Click 'Save' for your settings to take effect.


---