North America
How to create a rescue disk in Comodo Client Security
Views
4411 times
Category
Xcitium Client Security
Tags
Open CCS > Click ‘Advanced Tasks’ > ‘Create Rescue Disk’
- Comodo Rescue Disk (CRD) is a bootable disk image that lets you run virus scans in a pre-boot environment (before Windows loads).
- CRD runs Comodo Cleaning Essentials on a lightweight distribution of Linux.
- The application is a powerful virus, spyware and root-kit cleaner which works in both GUI and text mode.
- CRD can eliminate infections that are preventing Windows from booting in the first place.
- It is useful for removing malware which has embedded itself so deeply that regular AV software cannot remove it.
- CRD contains tools to explore files in your hard drive, take screen-shots and browse web pages.
- CRD can eliminate infections that are preventing Windows from booting in the first place.
The disk is available in .iso format and can be burned to CD, DVD or USB.
Create a rescue disk
- Login to the endpoint and open CCS. You can open CCS by double-clicking the system tray icon:


- Click ‘Advanced Tasks’ > ‘Create Rescue Disk’

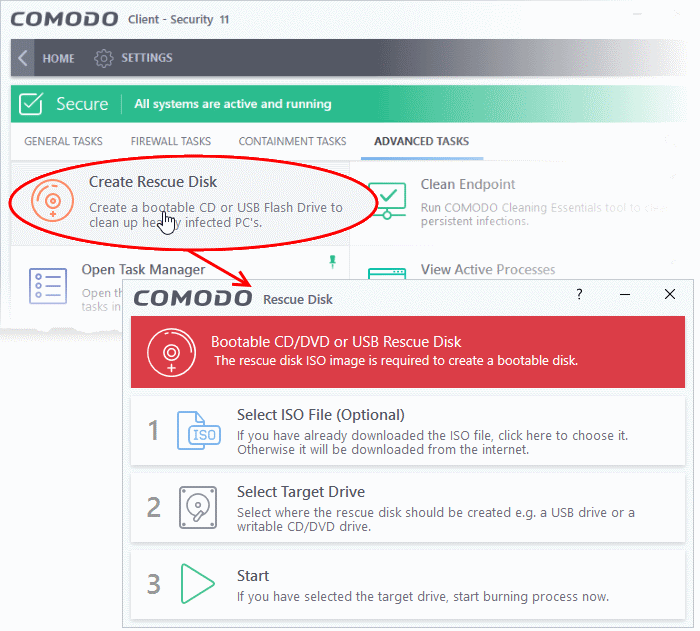
The setup screen shows the steps to create a new rescue disk:
Step 1 - Select the ISO file (optional)
- Only click step 1 if you have already downloaded the rescue disk ISO from Comodo. Step 1 allows you to select the file.
- If not, please ignore step 1. The .iso will be automatically downloaded in Step 3 anyway.
- You can download the .iso, if required, from http://download.comodo.com/crd/download/setups/comodo_rescue_disk_2.0.261647.1.iso
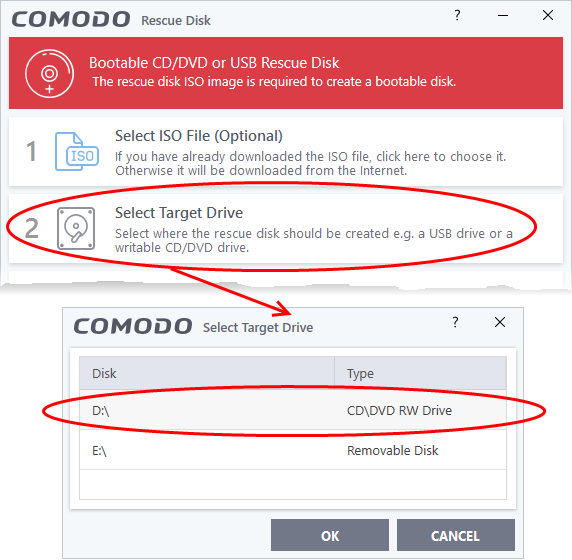
Step 2 - Select target drive
- Choose the CD/DVD or USB on which you want to burn the rescue disk. You will boot to this disk to run the virus scanner.
Burn to CD or DVD
- Label a blank CD or a DVD as "Comodo Rescue Disk - Bootable" and load it in your CD/DVD drive.
- Click 'Select Target Drive' then choose the drive in the 'Select Target Drive' dialog
- Click 'OK'
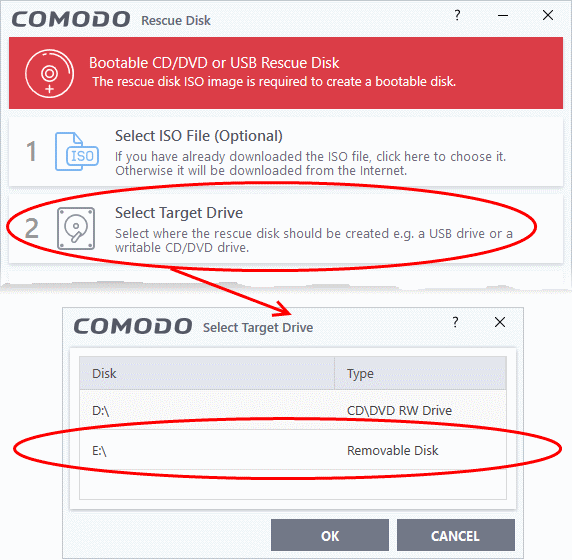
Burn to a USB drive
- Insert a formatted USB stick in a free USB port on your computer
- Click 'Select Target Drive' in the 'Rescue Disk' dialog
- Select the drive from the 'Select Target Drive' dialog and click 'OK'

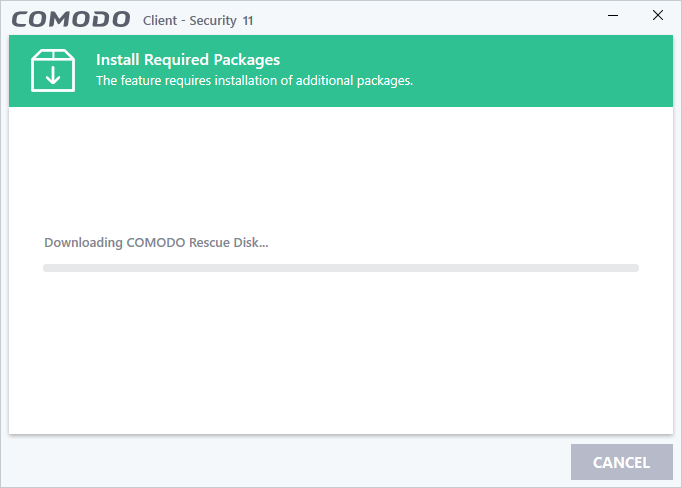
Step 3 – Burn the Rescue Disk
- Click 'Start'
- If you selected a local ISO in step 1 then burning will start immediately. If not, the ISO will be downloaded from Comodo servers:
After downloading, setup will burn the ISO to your target drive:


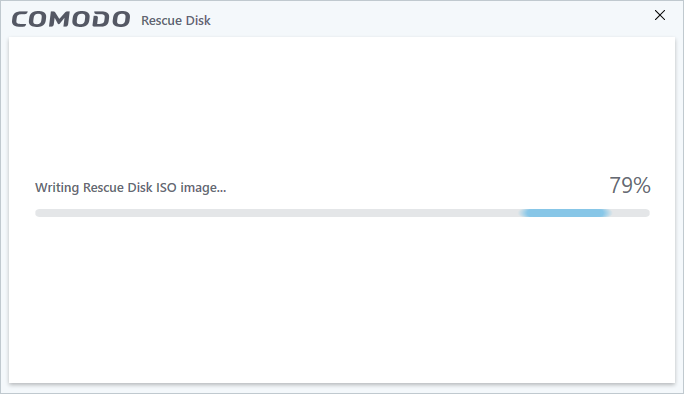
- Wait until the writing process is complete. Do not eject the CD/DVD/USB drive early. The CD/DVD/USB will be ejected automatically when the process is finished.

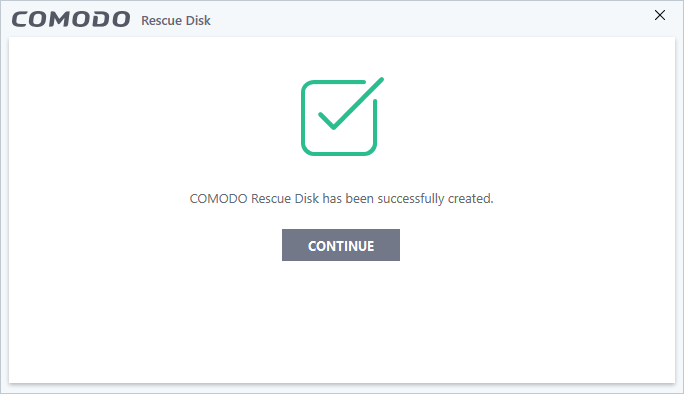
Your bootable Comodo Rescue Disk is ready.
- Click 'Continue' to go back to the CIS interface.
You can now boot your system using the rescue disk. This will run the scanner in your pre-boot environment.
- Change the boot order on your computer - http://help.comodo.com/topic-170-1-493-5227-Changing-Boot-Order.html
- Start using CRD - http://help.comodo.com/topic-170-1-493-5228-Booting-to-and-Starting-Comodo-Rescue-Disk.html
- Run scans on your pre-boot environment - http://help.comodo.com/topic-170-1-493-5216-Starting-Comodo-Cleaning-Essentials.html and http://help.comodo.com/topic-170-1-493-5217-CCE-Interface.html


CONTACT US
Call now!  (973) 859 4000 ext 3025
---