How to create and manage registry groups in Endpoint Manager
- A registry group is a collection of registry keys with similar attributes or scope.
- For example, the 'Important Keys' group contains keys which are essential to the security and stability of the operating system. The 'Automatic Startup' group contains keys which load at Windows boot.
- Registry groups are useful when you want to apply an action to an entire class of keys. For example, you can:
- Add a registry group as a protected object under HIPS.
- Create an exclusion for a registry group, so its member keys can be accessed by contained applications.
- Add a registry group as a protected object under HIPS.
- Endpoint Manager ships with a set of predefined groups, and allows you to create your own.
Use the links below to jump to the task you need help with:
- Open the registry groups interface
- Create a new registry group
- Example 1: Do not virtualize access to a certain registry group
- Example 2: Protect a registry group with HIPS
Open the registry groups interface
- Login to Comodo One / Dragon
- Click ‘Applications’ > ‘Endpoint Manager’
- Click 'Settings' > 'System Templates'
- Click the 'Registry Variables' tab
- The interface shows a list of existing groups. 'Default' groups cannot be edited or deleted.
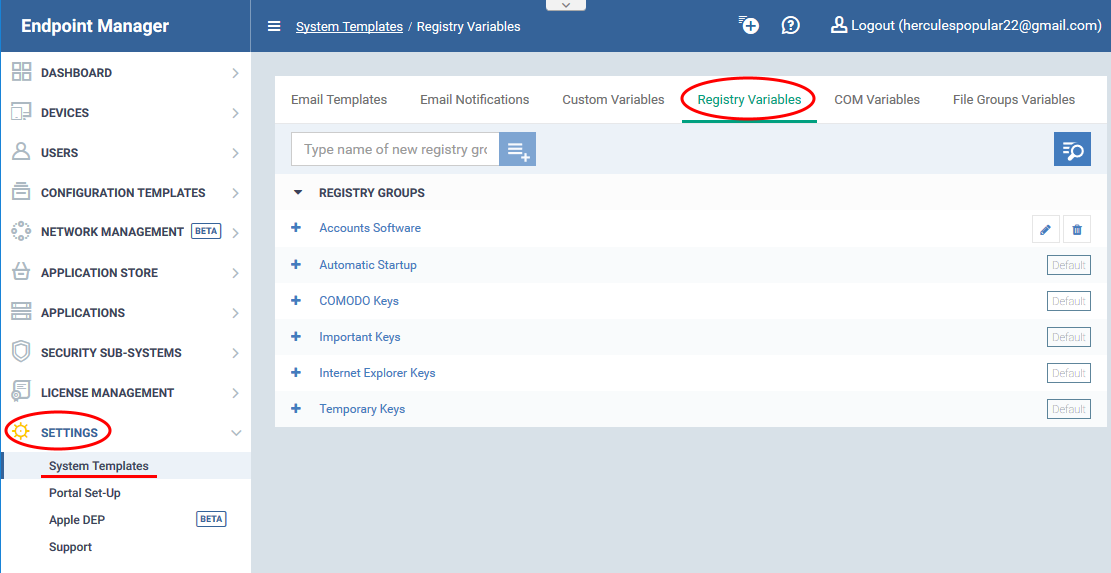
- Click ‘Settings' > 'System Templates' > ‘'Registry Variables'
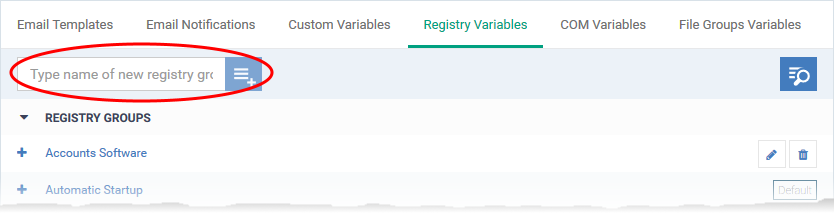
- Enter a name for the registry group then click the
button
- The group name should ideally identify the members of the group. For example, 'Media player registry keys' or 'Accounts software registry keys' etc.


The registry group will be added to the list. The next step is to add registry hives/keys to the group.
- Click the '+' button at the left of the group name:

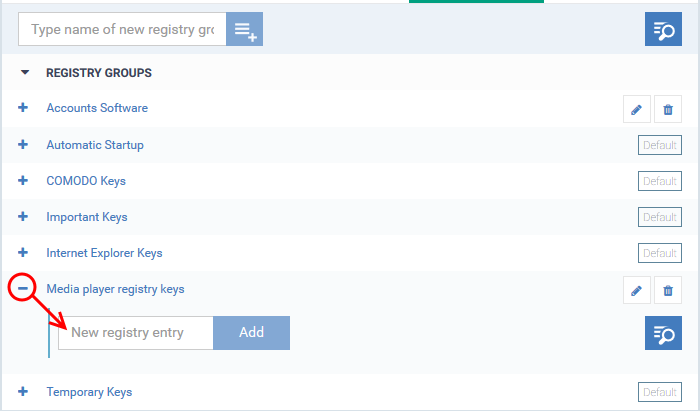
- Enter the path of the registry key/value then click 'Add':
The key will be added to the group.
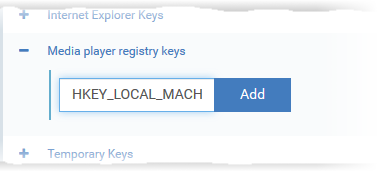


- Repeat the process to add more keys and values to the group.
The new registry group is now available for selection when configuring a Windows Profile.
Example 1: Do not virtualize access to a certain registry group
Applications in the container are not allowed to access the local registry. Instead, they write all changes to a virtual copy of the registry. You can create an exception to this rule for specific registry groups. Afterward, contained applications will be able to access the keys in the group.
- Click ‘Configuration Templates’ > ‘Profiles’
- Open the Windows profile applied to your target devices
- Click 'Add Profile Section' > 'Containment'
- ...or simply open the 'Containment' section if you have already added it.
- ...or simply open the 'Containment' section if you have already added it.
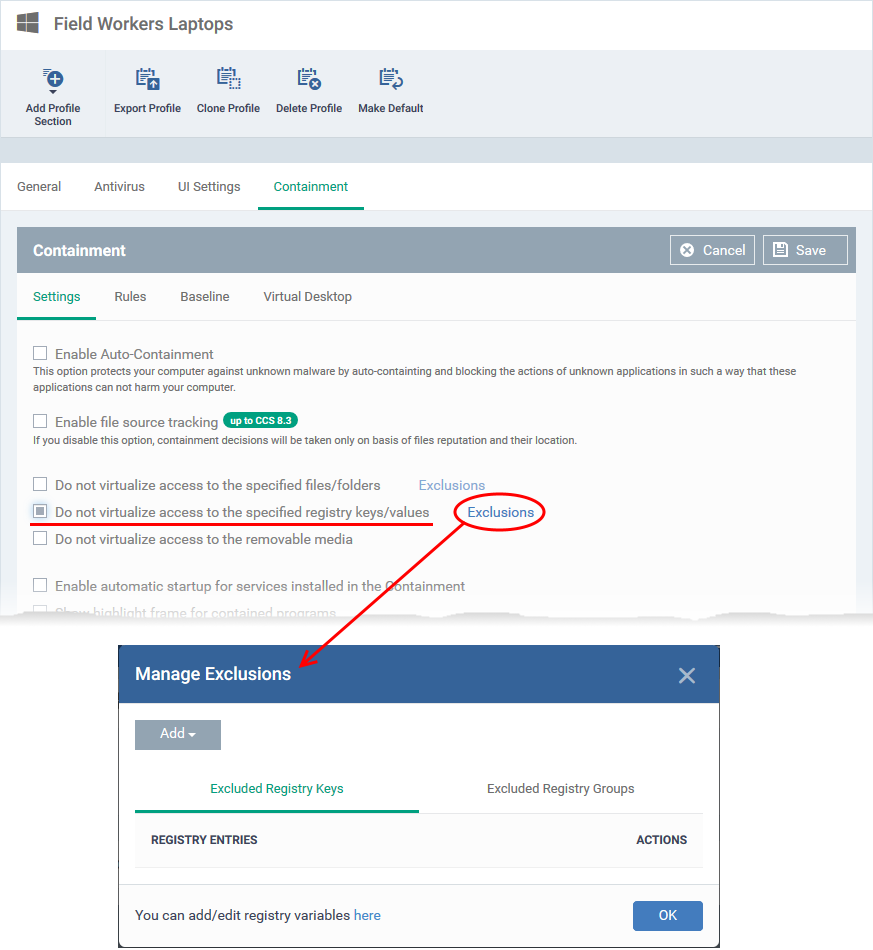
- Click the 'Settings' tab
- Enable 'Do not virtualize access to the specified registry keys/ values', then click 'Exclusions':
- Click 'Add' > 'Registry Groups':

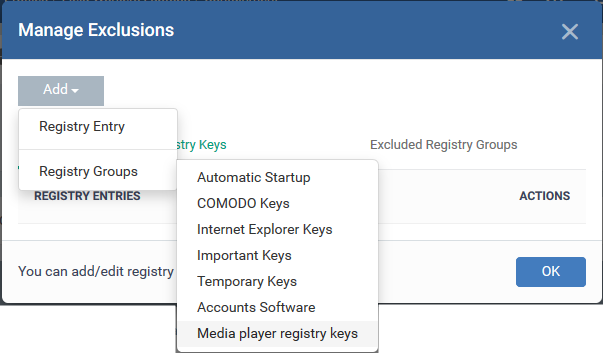
- Choose the group you want to exclude
- Click 'OK' to apply your settings
Example 2: Protect a registry group with HIPS
The 'Protected Objects' module in the HIPS section of a profile lets you protect specific items against modification. By adding your registry group as a protected object, you will prevent malware and other unauthorized processes from making changes to keys in the group.
- Click ‘Configuration Templates’ > ‘Profiles’
- Open the Windows profile applied to your target devices
- Open the 'HIPS' tab
- … or click 'Add Profile Section' > 'HIPS' if you haven’t yet added the section
- … or click 'Add Profile Section' > 'HIPS' if you haven’t yet added the section
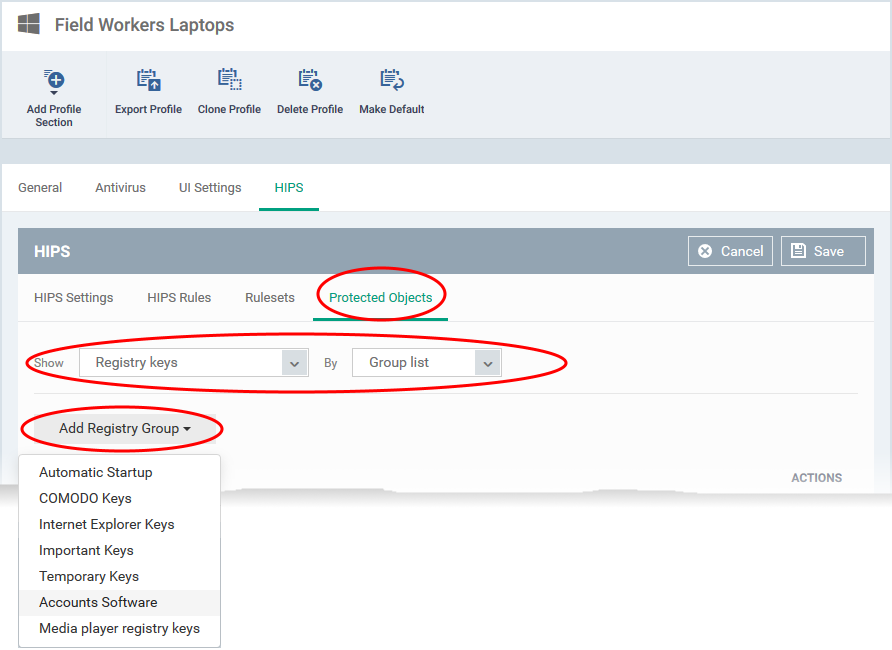
- Click the 'Protected Objects' tab
- Show - 'Registry keys'
- By - 'Group List'
- Show - 'Registry keys'
- Click the 'Add Registry Group' button then select the group you want to protect

- Click 'Save' to apply your changes.


---