North America
How to enroll discovered devices to Endpoint Manager
Views
2806 times
This page assumes you have already run a network discovery task to identify unmanaged devices. Click here if you need to know how to discover devices.
We will perform the following steps to enroll the discovered devices:
- Create an installer (.msi) to install the Communication Client on each device.
- Use Xcitium Auto-Deployment tool to deploy the installer.
1. Create an installation package
- Click 'Devices' > 'Device List' > 'Bulk Installation Package'. Configure the package as required.

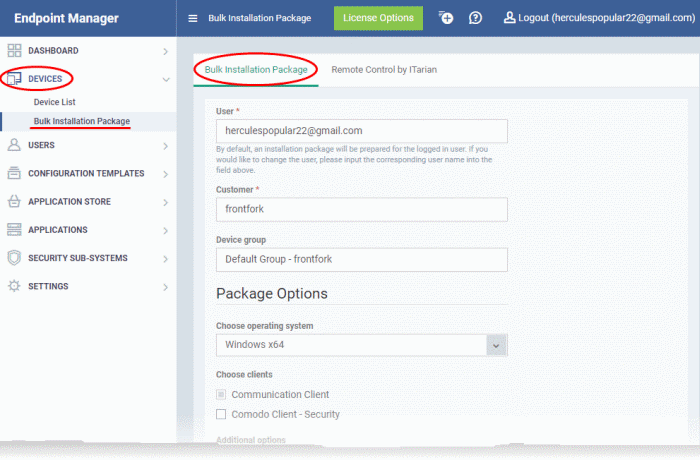
- The ‘user’ field is auto-populated with your username. All devices will, therefore, be enrolled to you. You can assign them to different users later.
- Remember to specify the correct company and the group you just created.
- Choose the correct operating system for you targets. The ‘Hybrid’ package will service both 64-bit and 32-bit Windows systems. Alternatively, you can go through the wizard twice to create separate installers for 32-bit and 64-bit systems.
- You can omit ‘Xcitium Client Security’ at this stage. The communication client is the important item here.
- Click 'Download Installer' and save the .msi to your local machine.
- Do not change the filename of the .msi. It is unique to this deployment.
- Do not change the filename of the .msi. It is unique to this deployment.
- Tip – also download the auto-deployment tool at the pop-up that follows. You will need this next.
2. Use Xcitium Auto-Deployment tool to deploy the installer
- Download ‘Xcitium Auto Discovery and Deployment Tool' (ADDT). You can do this immediately after creating your .msi …

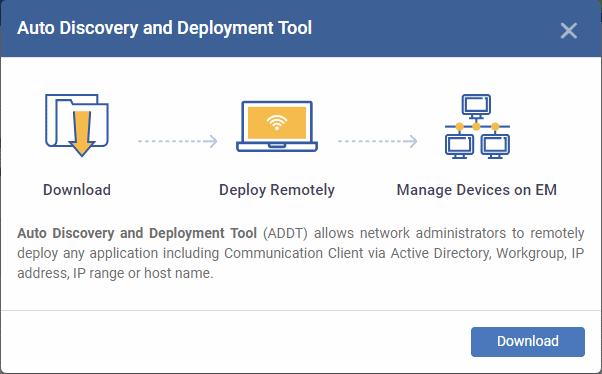
… or download it from the Xcitium : Log into C1 / Xcitium > Click 'Tools' in the top-menu > Click ‘Download’ in the ADDT tile.
- Run ADDT. ADDT is a portable app which does not require installation. It lets you deploy the installer .msi via Active Directory, Workgroup or network address:

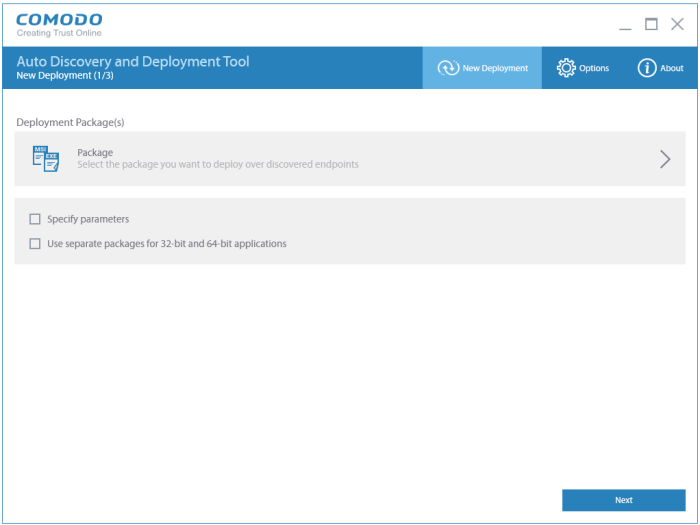
- Click ‘Package’ and select the .msi installer file you just created.
- If you created different installers for 32 bit and 64 bit, then upload each separately.
- If you created a hybrid package, then deselect ‘Use separate packages for…’
- If you created different installers for 32 bit and 64 bit, then upload each separately.
- Click ‘Next’ to move onto the deployment stage
- Select ‘Network Addresses’ as the discovery selection type:

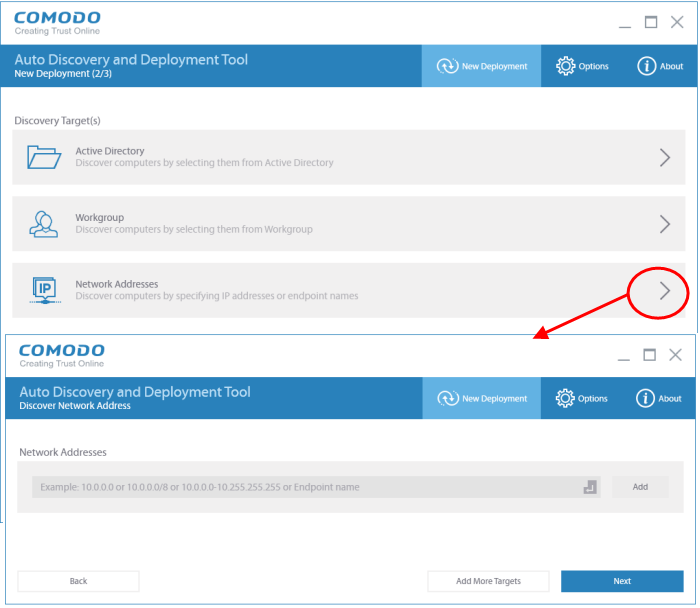
- Enter the same IP range as you used in the discovery task.
- Click 'Start Deployment' to install the .msi on the target devices. This will enroll the devices to Endpoint Manager to the customer/group you created earlier.
- To view the enrolled devices in Endpoint Manager, click 'Devices' > 'Device List' > 'Group Management' > Company/Group
- You can now assign the devices to new users, or move them to other groups, as required.


CONTACT US
Call now!  (973) 859 4000 ext 3025
---