How to filter notifications in Endpoint Manager portal
This feature allows admin to filter the notifications generated in Endpoint Manager as per their need. Please refer below steps to use it effectively.
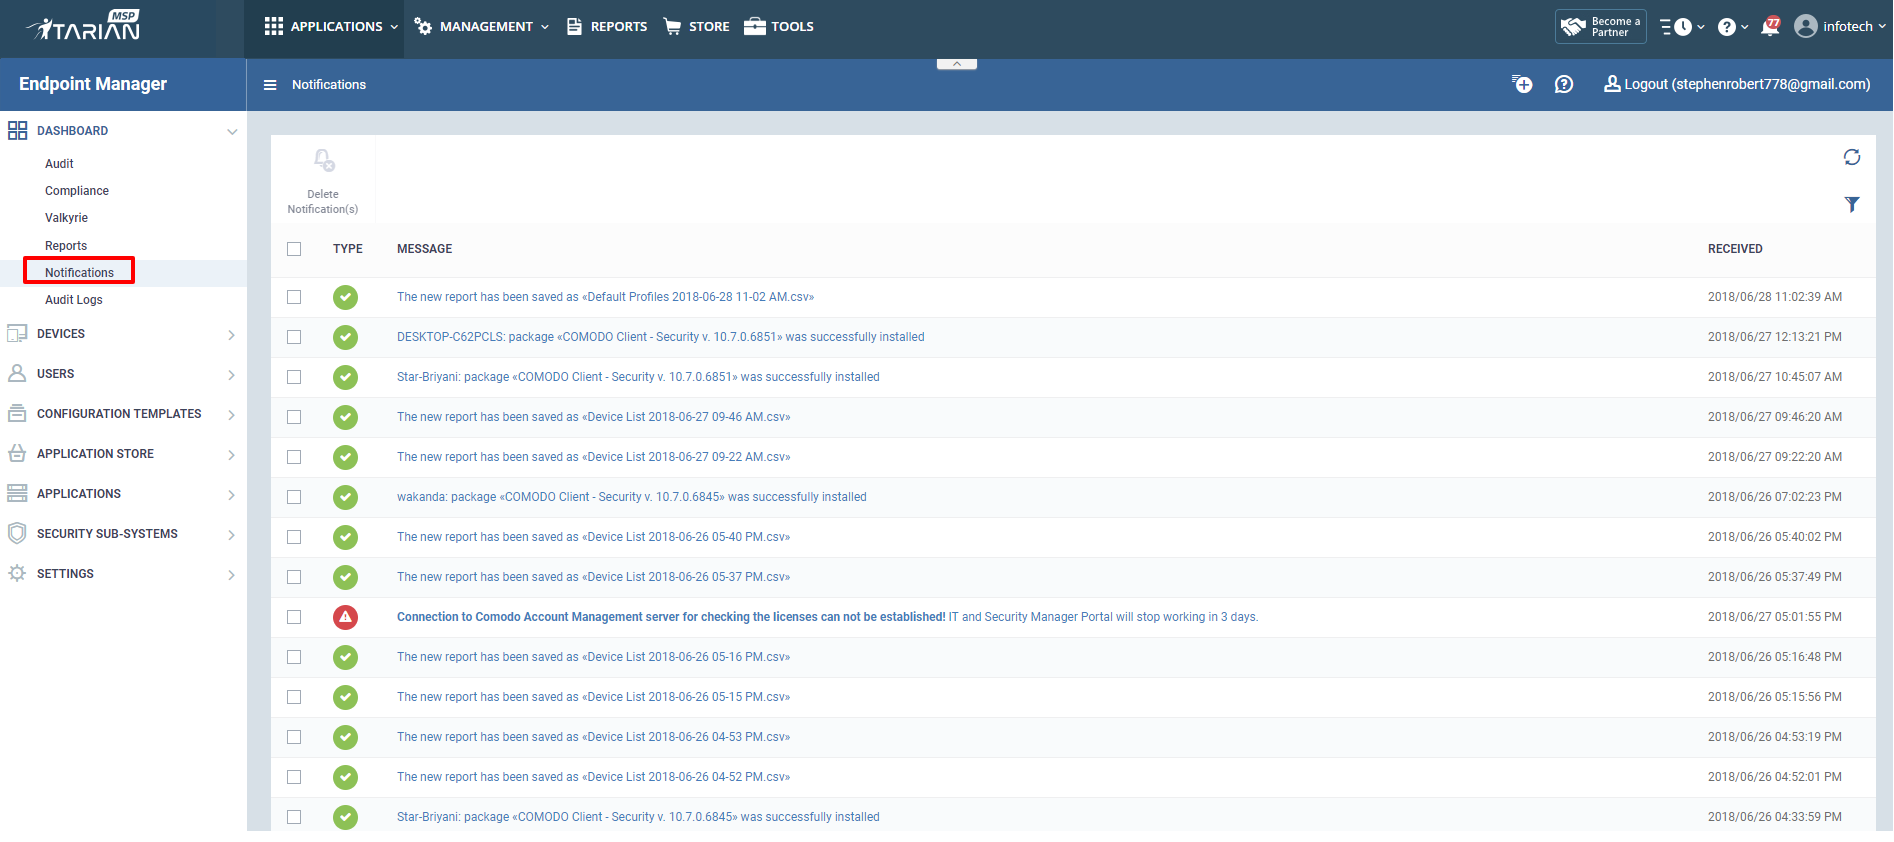
Step 1: Go to Endpoint Manager→DASHBOARD → Notifications to see all the notifications generated in Endpoint Manager.
Step 2: Click "Table filter" as shown below. The notifications can be filtered using their Type or Message or Received Date.


Step 3: Filtering options
a) Types - There are five types available in the filtering options. They are explained as below
i)Success - This type will list all the successful activities of Endpoint Manager and it is notified by a green tick mark.
ii)Warning - If any warning event occurs in Endpoint Manager, in notification bar it is notified by a yellow color mark.
iii) Error - If an error is received, it is notified by a red alert mark.
iv) Blocker - When a blocker is found out by the Endpoint Manager, it is notified by the yellow color in the notifications.
v)Support - If any support is provided from Endpoint Manager, it is notified by the yellow color mark.
b) Message
Type the Message to filter the appropriate notifications as shown below.
c) Received
Type the Start date and End date to filter notifications from a particular period of their Received time.
For Example, A sample filter is given below.

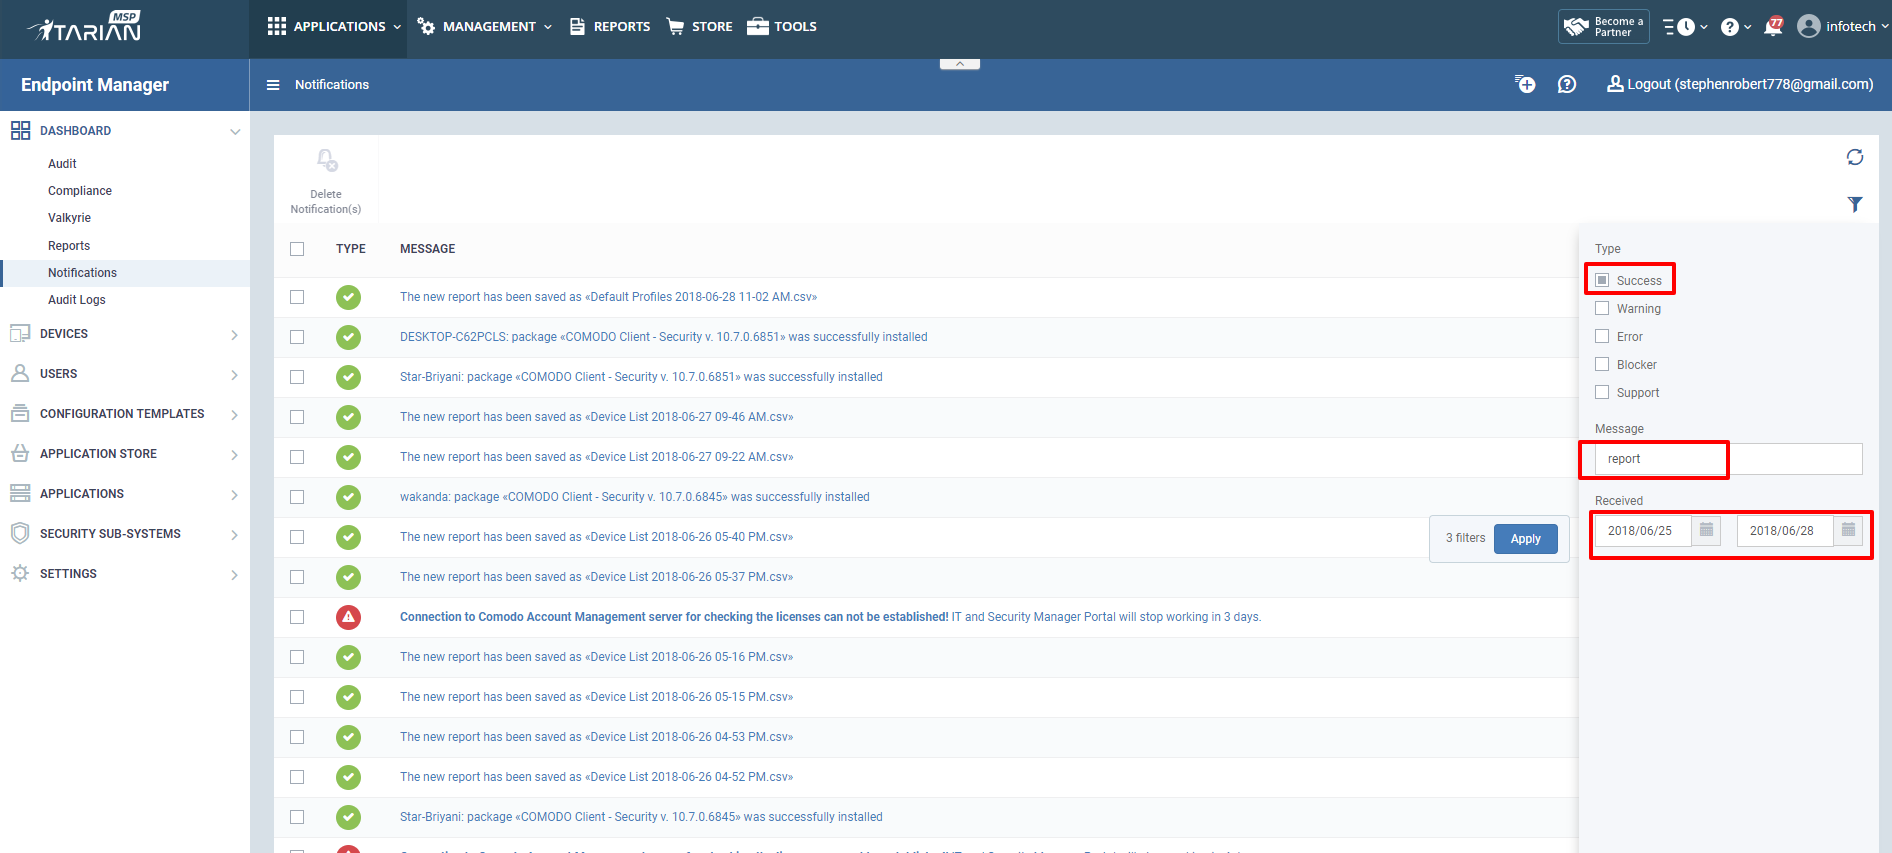
After applying a filter, it will list the filtered notifications.


---