How to locally configure antivirus in CCS for Mac
-
Xcitium Client Security (CCS) is the antivirus software for Mac devices which are managed by Endpoint Manager (EM).
-
In most cases, admins should configure CCS settings in an EM profile which is applied to their Mac devices.
-
See https://wiki.xcitium com/frontend/web/topic/how-to-configure-antivirus-settings-in-a-mac-os-profile if you need help with this.
-
-
However, antivirus settings can also be configured on a local endpoint if required. This article explains how to configure CCS scanner settings on a local machine.
-
Note. Do not apply a profile with an ‘Antivirus’ section to the device if you want to configure the AV locally. Endpoint manager will constantly overwrite the local settings with the profile settings if you do.
-
This includes the default ‘mac OS – Security Level 1 Profile’. You must apply a different profile which does not have an AV section.
-
Configure the antivirus locally
-
Login to the endpoint and open CCS. You can open CCS by clicking the dock icon:
-
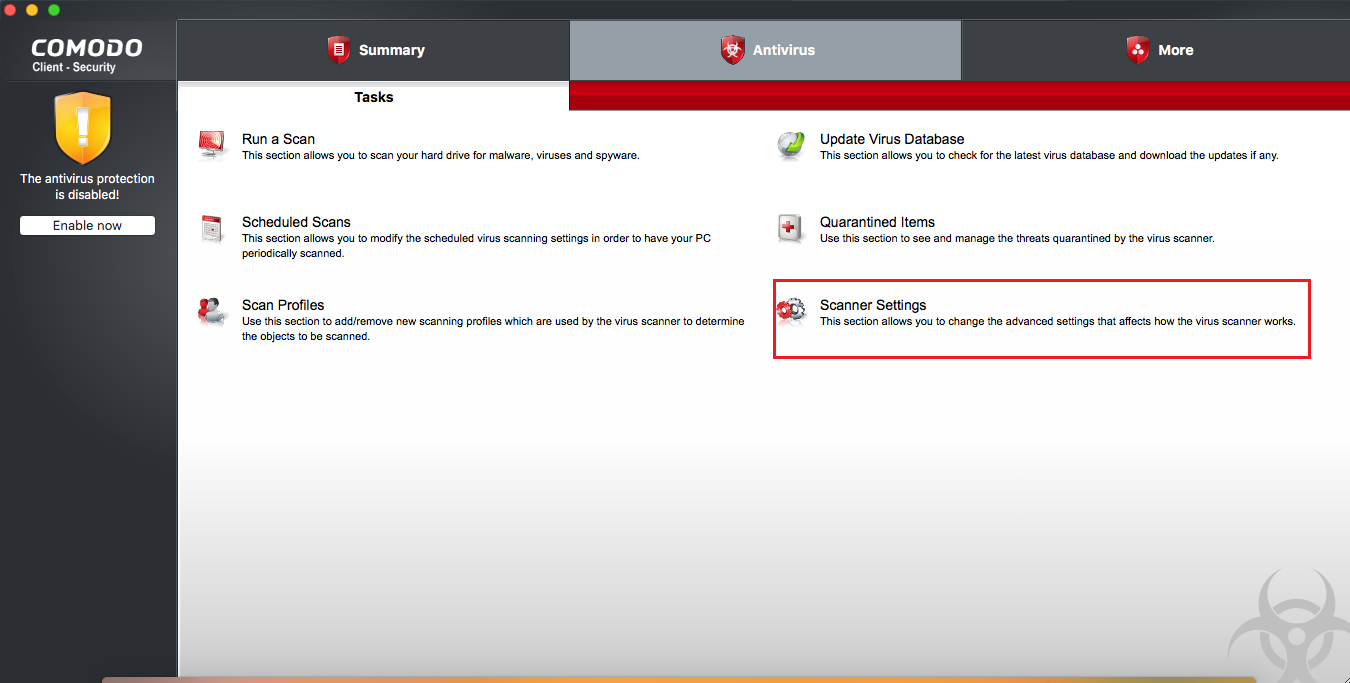
Click the ‘Antivirus’ tab then ‘Scanner Settings’:
The scanner settings area lets you configure real-time scans, manual scans, scheduled scans, and exclusions.
-
The settings you implement will apply to all future scans of that type
-
Items added to 'Exclusions' are excluded from all types of scan
The scanner settings area has four sections:
-
Real Time Scan - Set preferences for the 'always-on' virus monitor
-
Manual Scan - Set preferences for on-demand (manual) scans
-
Scheduled Scan - Set preferences for automated scans scheduled to run periodically
-
Exclusions - Specify files/folders which should be skipped by all scan types
-
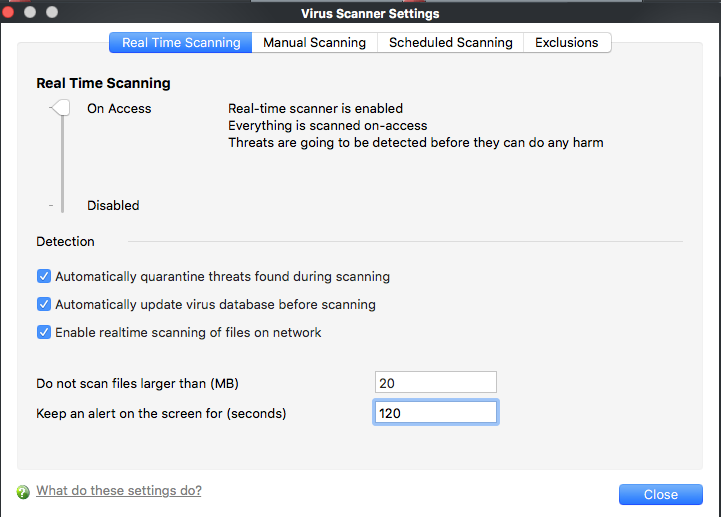
The real-time scanner is the 'always on' virus monitor which runs in the background.
-
We highly recommended you keep the real-time scanner active at all times.
-
This settings area lets you enable or disable the scanner, and configure scan options.
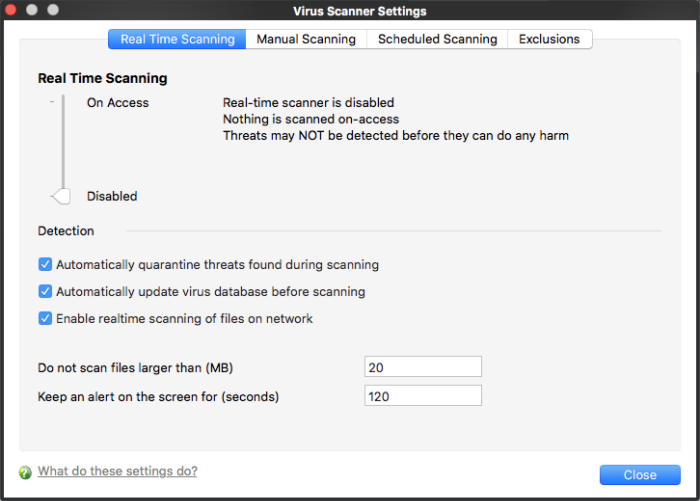
Use the slider to enable or disable the real-time virus monitor:
-
On Access - Real-time protection is enabled. The scanner constantly monitors background processes for threats and checks files whenever they are created, opened or copied. Threats are detected before they get a chance to execute.
-
Disabled - Real-time protection is switched off. Files are allowed to run without being checked for threats.
Detection settings:
-
Automatically quarantine threats found during scanning
-
Enabled - All discovered threats are moved to a secure holding area called ‘quarantine’. Quarantined files cannot be executed so present no threat to the endpoint. You can review quarantined files and restore or delete them as required.
-
Disabled – Detected threats are not quarantined. Instead, an alert is shown with details about the threat. End users can block or ignore the threat at the alert.
-
-
Automatically update virus database before scanning - CCS will check for and download the latest virus database prior to running a scan
-
Enable real-time scanning of files on network - Activate or deactivate automatic scans of files on network drives.
-
Enabled - CCS scans every file you interact with on a network drive, even if you do not copy it to your local machine.
-
Disabled - Network files are not scanned when you interact with them. This can save time by eliminating needless scans on write-protected files. If an endpoint doesn’t have the rights to delete/quarantine network files anyway, then there is little reason to scan them at this point. The file will still get scanned if it is copied to the local machine.
-
-
Do not scan files larger than - The maximum file size that the antivirus should attempt to scan. CCS will not scan files larger than the size specified here. (Default = 20 MB)
-
Keep an alert on the screen for - How long threat notifications should stay on-screen if not dismissed by the end-user. (Default = 120 seconds)
-
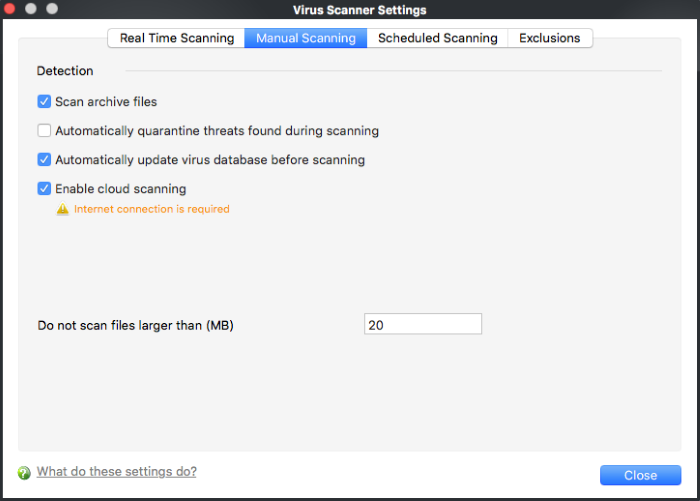
A manual scan is one that you run on-demand on an item of your choice. Example items you can scan include files, folders, drives, and external devices.
-
The settings in this area apply to all manual scans that you run.
-
For example, these settings are used when you:
-
Click ‘Scan Now’ on the home screen then run a full, quick or custom scan
-
Drag an item into the scan-box on the home screen
-
Right-click on a file and select ‘Scan with Xcitium Client Security’
-
-
Scan archive files - The scan will check compressed files such as.ZIP, RAR and .7z files.
-
Automatically quarantine threats found during scanning - See the description in the ‘real-time’ section
-
Automatically update virus database before scanning - See the description in the ‘real-time’ section
-
Enable cloud scanning – During a scan, CCS will also consult our online virus database to check whether a file is a malware. The online database is the latest and most accurate. This option makes it possible to detect brand-new malware, even if the local virus db is outdated.
-
Do not scan files larger than - See the description in the ‘real-time’ section
-
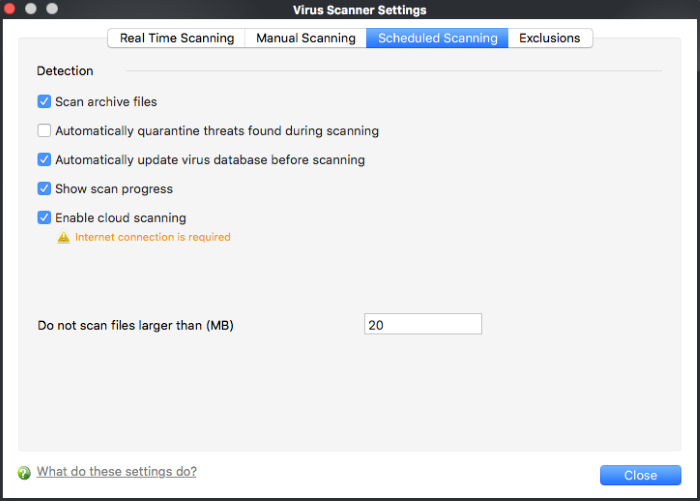
A scheduled scan is one that runs at a specific date and time. You can create recurring scans which run at daily, weekly, monthly, or custom intervals.
-
Note. This area only determines general settings which apply to scheduled scans. You configure the schedule itself elsewhere in the CCS interface:
-
Create a scheduled scan - Open CCS > Click ‘Antivirus’ > ‘Scheduled Scans’
-
Choose the items to scan - Open CCS > Click ‘Antivirus’ > ‘Scan Profiles’ > ‘Add…’
-
-
The settings you choose here apply to every scheduled scan you create.
The preferences for scheduled scans are similar to manual scans as explained above, except :
- Show scanning progress - End-users will see a scan progress bar when the scan is running.
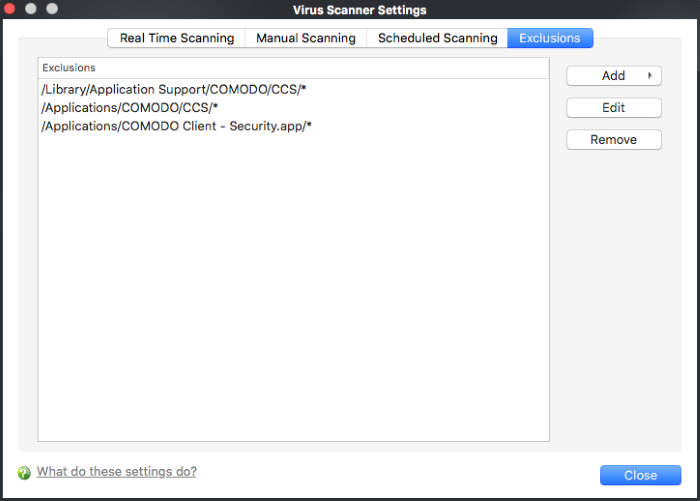
- The 'Exclusions' tab lets you specify files and folders that should be ignored by the antivirus scanner.
- The main reason to exclude an item is because you think it is a ‘false-positive’ – a file that the antivirus detects as malicious, but you think is trustworthy.
- You can create new exceptions by clicking the ‘Add’ button on this screen. You can also create them at a virus alert, or in the results at the end of a scan.
- Any item you exclude will be skipped by ALL types of scan - real-time, on-demand and scheduled
Add an item to be excluded
- Click 'Add'.
There are two methods available to choose the application that you want to trust: 'Browse Files...' and 'Browse Running Processes':
- Browse Files... - This option is the easiest for most users and simply allows you to browse the files which you want to exclude from a virus scan.
- Browse Running Processes - As the name suggests, this option allows you to choose the target application from a list of processes that are currently running on your computer.
When you have chosen the application using one of the methods above, the application name appears along with its location.
- Select an item and click ''Edit' to change the path of an excluded application.
- Select an item and click 'Remove' to delete the item from the exclusions. The item will be scanned in the future by all types of scan.
- Click 'Close' for your settings to take effect


