North America
How to modify your company profile and customize your support portal
Views
4284 times
Category
Service Desk
Tags
Click 'Admin Panel' > 'Settings' > 'Company'.
- The company profile area contains details about your organization and lets you customize your support portal
- Your support portal is the website where your users can submit tickets, track tickets or read your support content. The URL of your portal is https://<your company name>.servicedesk.comodo.com
- You can brand the support portal with your own logos and web page content.
Use the links below to jump to the task you need help with:
- Login to Comodo One / Dragon
- Click 'Applications' > 'Service Desk'
- Open the admin panel (see the last link on the left)
- Click 'Settings' > 'Company'
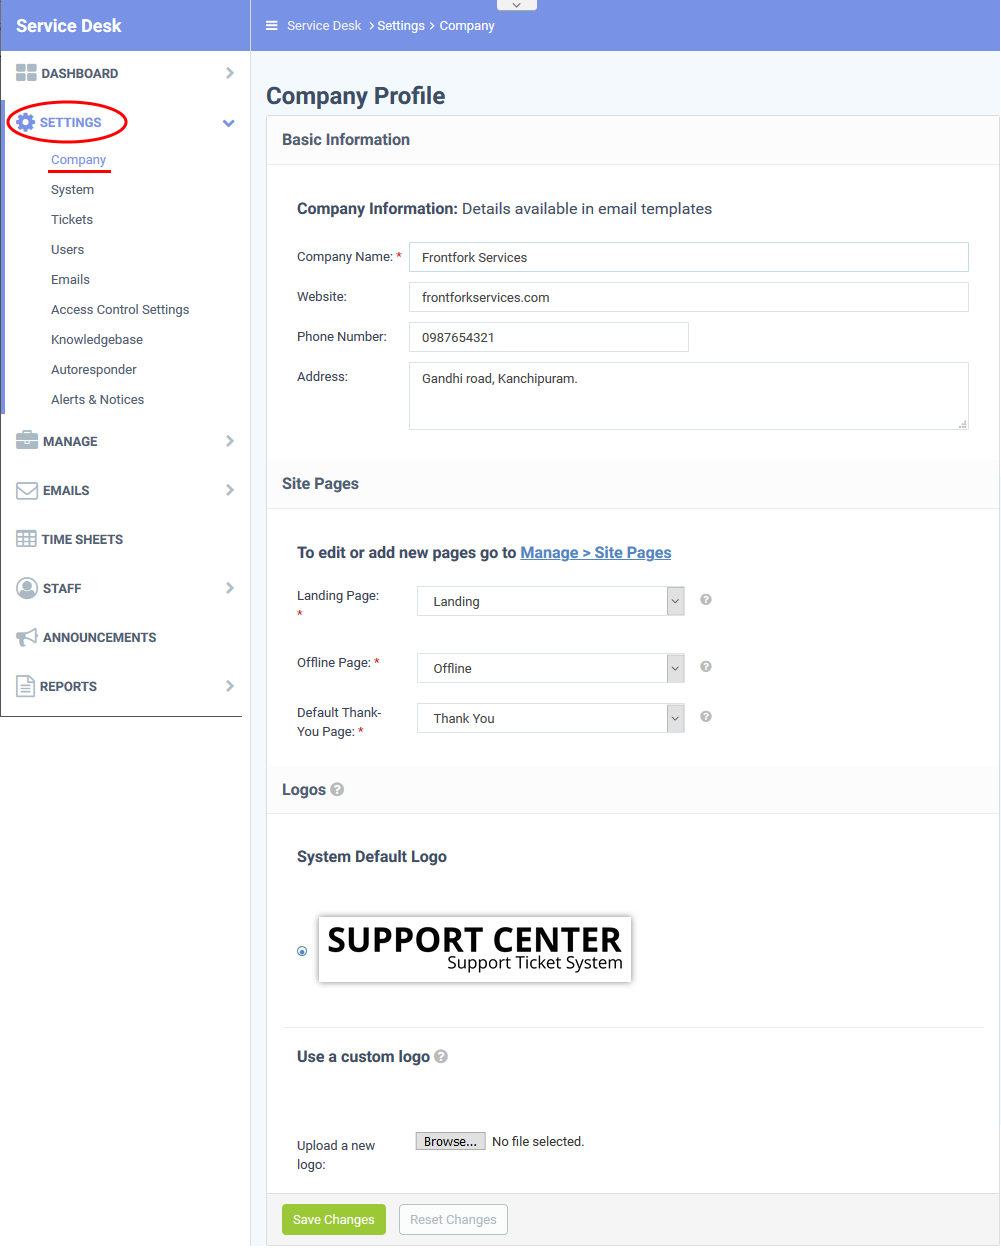
- Company Name: The name of your organization
- Website: The URL of your corporate/marketing website
- Phone Number: Your company's contact number
- Address: The physical/postal address of your company
- Company Email: Provide the company's contact email address.
- This area lets you customize the pages on your support portal. This portal is where users can submit tickets to you or your support team.
- Service Desk ships with a default landing, offline, and thank-you pages.
- You can customize these pages at 'Admin Panel' > 'Manage' > 'Pages'.
- See Manage site pages if you need help with this.
Choose site pages
- Select the pages you want to use on your portal from the drop-down menus:

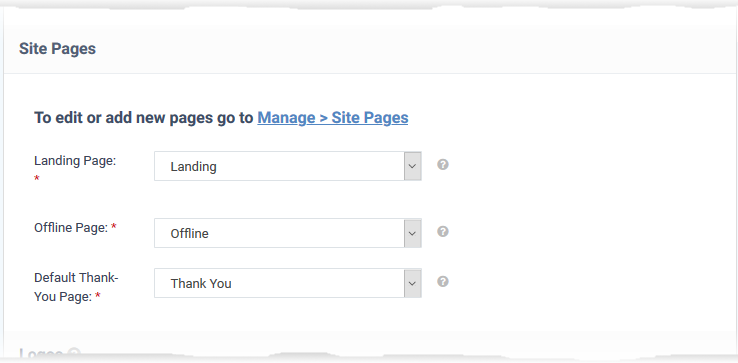
- Landing Page: The ‘home page’ of your site.
- Offline Page: The page shown when the support site is not available.
- Click 'Admin Panel' > 'Settings' > 'System' to switch your support portal online or offline.
- See this wiki to read more about system settings.
- Click 'Admin Panel' > 'Settings' > 'System' to switch your support portal online or offline.
- Default Thank-You Page: The page that is shown after a user submits a ticket.
- The logo is the banner shown at the top-left of your support portal:

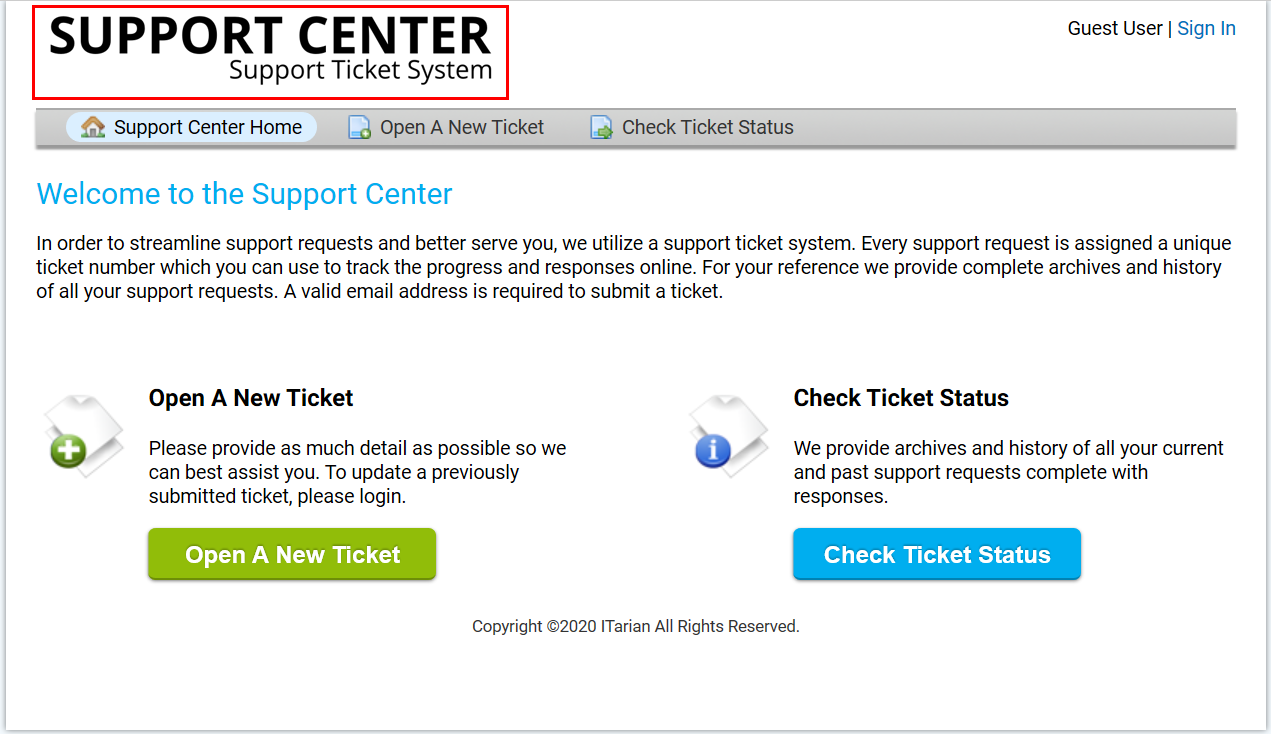
- You can use the system default logo or upload your own company logo.
- Logo requirements:
- Format - gif, jpg or png.
- Dimensions - 817 px X 170 px.
- Format - gif, jpg or png.
- Click the browse button, select your image then click ‘Open’.
Click 'Save Changes'.
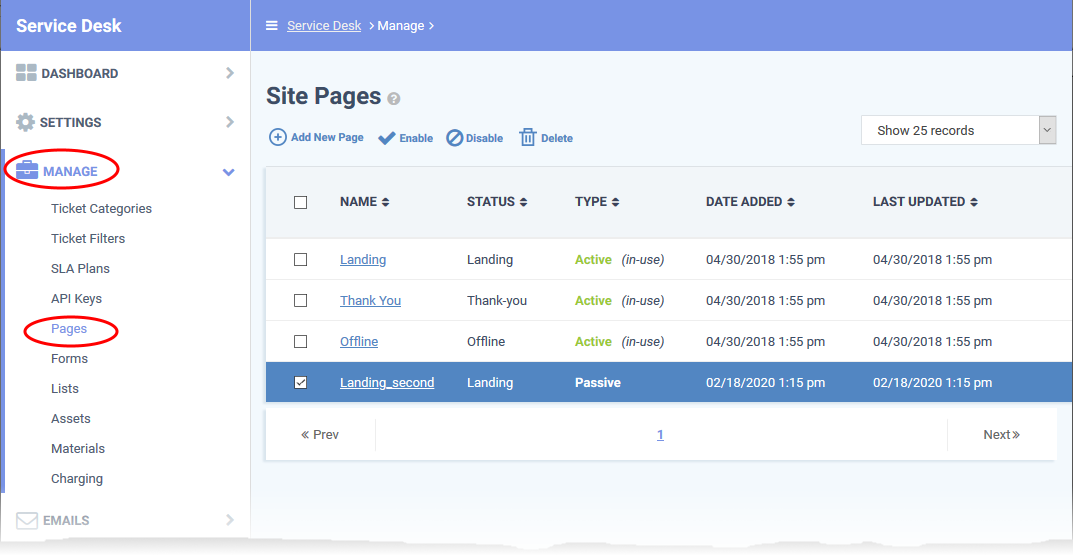
Click 'Admin Panel' > 'Manage' > 'Pages'
- Your support portal was automatically created when you created your Comodo One / Dragon account. The URL of your portal is: https://<your company name>.servicedesk.comodo.com
- The site pages area lets you view and manage the content of your support center pages. There are four types of pages:
- Landing Page: Home page of your customer support centre.
- Offline Page: Displayed when the service centre is not available.
- Thank You Page: The page that is displayed after a user submits a ticket.
- Other: Pages that can be used for general content.
- Landing Page: Home page of your customer support centre.
- Service Desk ships with one page of default content for each of the 'Landing', 'Offline and 'Thank you' pages. You can edit these pages and create multiple versions of each type if required. However, only one page of each type can be live at any time.
Manage pages
- Open the admin panel (see the last link on the left)
- Click 'Manage' > 'Pages'

- Click 'Add New Page'

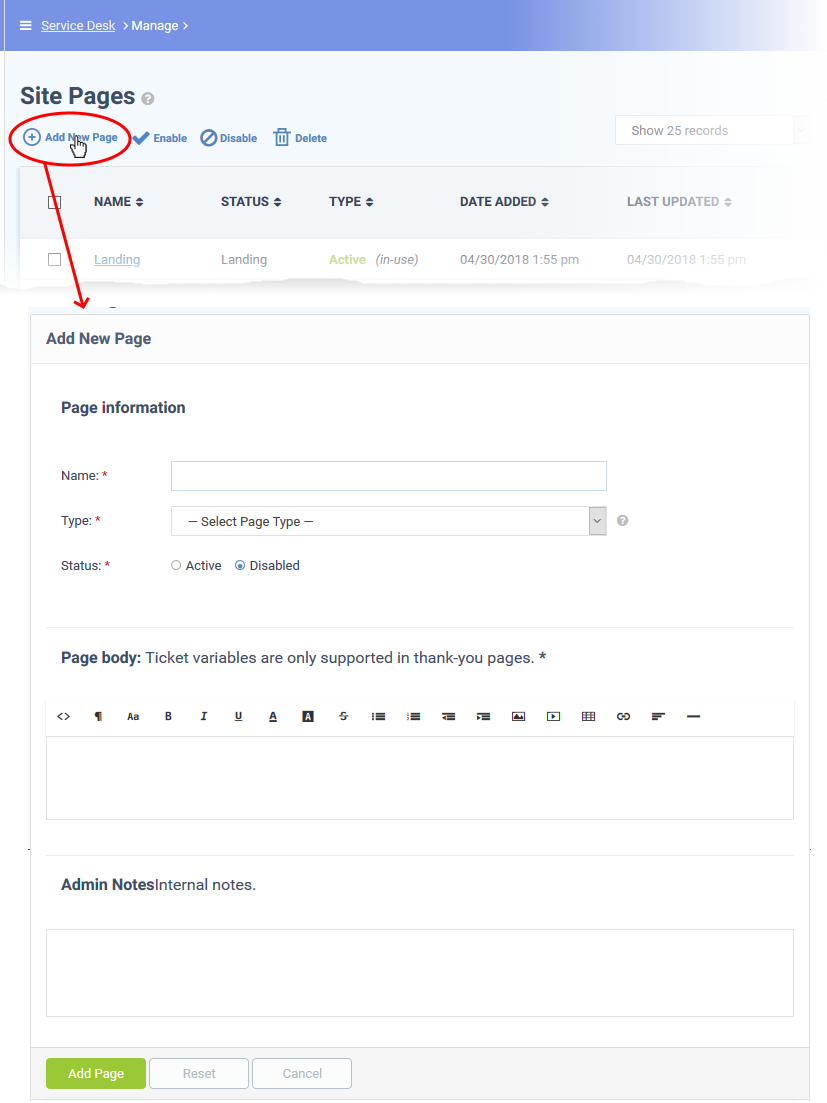
Page Information
- Name: Enter the unique label for the page
- Type: Select landing page, offline page or thank-you page
- Status: Choose whether to activate or deactivate the page
Page Body
- Paste the content for page in the rich text editor. Please note that ticket variables are only supported in the 'Thank-you' pages.
Admin Notes
- Add any comments related to the page for internal reference.
Click the 'Add Page' button to save the page.
- Click the site page on the list.

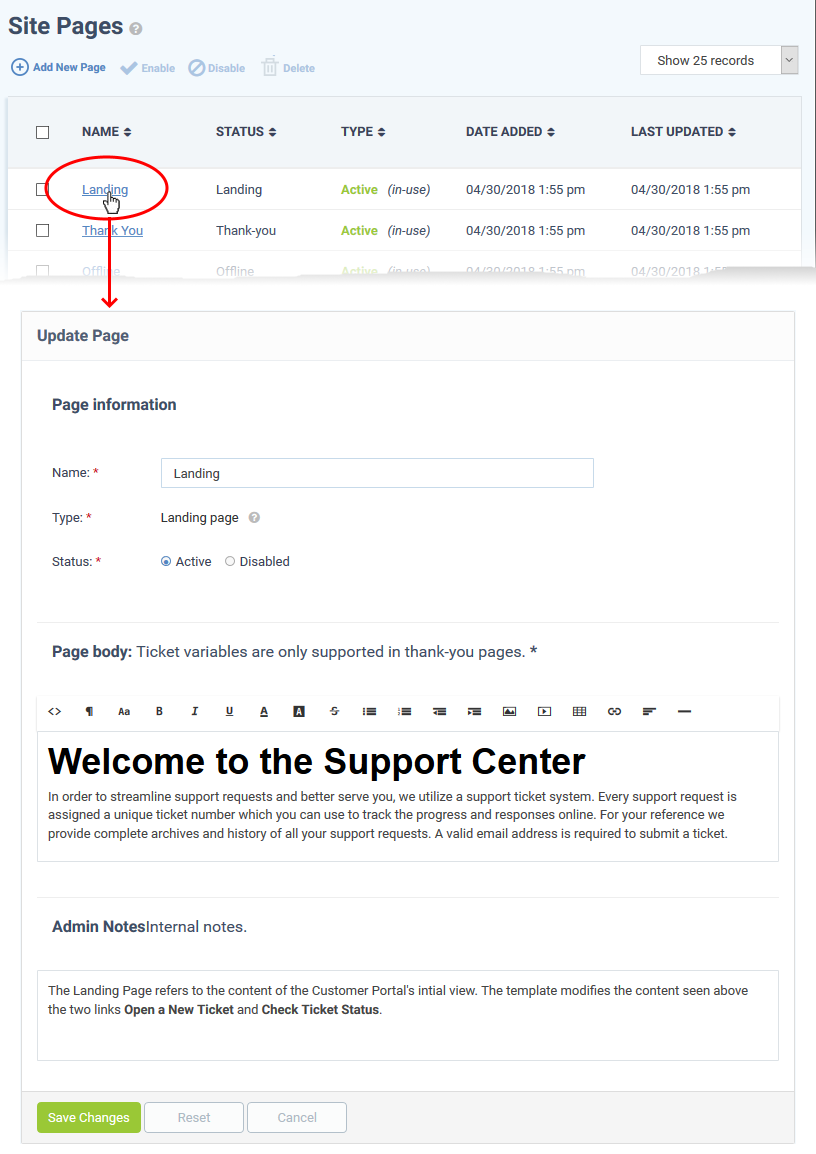
- The update procedure is similar to adding a new page. See above for more details.
- Click 'Save Changes' for your modifications to take effect.


CONTACT US
Call now!  (973) 859 4000 ext 3025
---