How to rebrand Comodo Client Security
Comodo Client Security white labeled versions are available. Now you can rebrand our agents with your own company and product names. This will help you to have a superior hand in your market.
Step 1:
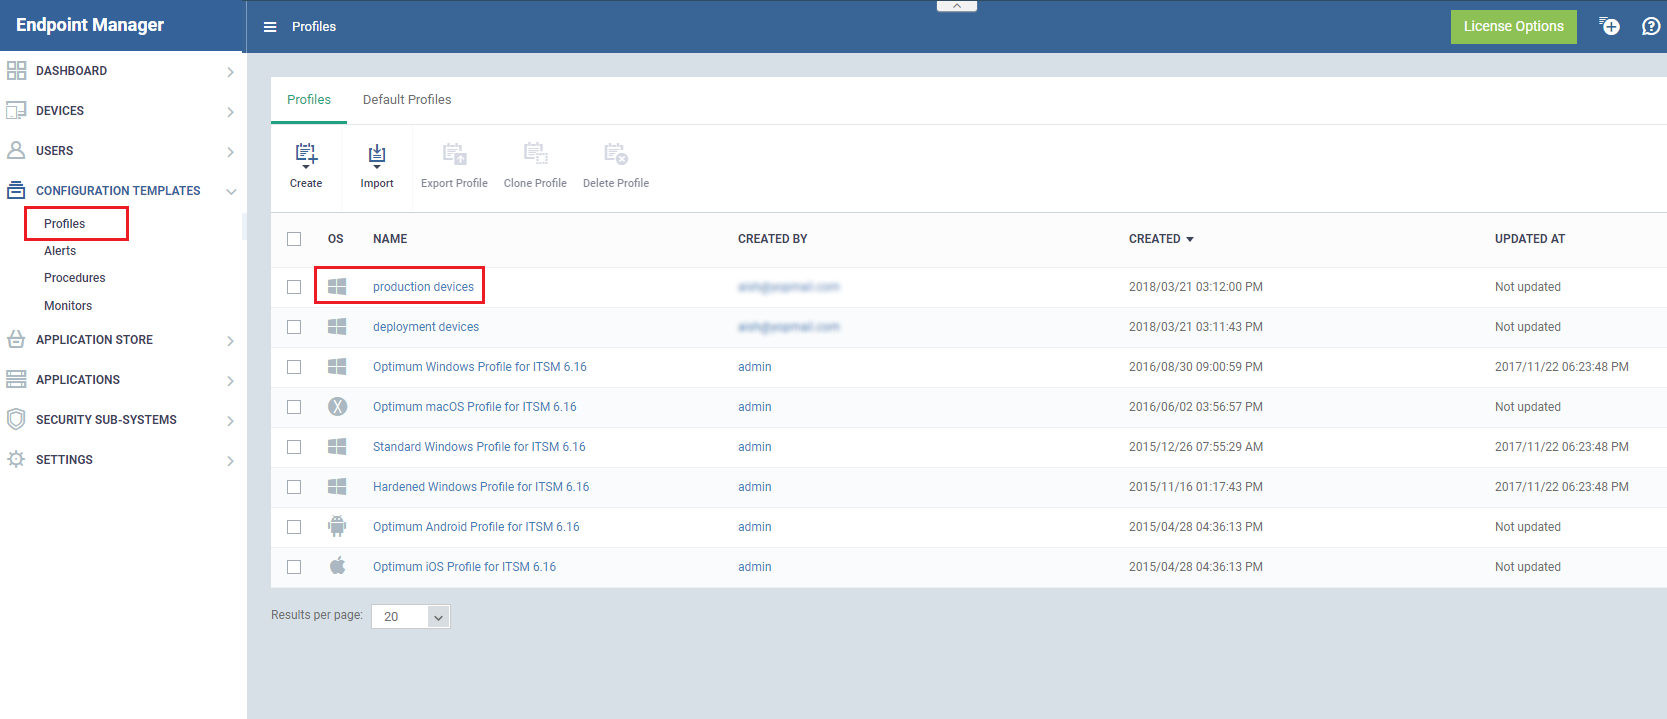
- In Endpoint Manager go to "Configuration Templates" → "Profiles"
- Please select profile associated with device or group which requires rebranding the Comodo Client Security.
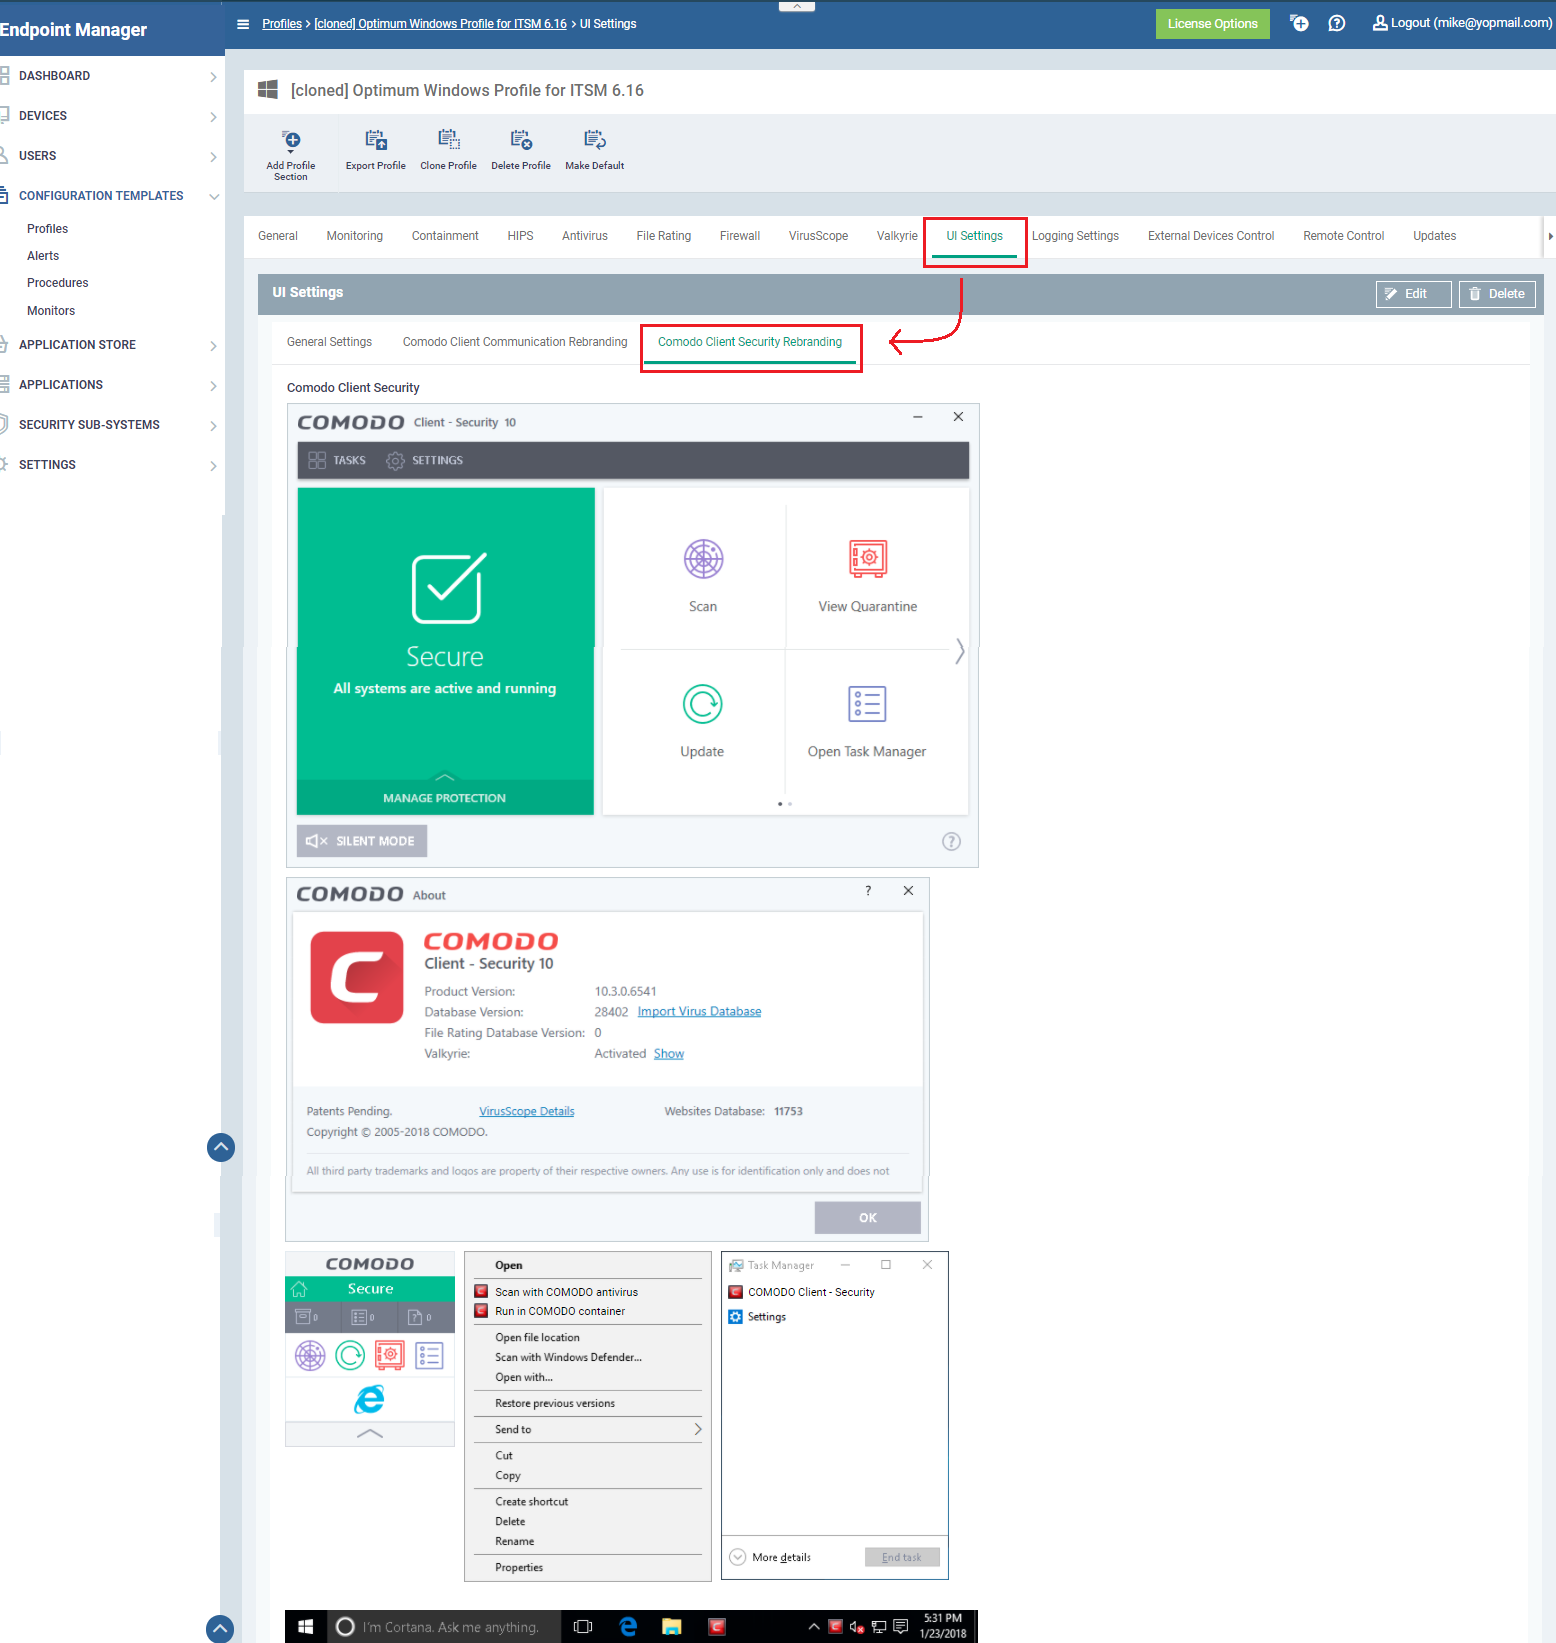
Now you will be directed to the cloned profile that you created. Click on the "UI setting"
Step 2: Now you can see the Comodo Client Security Rebranding option available on the Horizontal bar that is been located below.
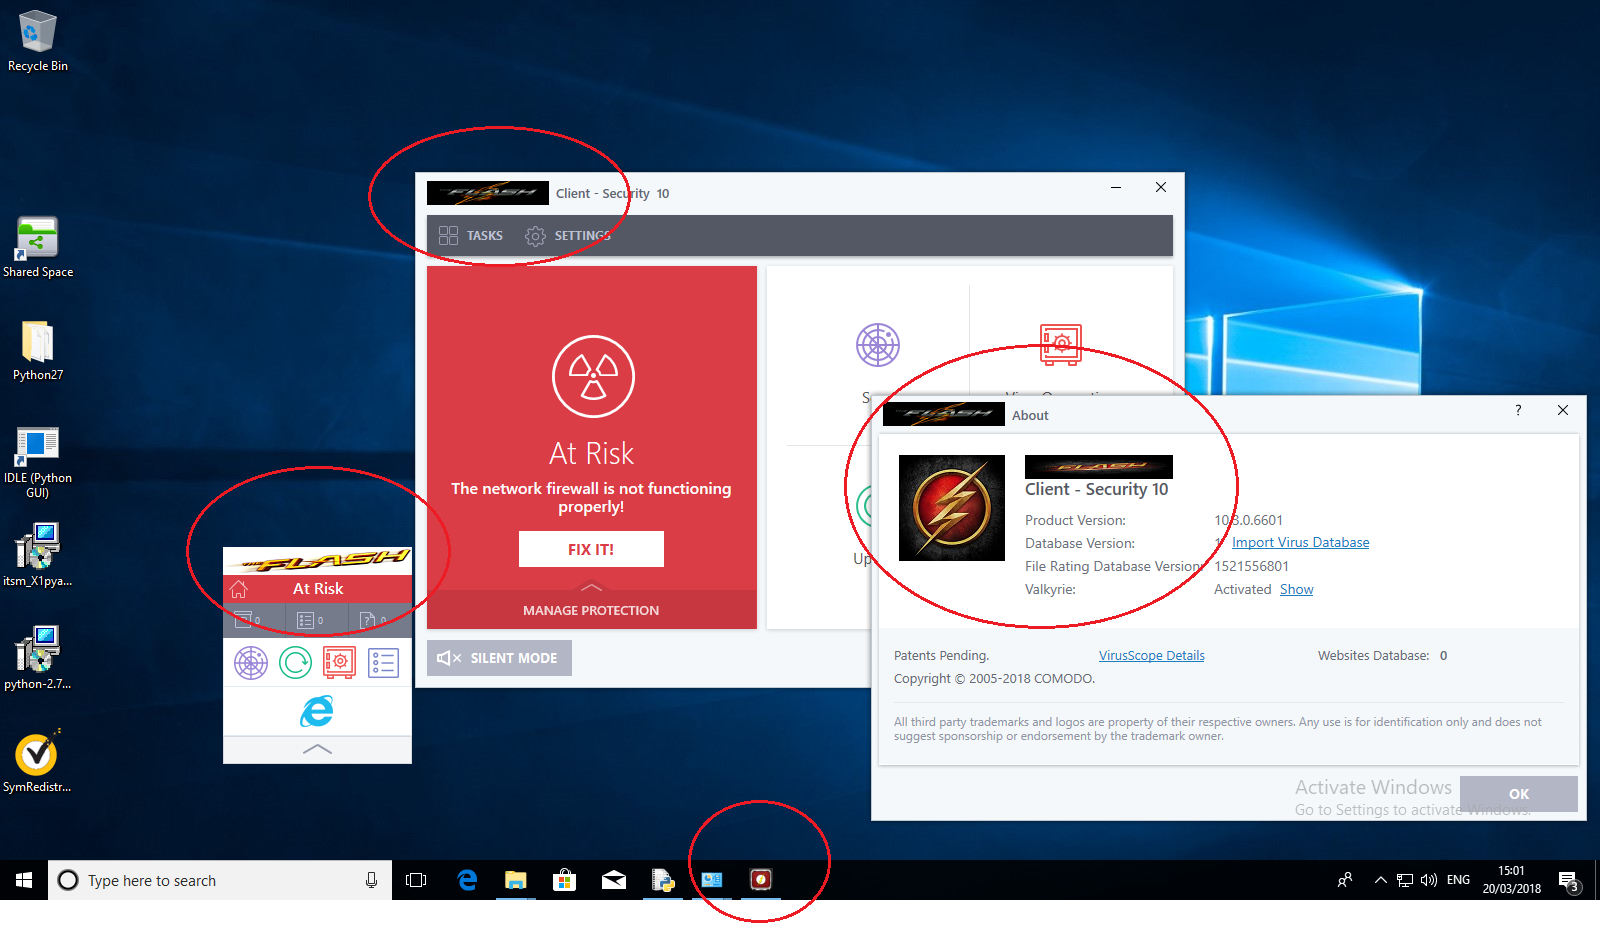
Here you can see the original comodo client security UI settings before any changes were made to it.
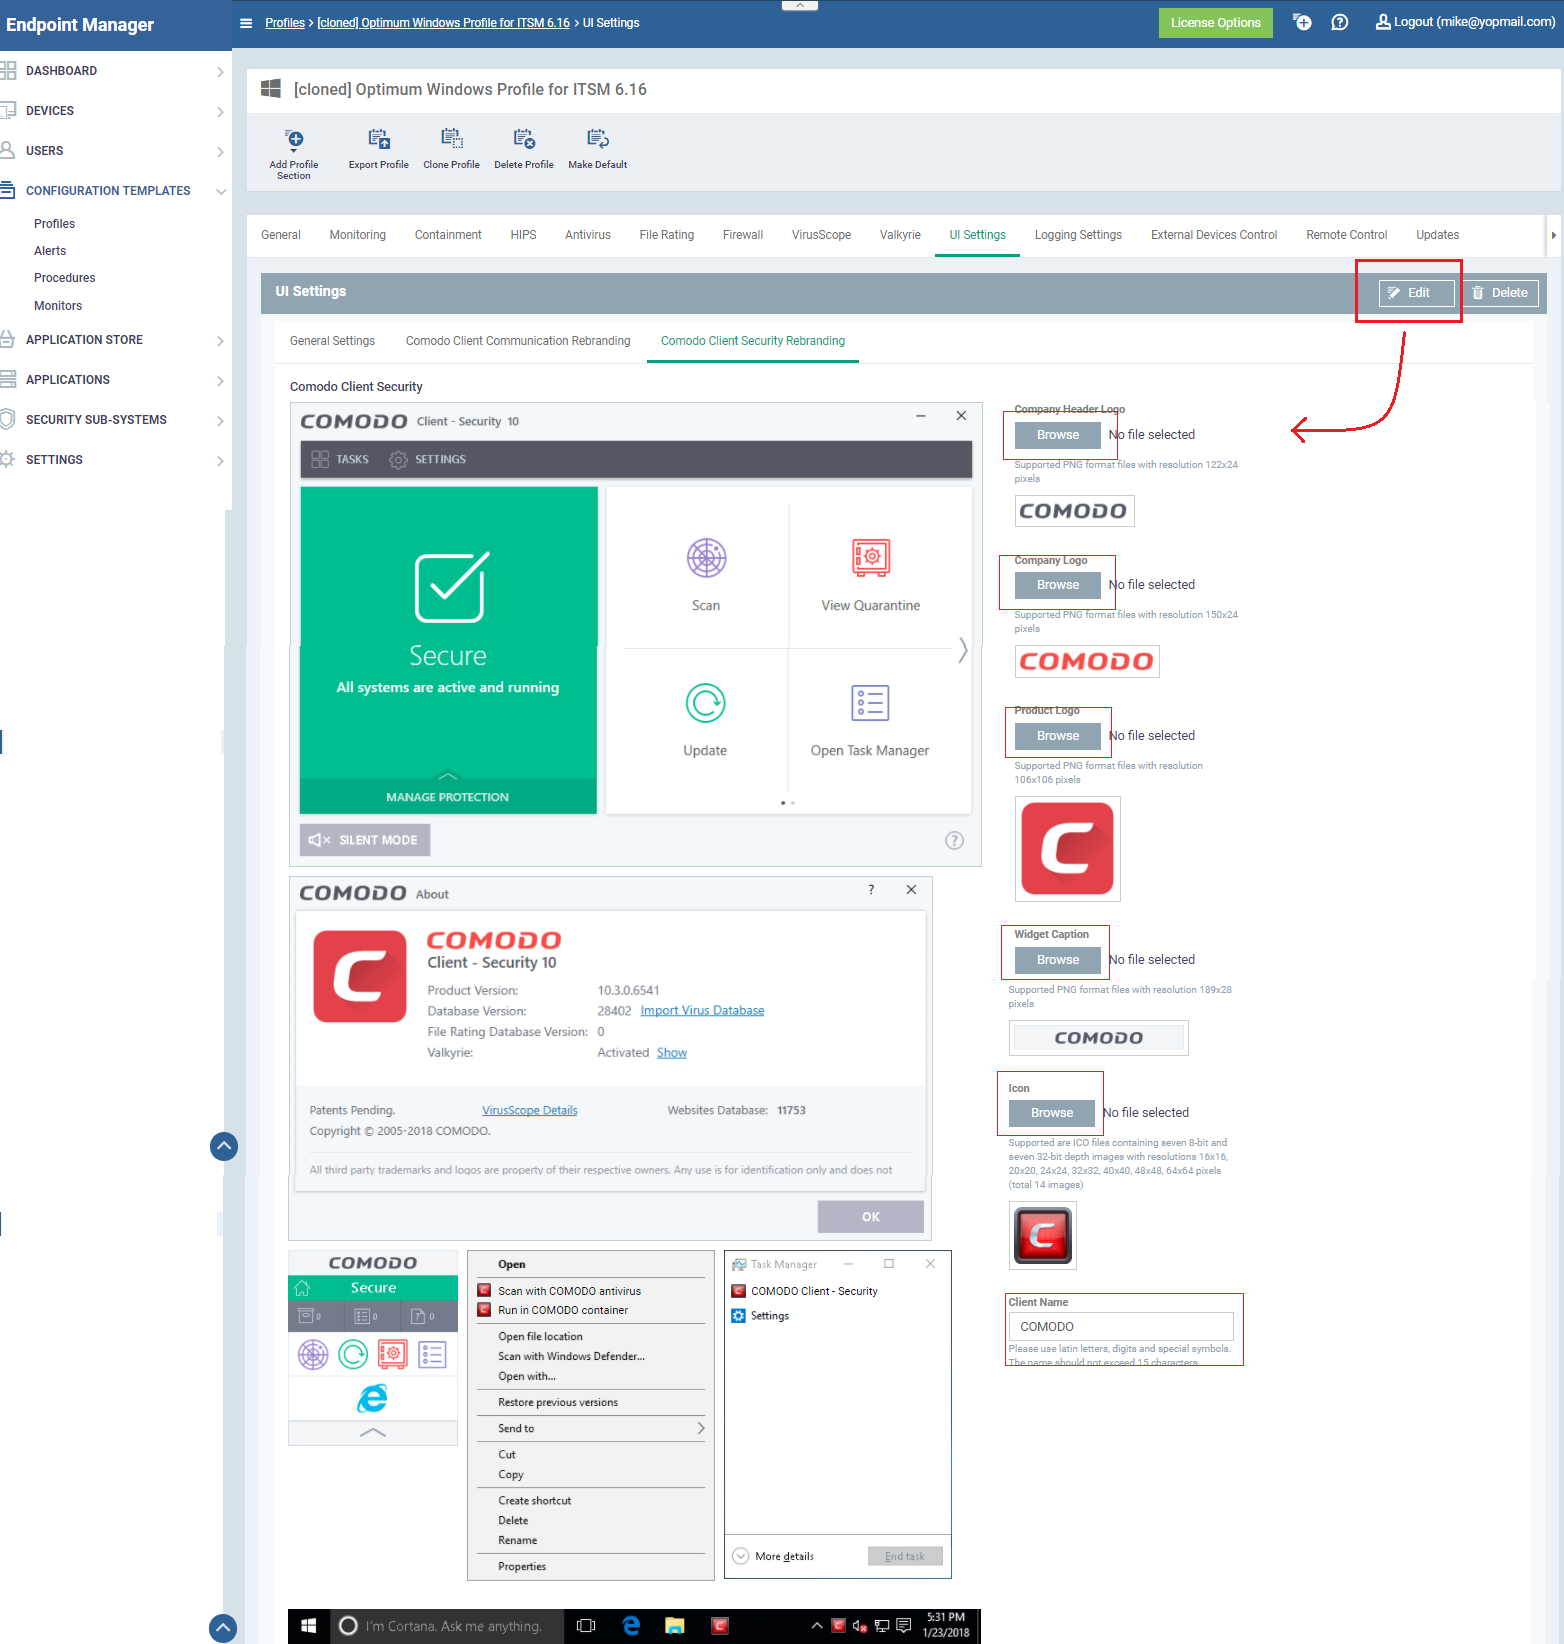
On the right side, you can see the "Edit" option.
Step 3: Click on "Edit", When you click on the Edit option you will be able to see a list of names and artworks you can rebrand on the Comodo Client Security.
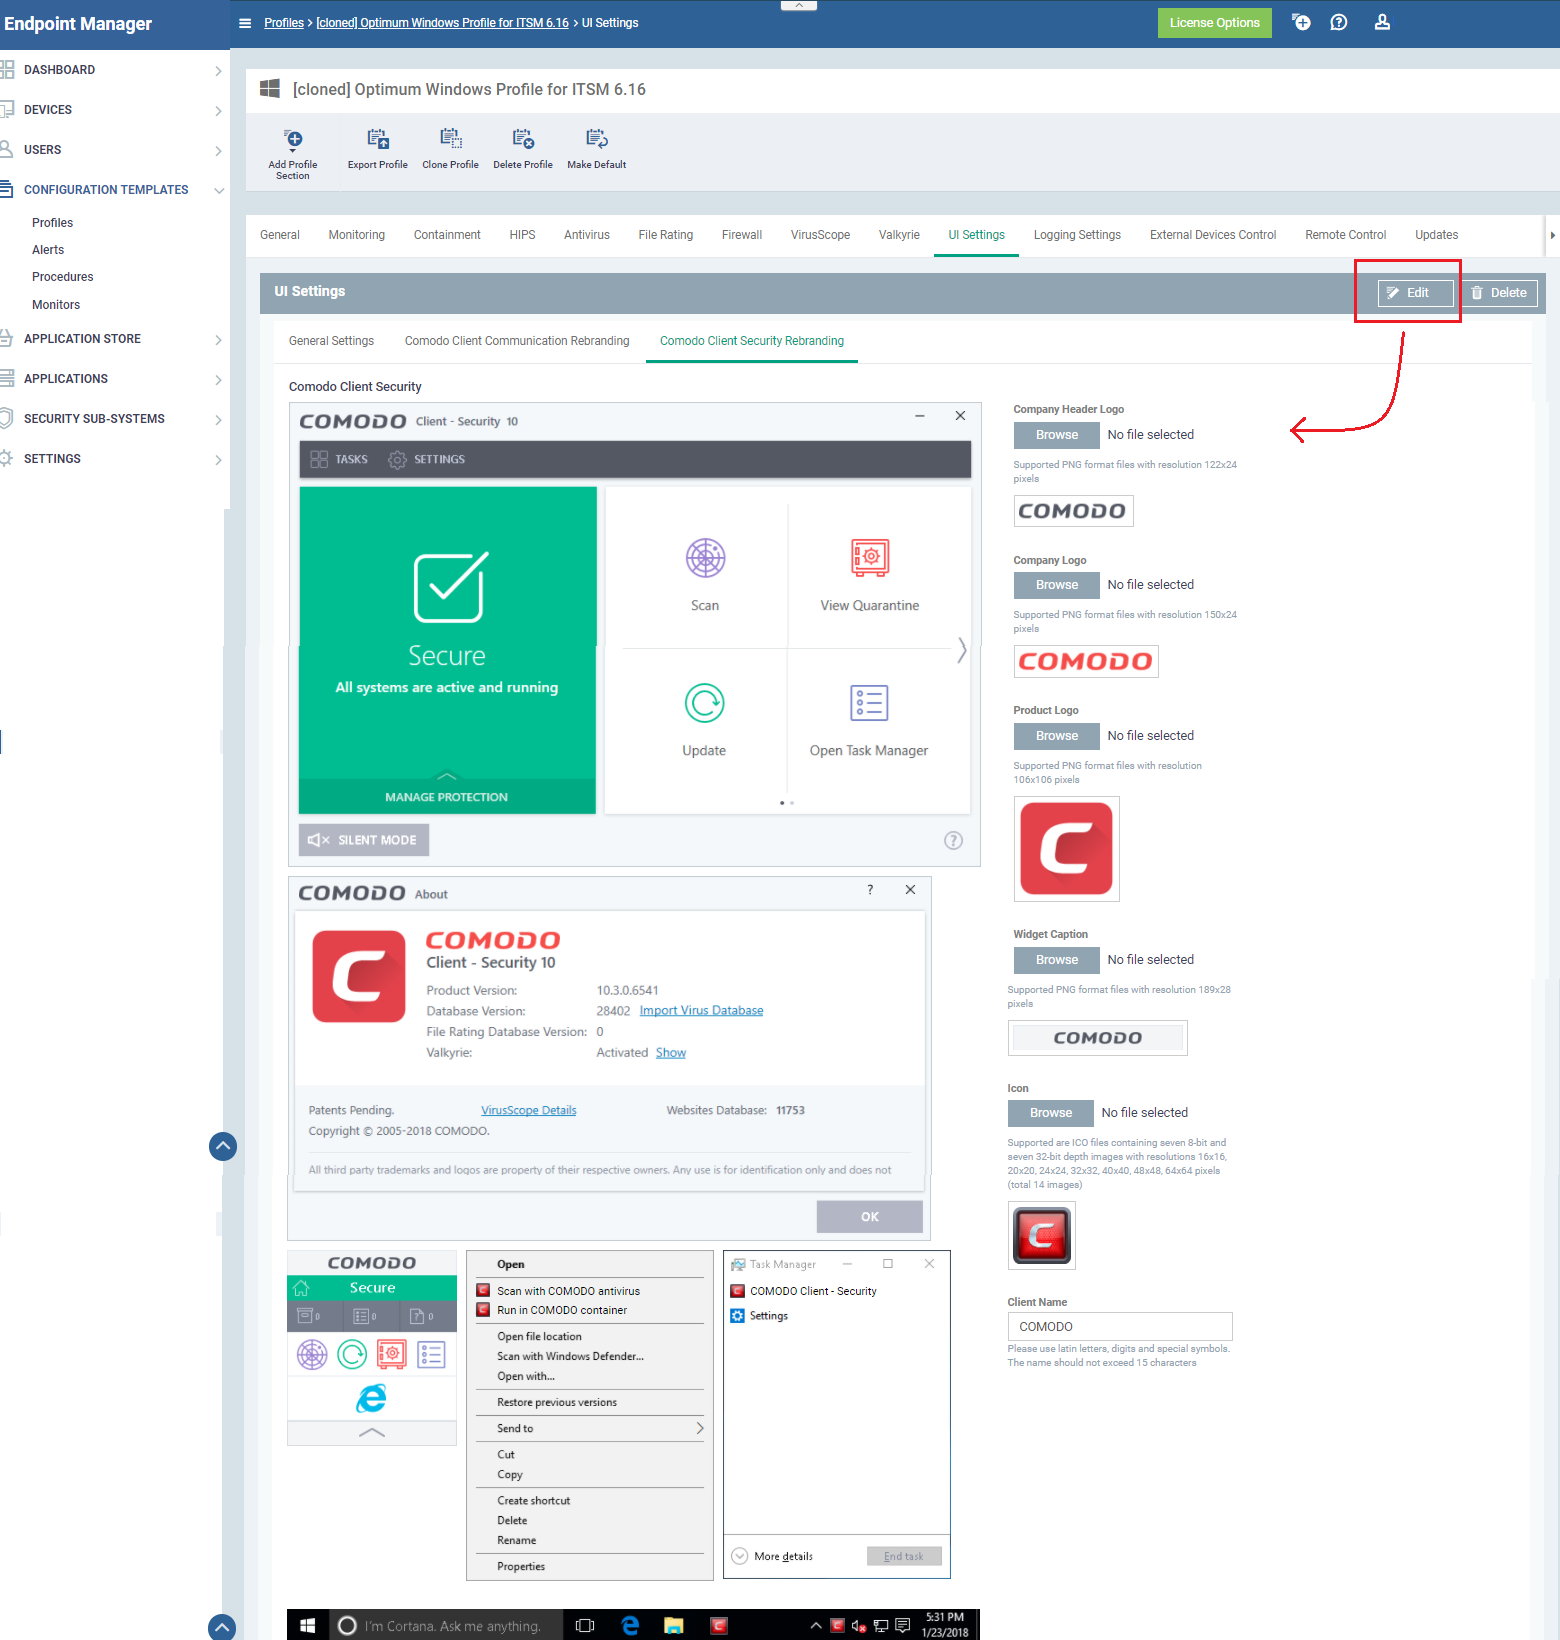
Each of this artworks needs a separate format of images and icons to replace the original.
Below Each and every artwork the format of the file and resolution is mentioned. Only those particular files will be accepted.
A separate trusted application is provided to convert the artwork to the required format and resolution.
Let us see a short user guide to convert png of different formats into a required icon for Comodo client security.
As you see you need
1. Client Name - your company name
2. Company Header Logo - Supported PNG format file with resolution 122x24 pixels
3. Company Logo - Supported PNG format files with resolution 150x24 pixels
4. Product Logo - Supported PNG format files with resolution 106x106 pixels
5. Widget Caption - Supported PNG format files with resolution 189x28 pixels
6. Icon - Supported are ICO files containing seven 8-bit and seven 32-bit depth images
with resolutions 16x16, 20x20, 24x24, 32x32, 40x40, 48x48, 64x64 pixels.
Converting PNG to required file formats (.ICO., PNG)
Easy PNG to Icon converter 1.1 is used to create such formats. you can download this application from the following link.
http://www.dihav.com/view.php?id=png2icon
Step i: Open Easy PNG to Icon Converter, You will see the list of default formats available on the scroll box. some basic formats are PNG, 32 bit, 8 Bit, 24 bit.
All these formats have a separate resolution.
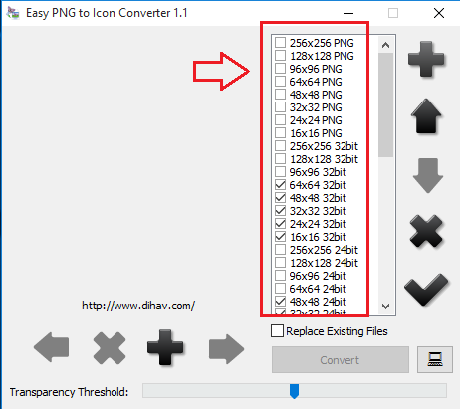
you can also add custom resolution and formats by using the following steps.
Step ii: On the right side of the scroll bar you can see a large "+" symbol. Click on that.
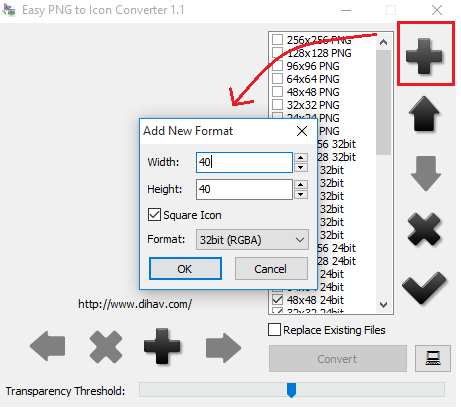
"Add new format" drop box is opened. In that, you can able to specify required Width and height for the resolution and also the format that you want. Click "ok".
Now it will be added to your default formats.
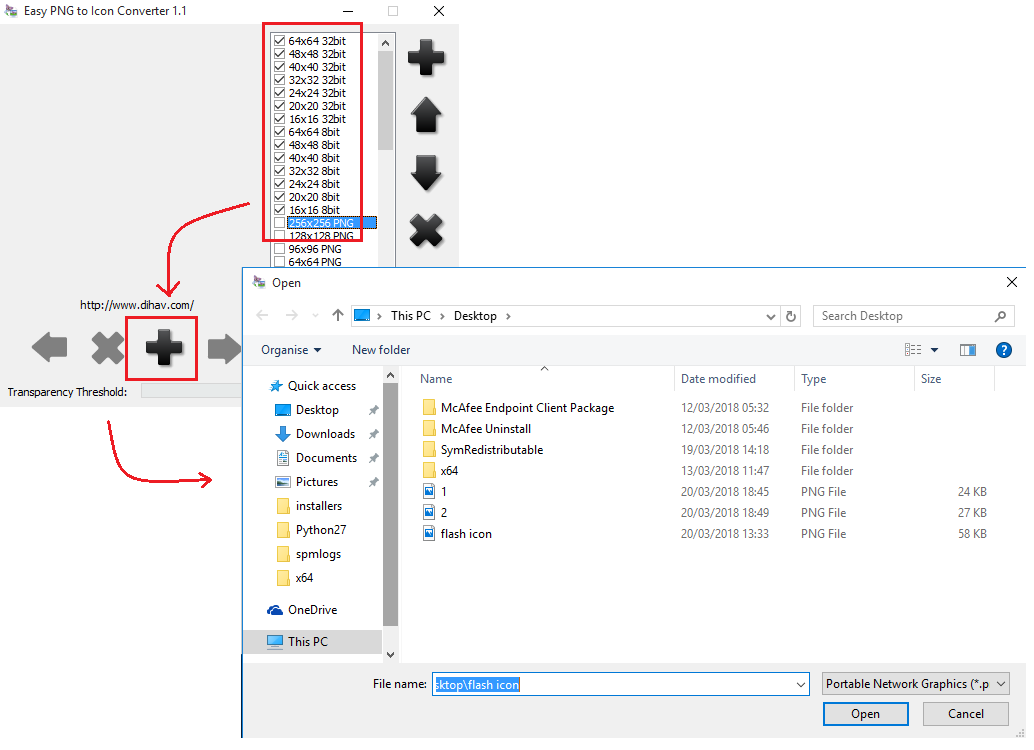
Step iii: Select the formats that you want as an output. for example, if you want formats for company logo, you can select 150x24 pixels with PNG format.
There is an another "+" option available on the left bottom of the page. this is used to add the PNG file that you want to convert. Browse the files and select the file that you want to add.
Click ok.
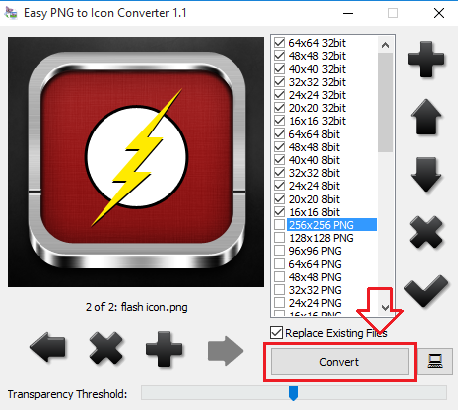
Step iv: On the right bottom of the page you can see "convert" option. click on that.
Your file will be converted and saved to a specified location.
Note:
- Company Header Logo, Company logo, Product logo, Widget caption - these files are required in PNG formats. In order to get that formats select the PNG format with the specified resolution. click on "convert", you will get the PNG format images.
- Icon - this requires ICO format files with 7 types of resolution with two different image depths (8bit & 32bit) click on the required resolution with the specified format, for example, 24x24 8bit and 24x24 32bit. click on "convert", you will get the required ICO format file.
Step 4: In the UI settings for the profile, click on the browse option. select the specified format image that you converted. You may notice the artworks and the names are changing in the sample Comodo Client Security profile that is been shown on the left side of the UI settings.

After changing all the artworks and names of the comodo client security, click on the "save" option.
Step 5: Open the device on which you have updated the profile. It may take a few minutes to change the profile. After few minutes you will be able to see the name and artworks that you have changed.


---