How to run on-demand and scheduled antivirus scans in CCS on Linux devices
Click 'Antivirus' > 'Run a Scan'
-
CCS leverages multiple technologies, including real-time monitoring and on-demand scans, to keep endpoints totally free of malware
-
You can scan any folders, files, drives or any area on your device any time for malware
-
You can also create your own scan profiles to scan specific files, folders and drives and schedule scans to run at specific time
-
CCS shows the list of items identified as malware at the end of each scan. You can choose ignore, or clean the infected files.
Click the links below to jump to the task you need help with:
Instantly scan files and folders
Manage quarantined items
Instantly scan files and folders
-
Drag and drop the individual files, folders or drives into the scan box to instantly check whether they contain threats.
- For example, this is useful if you are wary about an item you have copied from an external source or downloaded from the internet.
Instantly scan an item
-
Drag the item into the scan box in the 'Summary' interface

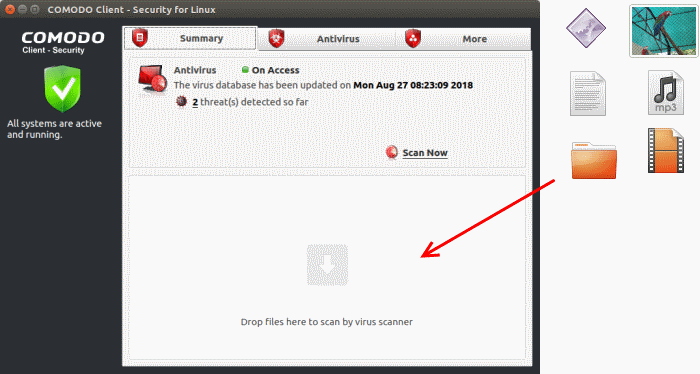
The item is scanned immediately.
Note - CCS skips files which are larger than the max. size allowed. Click 'Antivirus' > 'Scanner Settings' > 'Manual Scanning' to view this threshold. See this wiki to read more on scanner settings
-
Scan results are shown when completed. See Scan progress and results for help to view results and handle identified threats.
-
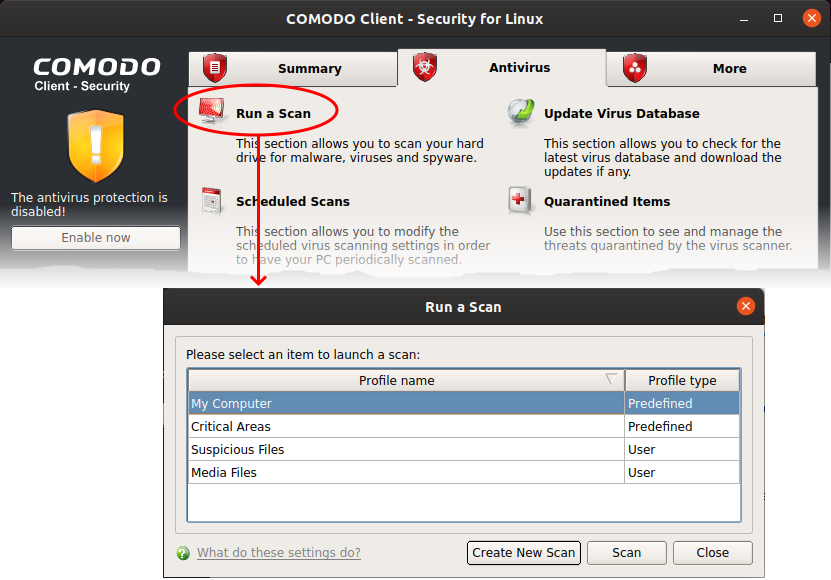
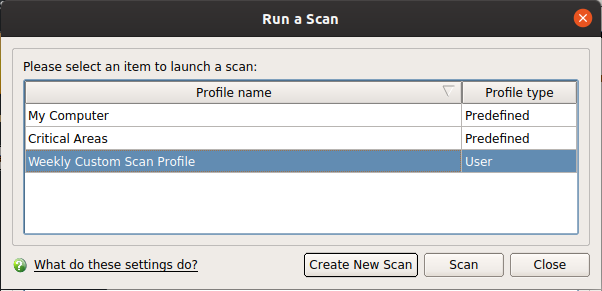
Click the 'Antivirus' tab then 'Run a Scan'

-
Choose a scan profile to select the areas you want to scan:
CCS ships with a set of pre-defined profiles:
You can also create user defined profiles to scan desired areas of your computer. See 'Create a custom scan' if you need help to do this.
-
Click 'Scan'.
Note - CCS skips files which are larger than the max. size allowed. Click 'Antivirus' > 'Scanner Settings' > 'Manual Scanning' to view this threshold. See this wiki to read more on scanner settings
- Next - Scan progress and results
Click 'Antivirus' > 'Run a Scan' > 'Create New Scan'
-
'Scan Profiles' let you set up custom scans on specific areas on your system. Scan profiles can be run on-demand at any time.
-
You can also add a custom scan profile to a schedule to periodically run the scans at specified intervals.
Create a new scan
-
Click the 'Antivirus' tab then 'Run a Scan'
-
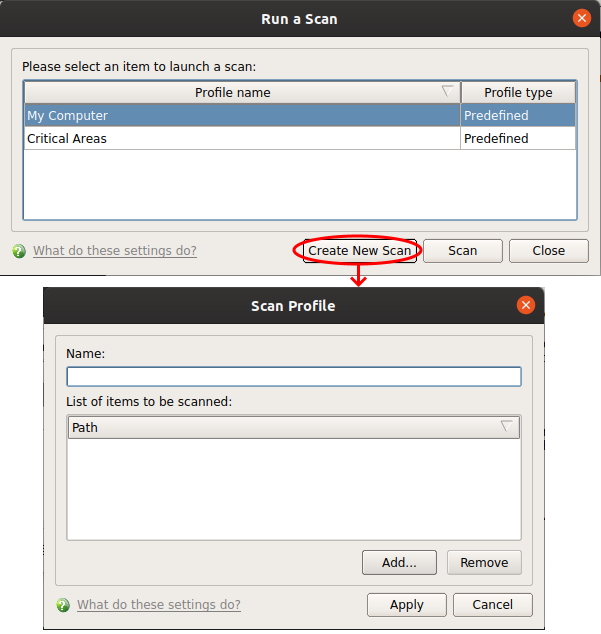
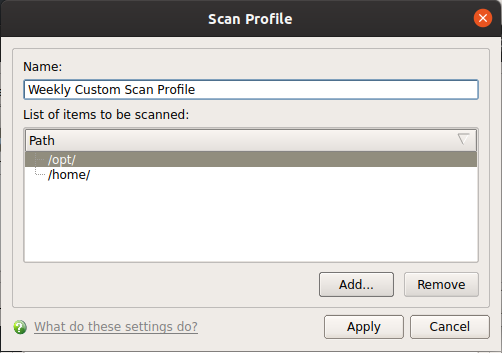
Click the 'Create New Scan' button

-
Name - Enter a label for the scan profile.
-
Click 'Add' to select the items you wish to include in the scan.
You can add items in two ways:-
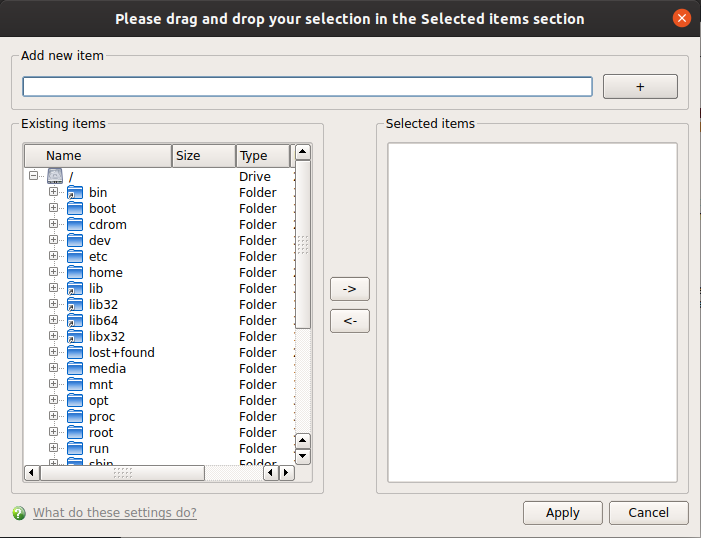
Manually enter the path in the 'Add new item' field and click the '+' button
-
Drag and drop the files, folders and/or drives you require from the left pane to the right pane.
-
-
Repeat the process to select multiple items
-
Click 'Apply'
-
Click 'Apply' in the scan profile dialog.
-
The profile is added to the list of scan profiles and available for selection while running an on-demand scan:
-
Repeat the process to add more scan profiles.


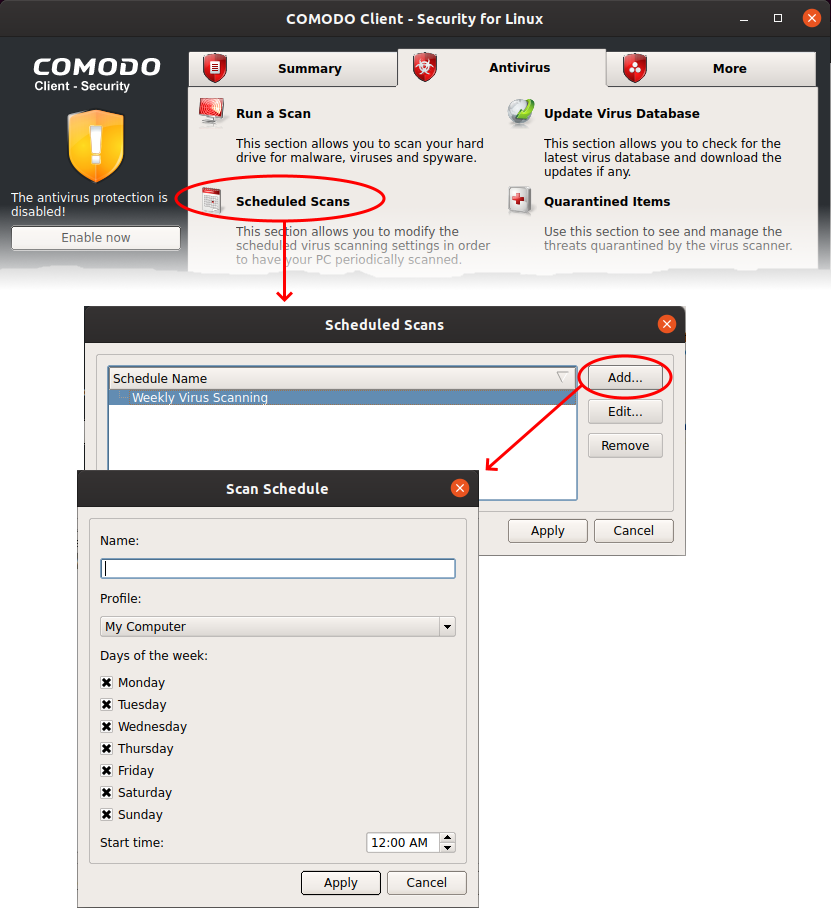
Click 'Antivirus' > 'Scheduled Scans' > 'Add'
-
The highly customizable scheduler lets you timetable virus scans according to your preference.
-
You can schedule a scan of your entire computer or specific areas. You can create an unlimited number of schedules.
-
You can run scans at daily, weekly, monthly or custom intervals.
Create a scan schedule
-
Click 'Antivirus' tab > 'Scheduled Scans'
-
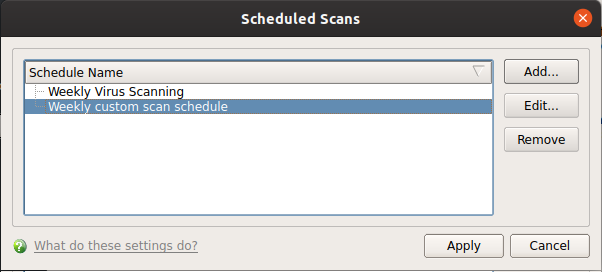
Click the 'Add' button in the 'Scheduled Scans'

-
Configure your schedule:
-
Name – Enter a label for the new schedule. E.g. 'Daily scan of external devices'
-
Profile – The profile determines which areas of your computer are scanned. 'Full Scan' and 'Critical Areas' are the default options. You can also create your own profile of specific targets. See Create a custom scan profile if you need help to do this.
-
Days of the week - Select the weekdays the scan should run.
-
Start time - Select the time the scan should start on the specified weekdays.
-
-
Click 'Apply'
-
Repeat the process to create more scan schedules.
-
Click 'Apply' to save the schedule.

CCS will run the scans on specified time and show the results at the end of each scan. The results are shown only if 'Automatically quarantine threats found during scanning' is disabled in scheduled scanner settings ('Antivirus' > 'Scanner Settings' > 'Scheduled Scanning'). See this wiki to read more on scanner settings
-
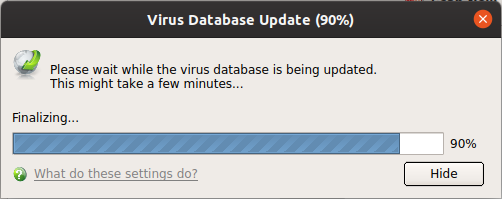
Before running the scan,xcitium Client Security checks for AV database updates. If updates are available they are downloaded and installed.

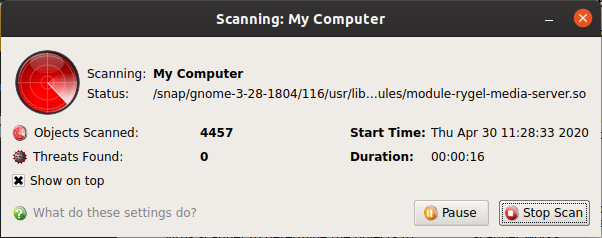
The scan, based on the profile you selected, will begin immediately.
The progress dialog shows the profile name, the location that is currently being scanned, the start time and duration of the scan, the total number of objects scanned so far, and the number of threats found:

Results are shown at the end of the scan:

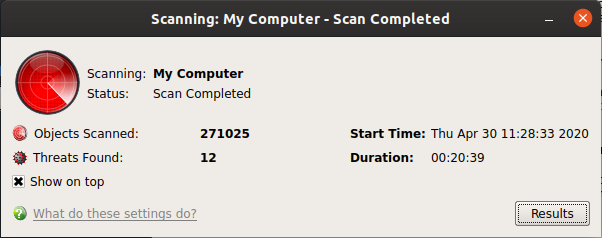
-
Click the 'Results' button to see detailed file information.
-
The results window lists all threats discovered by the scan and provides controls which let you deal with the them:

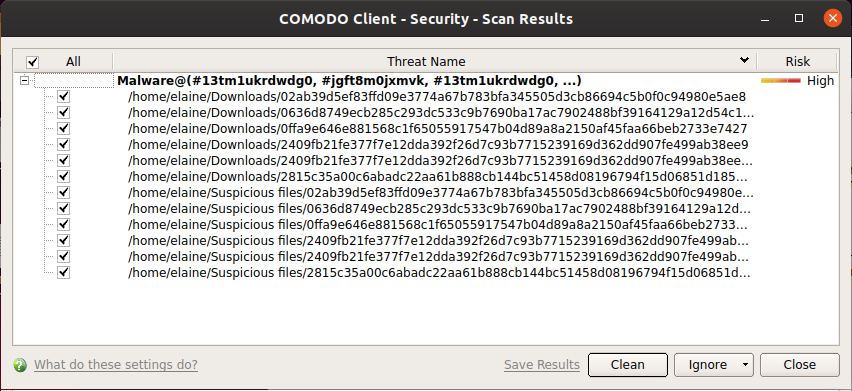
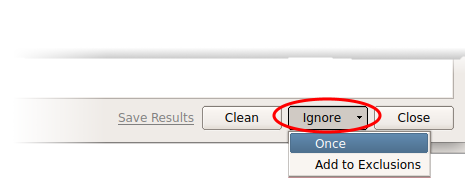
The buttons at the bottom of the results window let you take action on the selected threats:
- Clean - Removes the infected item and retain the original file. If no routine exists, CCS will move the file to quarantine. Click 'Antivirus' tab > 'Quarantined Items' to view this area. You can restore or permanently delete files from quarantine as required. See Manage Quarantined Items if you need help with these options.
- Ignore - Use the drop-down menus to apply actions to files:
- Once: Allows the file to run this time only. Removes the item from the threat results. The file isn't added to the exclusion list and be flagged as threat by the next scan.
- Add to Exclusions: Add an item to the exclusions list and skipped it by future scans and not consider it to be a threat. You can review exclusions at 'Click 'Antivirus' tab > 'Scanner Settings' > 'Exclusions'. See 'Exclusions' in this wiki if you need help with these options.
- Once: Allows the file to run this time only. Removes the item from the threat results. The file isn't added to the exclusion list and be flagged as threat by the next scan.

Click 'Antivirus' > 'Quarantined Items'
-
Quarantine is an encrypted holding area for threats detected by the antivirus scanner.
-
Quarantined files cannot be executed, so they present no danger to your computer or data.
-
You can analyze the trustworthiness of these items and take actions like permanently remove them from your computer or restore them to their original location.
-
Item - The name of the malicious application or process
-
Location - The file path of the item
-
Date/Time - Date and time the item was moved to quarantine.
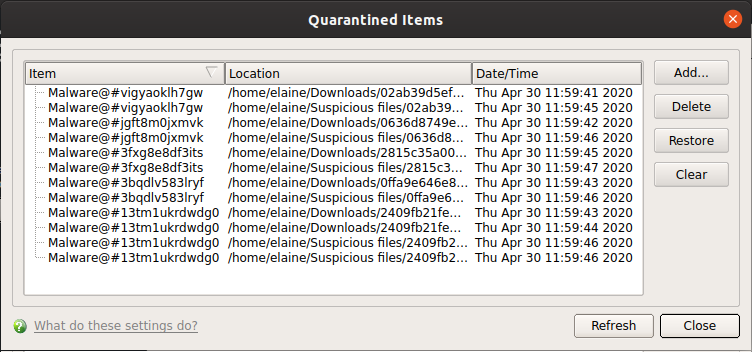

The interface lets you review quarantined files and take the following actions:
-
Click 'Antivirus' > 'Quarantined Items'
-
Select the items in the quarantine interface and click the 'Delete'
-
Click 'Clear' button to delete all the quarantined items permanently.
-
The files are deleted from your computer
-
Click 'Antivirus' > 'Quarantined Items'
-
Select the items to be moved back to their original locations and click the 'Restore'

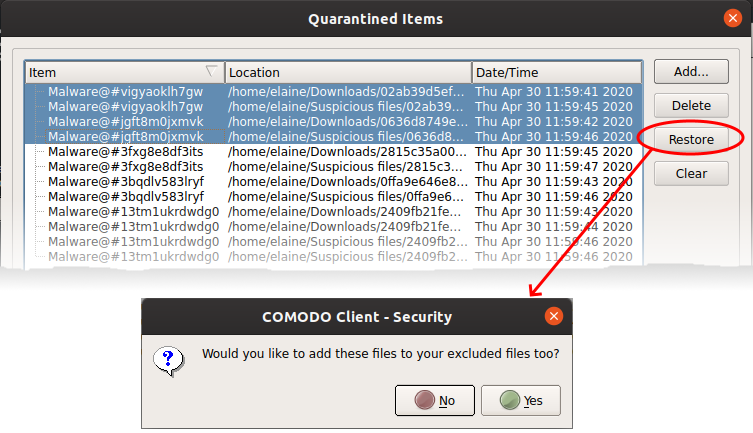
You will be asked if you want to add the item to the Scan Exclusions list:
-
'Yes' - The file is restored to its original location. It is not flagged as dangerous nor quarantined by future antivirus scans. You can manage excluded items in the Scanner Settings interface ('Antivirus' > 'Scanner Settings' > 'Exclusions'). See 'Exclusions' in this wiki if you need help with these options.
-
'No' - The file is restored to its original location. If the file contains malware it will be re-quarantined by the next antivirus scan.


---