How to schedule virus scan in Endpoint Manager
Introduction:
You can schedule a virus scan on your network in the ‘Antivirus’ section of a profile.
Step 1: In Endpoint Manager:
-
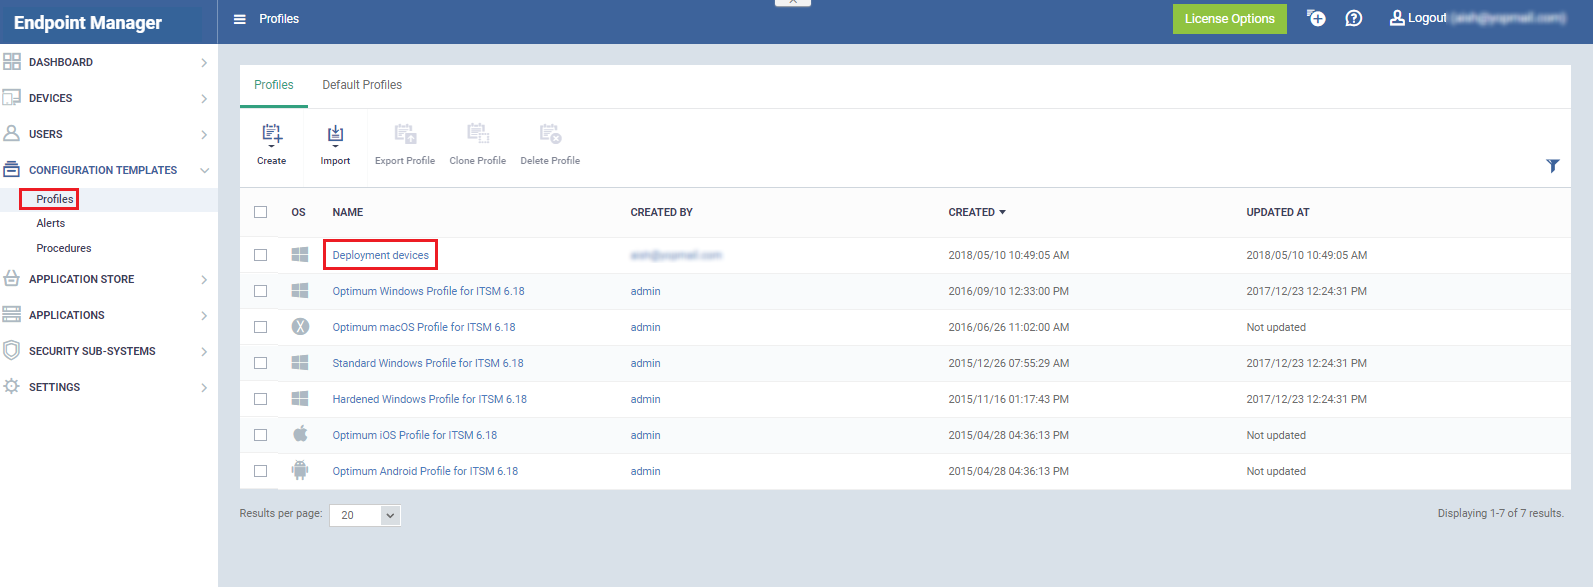
Click ‘Configuration Templates’ → ‘Profiles’
-
Open the profile applied to your devices
In the example below, ‘Deployment Devices’ is the profile on our devices:
Step 2: Add or open the antivirus section
-
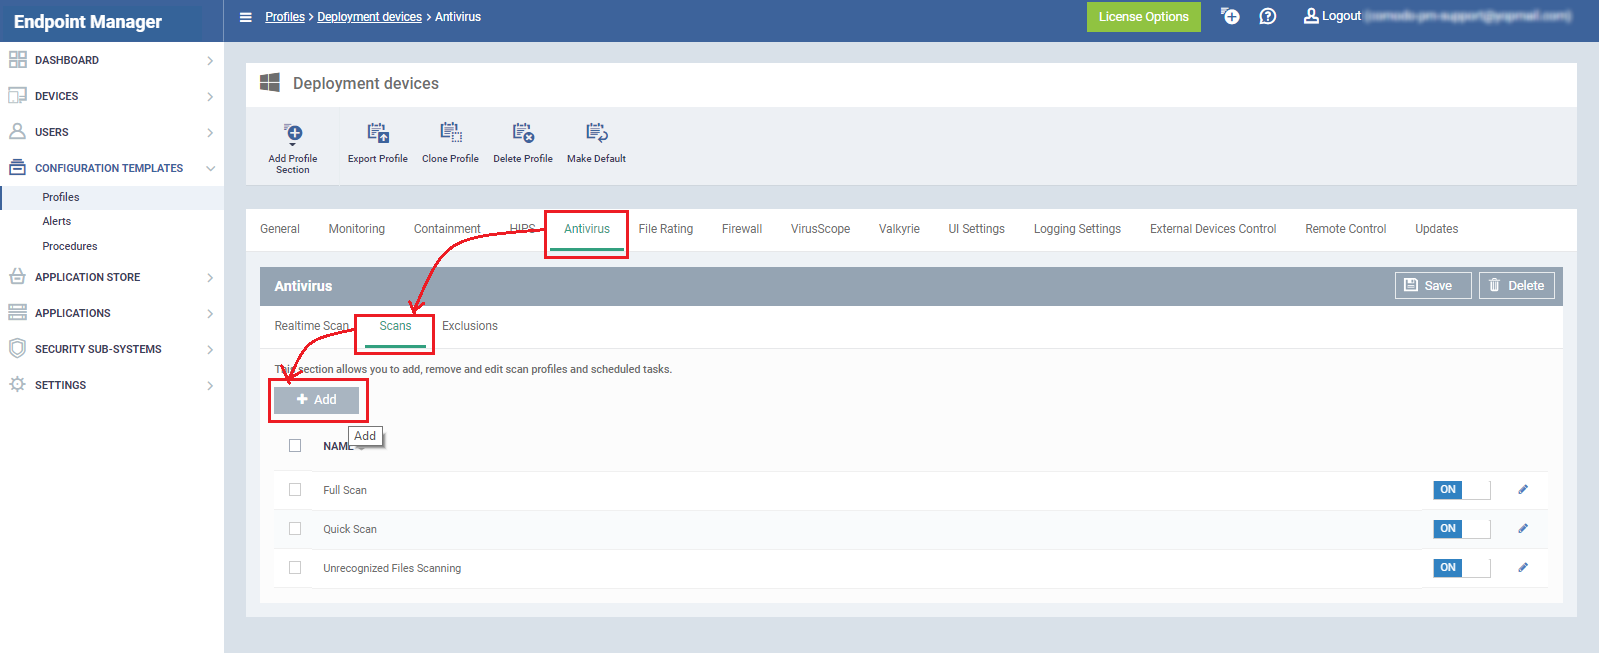
Open the ‘Antivirus’ tab of the profile
-
Click ‘Scans’ > ‘Add’
-
This will open the ‘Add Scan Profile’ dialog
If you don’t see the antivirus tab, add it by clicking the ‘Add Profile Section’ button then ‘Antivirus’.
Step 3: Configure the scan
-
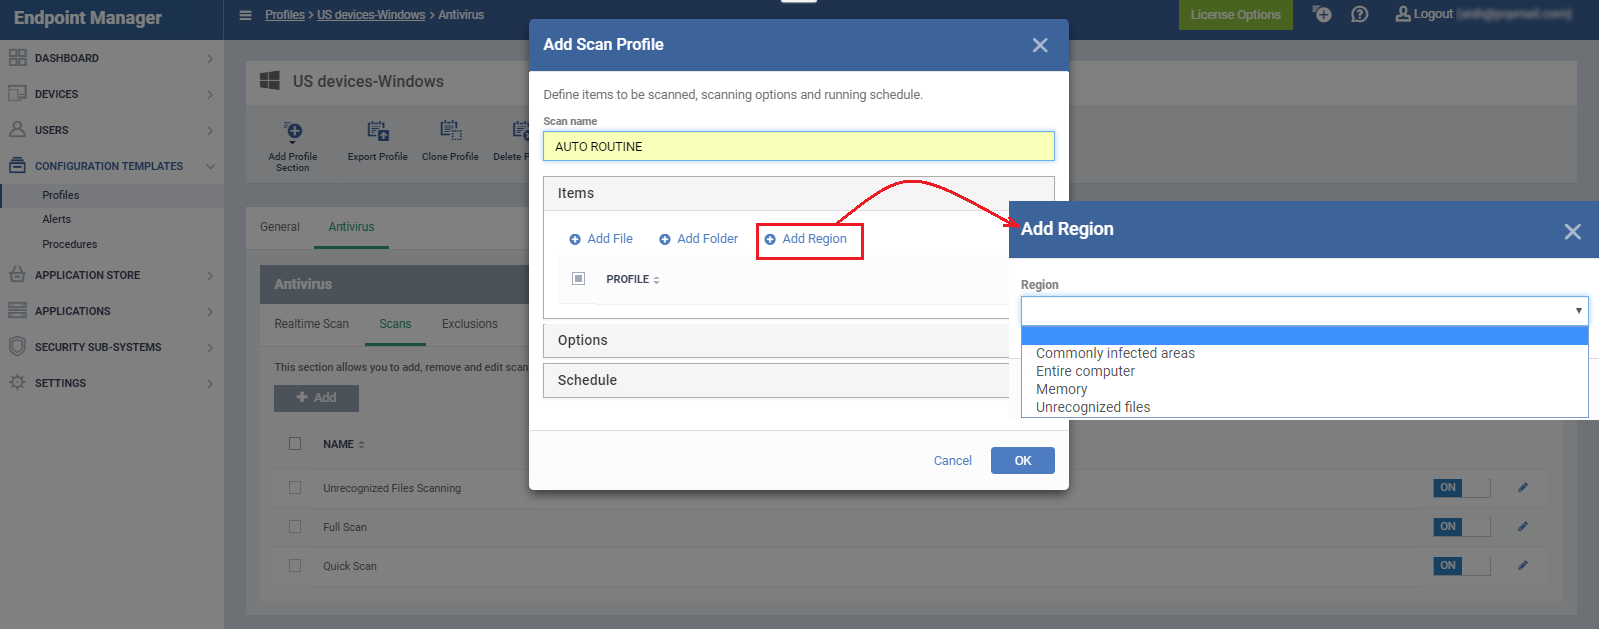
Provide a name for the scan. Example below = ‘Auto Routine’
-
ITEMS – Choose which items you want to scan. You can choose from the following:
-
File – Scan specific files. You can add an entire extension by using the wildcard character (e.g. *.exe).
-
Folder – Scan a specific directory.
-
Region - Scan a predefined area. For example, 'Entire Computer', 'Commonly Infected Areas', 'Memory' and 'Unrecognized Files'.
-
You can add multiple items to a single scan. Repeat the process to add more items
Step 4: Schedule the scan
-
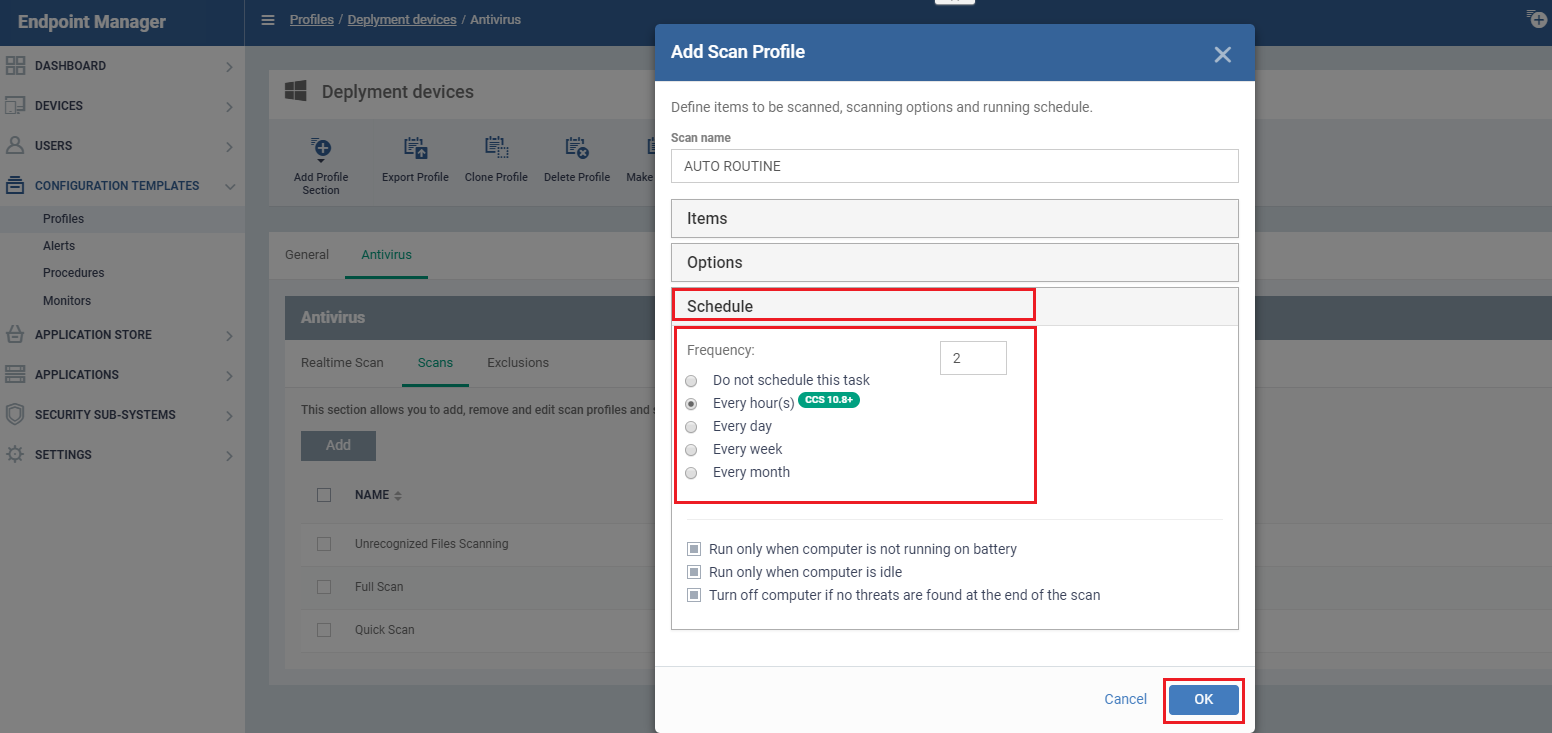
Click the ‘Schedule’ row
-
Specify the scan frequency and scan options:
- Every hour(s) - Run the scan once every n hours. For example, once every 3 hours. Enter the number of hours between scans in the box provided.
-
Every Day - Runs the scan daily at the time you specify
-
Every Week - Runs the scan once per week on the day and time you specify on the right. You can select the days of the week by directly clicking on them.
-
Every Month - Runs the scan once a month on the day and time you specify on the right
Step 5: Save the profile
-
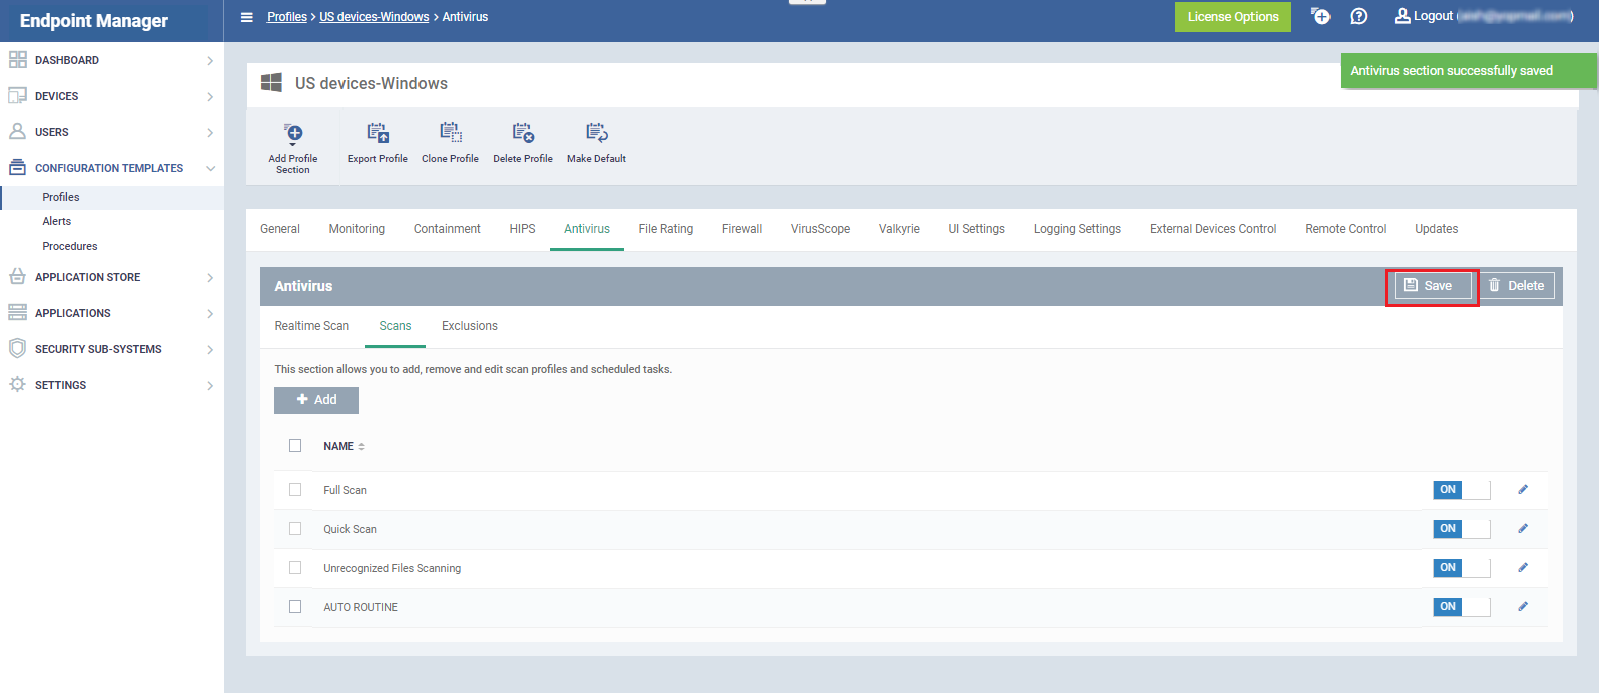
Click the ‘Save’ button at top-right
-
The scan will be automatically deployed to all endpoints covered by the profile. It will run at the times you specified in the schedule
-
The scan will also be listed in ‘Scans’ tab of the profile’s ‘Antivirus’ section
-
You can return here at any time to edit, or enable/disable this scan
