How to set Remote control options in a profile
-
ITarian Remote Control lets you take-over Windows and Mac OS devices to solve issues, install third party software and run system maintenance.
-
You can also transfer files and folders between your computer and the remote computer (Windows devices only).
-
You can take remote control of a device as follows:
-
Click ‘Devices’ > ‘ Device List’ > 'Device Management'
-
Select the device you want to control
-
Click the 'Remote Control' button above the table
-
Install the remote control application if required
-
-
Login to the application with your Comodo One/ Dragon username and password
-
Connect to the target device
-
-
This tutorial explains how to configure remote control preferences in a profile. The settings you choose will apply when you connect to devices that use the profile.
Process in brief:
-
Login to Comodo One/ Dragon
-
Click ‘Applications’ > ‘Endpoint Manager’
-
Click ‘Configuration Templates’ > ‘Profiles'
-
Click the name of the Windows or MAC profile that you want to work on
-
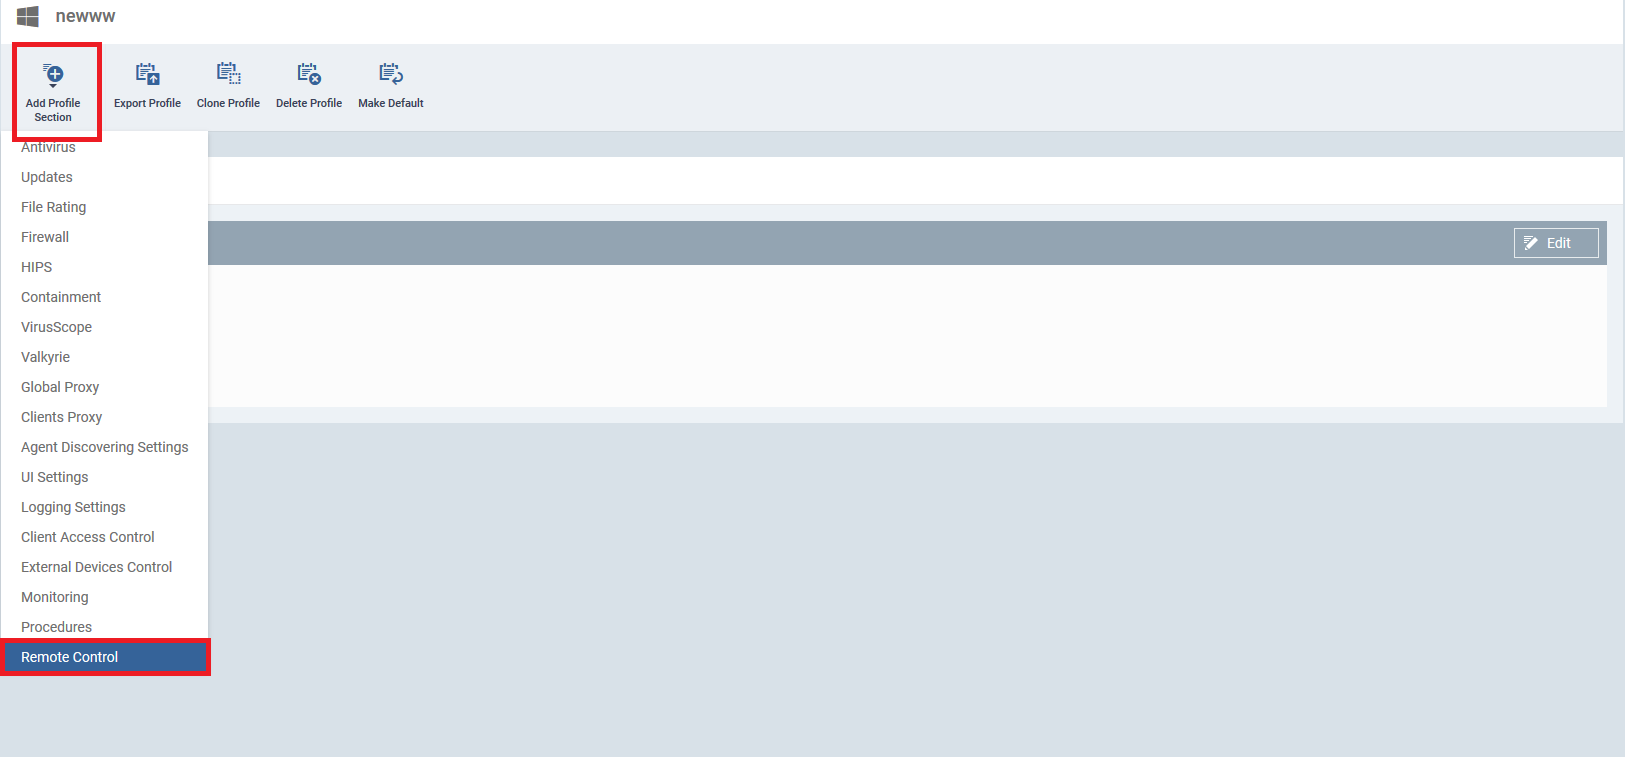
Open the ‘Remote Control’ tab (or click ‘Add Profile Section’ > ‘Remote Control’)
-
Configure the settings
-
Click 'Save'
Process in detail
-
Login to Comodo One/ Dragon
-
Click ‘Applications’ > ‘Endpoint Manager’
-
Click ‘Configuration Templates’ > ‘Profiles'
-
Click the name of the Windows or MAC profile that you want to work on
-
Open the ‘Remote Control’ tab and click 'Edit' (or click ‘Add Profile Section’ > ‘Remote Control’)
-
The configuration screens are different for Windows and Mac OS profile. Use the links below for help on each:

The remote control configuration screen has two tabs:
-
‘Device Takeover’ gives you full control of the remote device like a traditional RDP connection.
-
For example, you can move your mouse around the remote desktop, open programs, configure the control panel, etc.
-
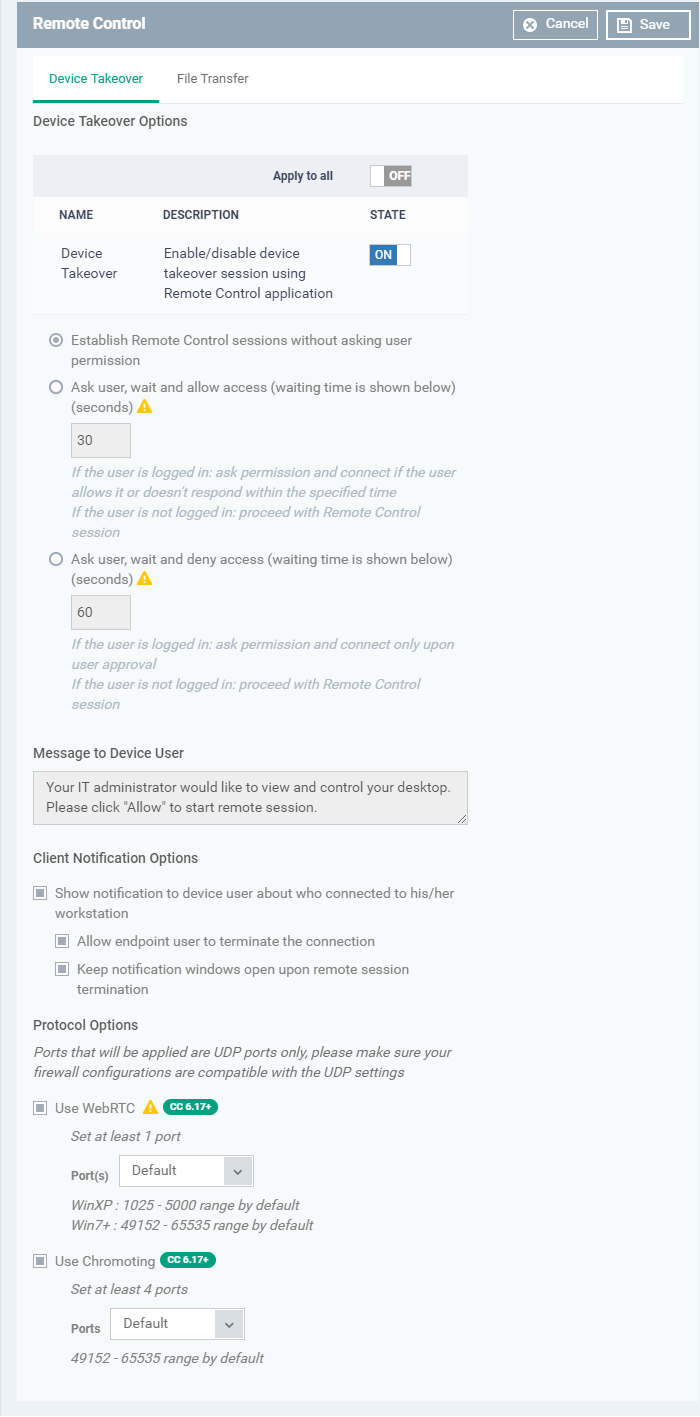
Click the 'Device Takeover' tab and configure the options below:
-
Device Takeover - Use the ‘ON/OFF’ switch to allow or disable remote control of devices that use this profile.
-
Establish Remote Control without asking permission – Take control without notifying the end-user.
-
Ask user, wait and allow access – Show a message to the user which requests them to accept the connection. The connection will be established if the user doesn’t respond within the timeout period.
-
Enter the timeout period (in seconds)
-
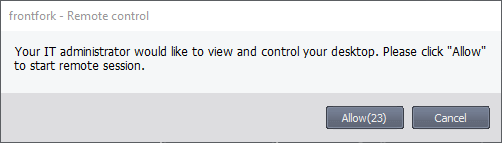
Users will see the following message each time you attempt to take over their device:
-
Ask user, wait and deny access - Show a message to the user which requests them to accept the connection (as shown above). The connection attempt will be abandoned if the user does not respond within the timeout period.
-
Enter the timeout period (in seconds)
-
-
- Message to Device User
- Enter the text of the connection request message. For example, “Your administrator would like to take control of your desktop. Click 'Allow' to accept the connection request.”
- You can only enter a message if you chose one of the ‘Ask...’ options above.
- Enter the text of the connection request message. For example, “Your administrator would like to take control of your desktop. Click 'Allow' to accept the connection request.”
-
Show notification to device user about who connected to his/her workstation - Enable or disable the notification shown on the endpoint when a remote session is active:
Allow endpoint user to terminate the connection - Choose whether or not the 'End Session' button is shown in the notification box above. If enabled, the end-user will be able to close the connection. -
Protocol Options
These options let you configure the protocol used for the remote takeover session.- These settings apply to version 6.17+ of the RC tool.
- Please make sure you do not assign well-known special ports. We recommend the following port range for custom use: 49152-65535.
- You can also specify custom ports to be used by the protocol for an additional layer of safety. This lets you keep specific ports open while blocking other ports for security.
- These settings apply to version 6.17+ of the RC tool.
- Use WebRTC – The remote control tool uses the WebRTC protocol to connect to the device. This option is mandatory and cannot be deselected.
-
Ports - Select the ports used by the WebRTC protocol. The options are:
-
Default - WebRTC will use port range 1025 - 5000 for Windows XP, and 49152 - 65535 for Windows 7 and above.
-
Custom - Specify a single custom port to be used by WebRTC
-
Custom Range - Specify a custom range to be used by WebRTC
-
- Use Chromoting – The Chromoting protocol provides stable, high quality connections to remote devices. It is supported by Windows 7 and later (and by all MAC devices).
- Enabled - The tool will use Chromoting to connect to devices running Windows 7 or above. It will use WebRTC to connect to Windows XP/Vista devices.
- Disabled – The tool will use WebRTC to connect to all Windows devices.
-
Ports
-
Default - Chromoting will use the port range 49152 – 65535
-
Custom Range - Specify a port range to be used by Chromoting. Enter a range covering at least 4 ports.
-
-
- Enabled - The tool will use Chromoting to connect to devices running Windows 7 or above. It will use WebRTC to connect to Windows XP/Vista devices.


File Transfer
-
The file transfer feature lets you perform file operations on the remote computer. For example, it allows you to copy files to and from the remote computer, and create/delete/rename items.


File Transfer Options:
-
File Transfer - Allows admins to view files/folders on remote devices. You can enable this setting in isolation if you only want admins to have read-access to the remote device.
You must enable this setting in order to enable the two more powerful settings below: -
Send & Receive Folders & Files - Enable admins to transfer files/folders between the admin computer and the remote computer.
- Create, Delete, Rename actions – Enable admins to perform file operations on the remote computer.
User Permission Settings
The user permission settings are the same, or very similar, to those described in the ‘Device Takeover’ section above.
Click the following links to read about each setting:
-
Establish File Transfer sessions without asking user permission
-
Show notification to device user about who connected to his/her workstation
Click 'Save' to apply your changes to the profile.
-
The remote control tool lets admins take full control of a remote MAC device.
-
For example, you can move your mouse around the remote desktop, open programs, configure the control panel, etc.
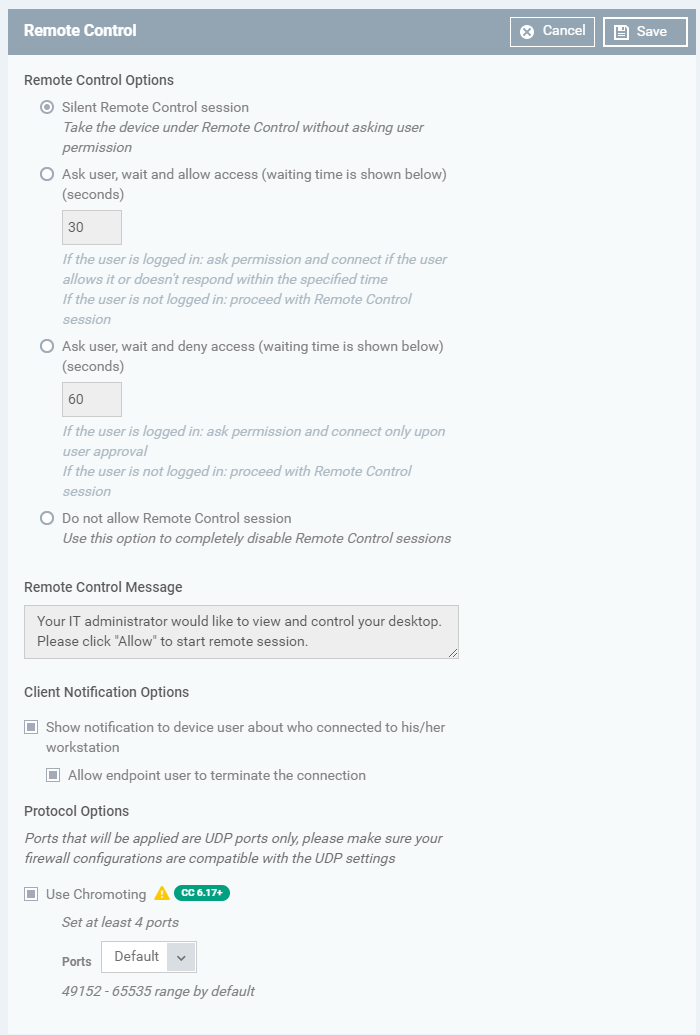
The settings in the remote control area are similar to those described in the Windows section earlier. Please click the following links to read more about each. -
Silent Remote Control Session – Same as ‘Establish without notification’ in a Windows profile
-
Do not allow remote control session – Same as choosing ‘Off’ for device takeover in Windows profile
-
Show notification to device user about who connected to his/her workstation
-
Use Chromoting – Note – Chromoting is the mandatory connection protocol for MAC devices.
Click 'Save' to apply your changes to the profile.


---