North America
How to set the default version of the communication and security clients for Windows
Views
1660 times
Category
Endpoint manager portal
Tags
- Open Endpoint Manager
- Click ‘Settings’ > ‘Portal Setup’ > ‘Client Settings’
- Click the ‘Windows’ tab
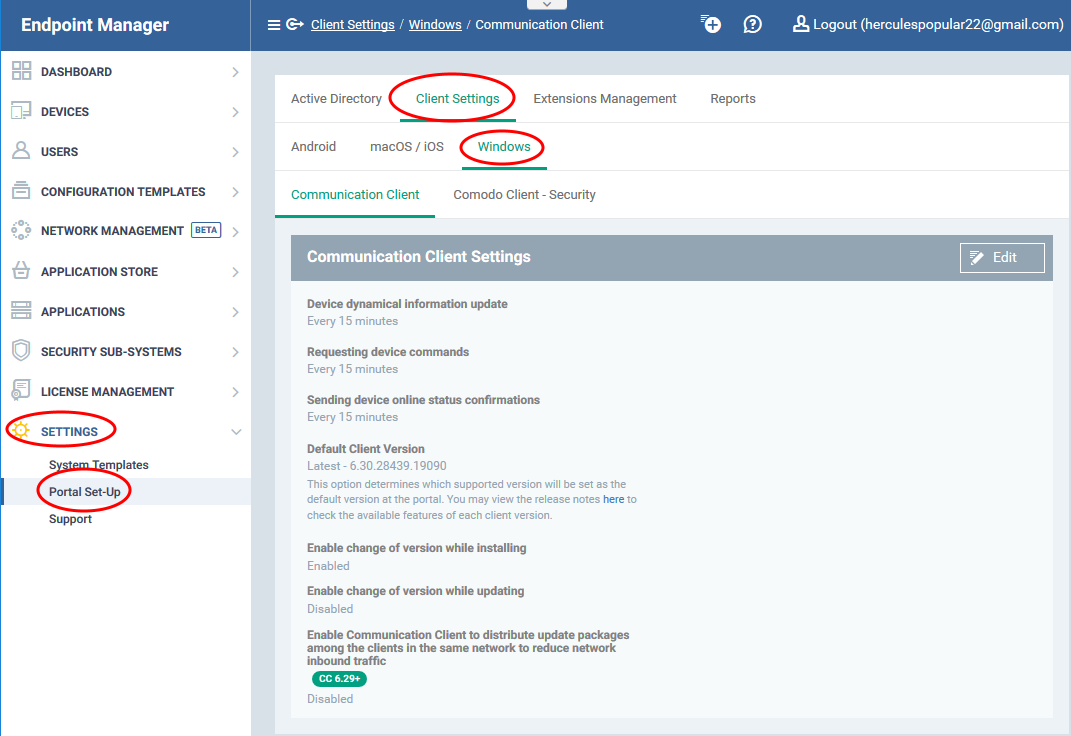
Overview
- The ‘default’ version of a client is the one that will be installed on endpoints when you run an install task via Endpoint Manager.
- This is set to always fetch and install the latest version unless you specify otherwise.
- Once you have chosen the default version, it will be pre-selected in the following wizards and interfaces:
- Device Enrollment - 'Devices' > 'Device List' > 'Enroll Device'
- Bulk installations - 'Devices' > 'Bulk Installation Package'
- Update additional packages - 'Devices' > 'Device List' > select a Windows profile > 'Install or Update Packages' > 'Update Additional Packages'
- ‘Updates’ section of a Windows profile - 'Configuration Templates' > 'Profiles' > open a Windows profile > 'Updates' profile section
- Device Enrollment - 'Devices' > 'Device List' > 'Enroll Device'
- You can also specify whether admins can change the client version when they perform one the activities listed above.
- Leave the 'Enable change...' options disabled to prevent admins from installing a different version to the one you selected.
- This avoids the possibility of admins installing older or incompatible versions of the clients.
- Leave the 'Enable change...' options disabled to prevent admins from installing a different version to the one you selected.
Step-by-step process
- Open Endpoint Manager
- Click ‘Settings’ > ‘Portal Set-Up’
- Select ‘Client Settings’ > ‘Windows’
- You can choose the default version of the communication client (CC) and / or Comodo Client Security (CCS)
- The rest of this article explains how to configure the default version of CC. The configuration options are similar for CCS too.
Communication Client
- Open the 'Communication Client' tab
- Click ‘Edit’ to change the settings:

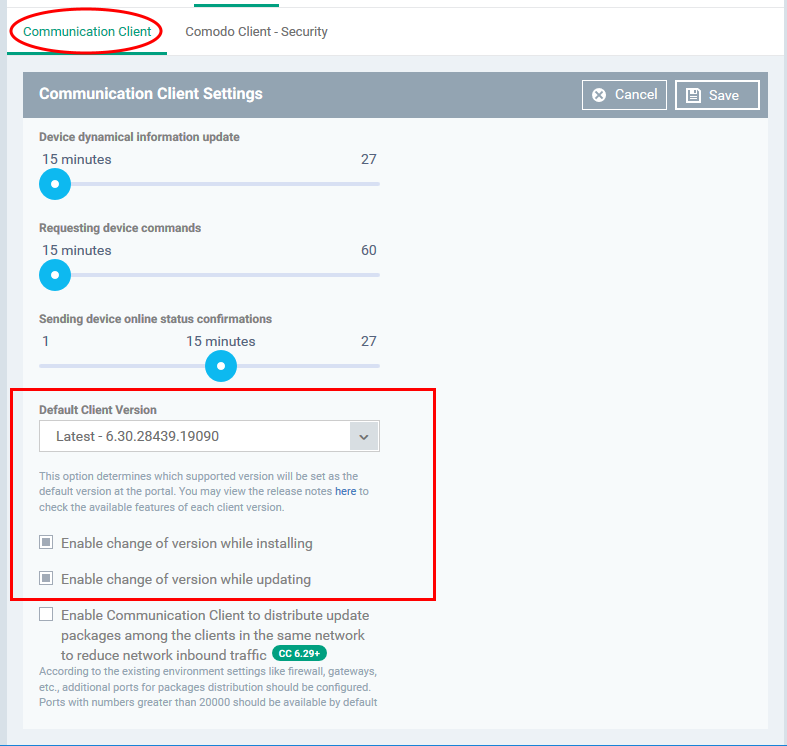
Configure the following settings:
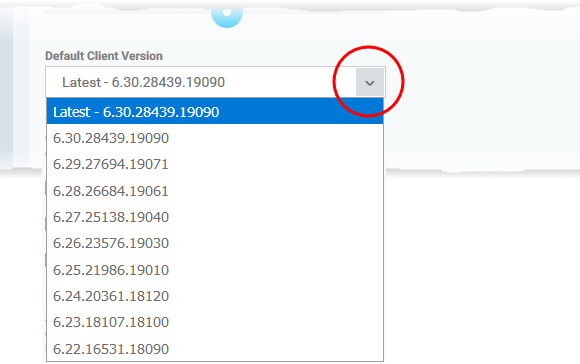
- Default Client Version – Choose which version of the agent should be installed or updated on managed endpoints. You can choose the version from the drop down:
- Endpoint Manager will present the default version you choose here in the installation interfaces listed above.
- The default, if you change nothing, is 'Latest - <version number>' (so Endpoint Manager will always present the most up-to-date version).
- Endpoint Manager will present the default version you choose here in the installation interfaces listed above.
- ‘Enable change of version while…’ – Specify whether admins can install/update to a different version than you one you selected:
- ‘Enable change of version while installing’ – affects:
- Device Enrollment - 'Devices' > 'Device List' > 'Enroll Device'
- Bulk installations - 'Devices' > 'Bulk Installation Package'
- Device Enrollment - 'Devices' > 'Device List' > 'Enroll Device'
- ‘Enable change of version while updating’ – affects:
- Update additional packages - 'Devices' > 'Device List' > select a Windows device > 'Install or Update Packages' > 'Update Additional Packages'
- ‘Updates’ section of a Windows profile - 'Configuration Templates' > 'Profiles' > open a Windows profile > 'Updates' profile section
- Update additional packages - 'Devices' > 'Device List' > select a Windows device > 'Install or Update Packages' > 'Update Additional Packages'

The rest of this article shows the various places where the default client version is shown.
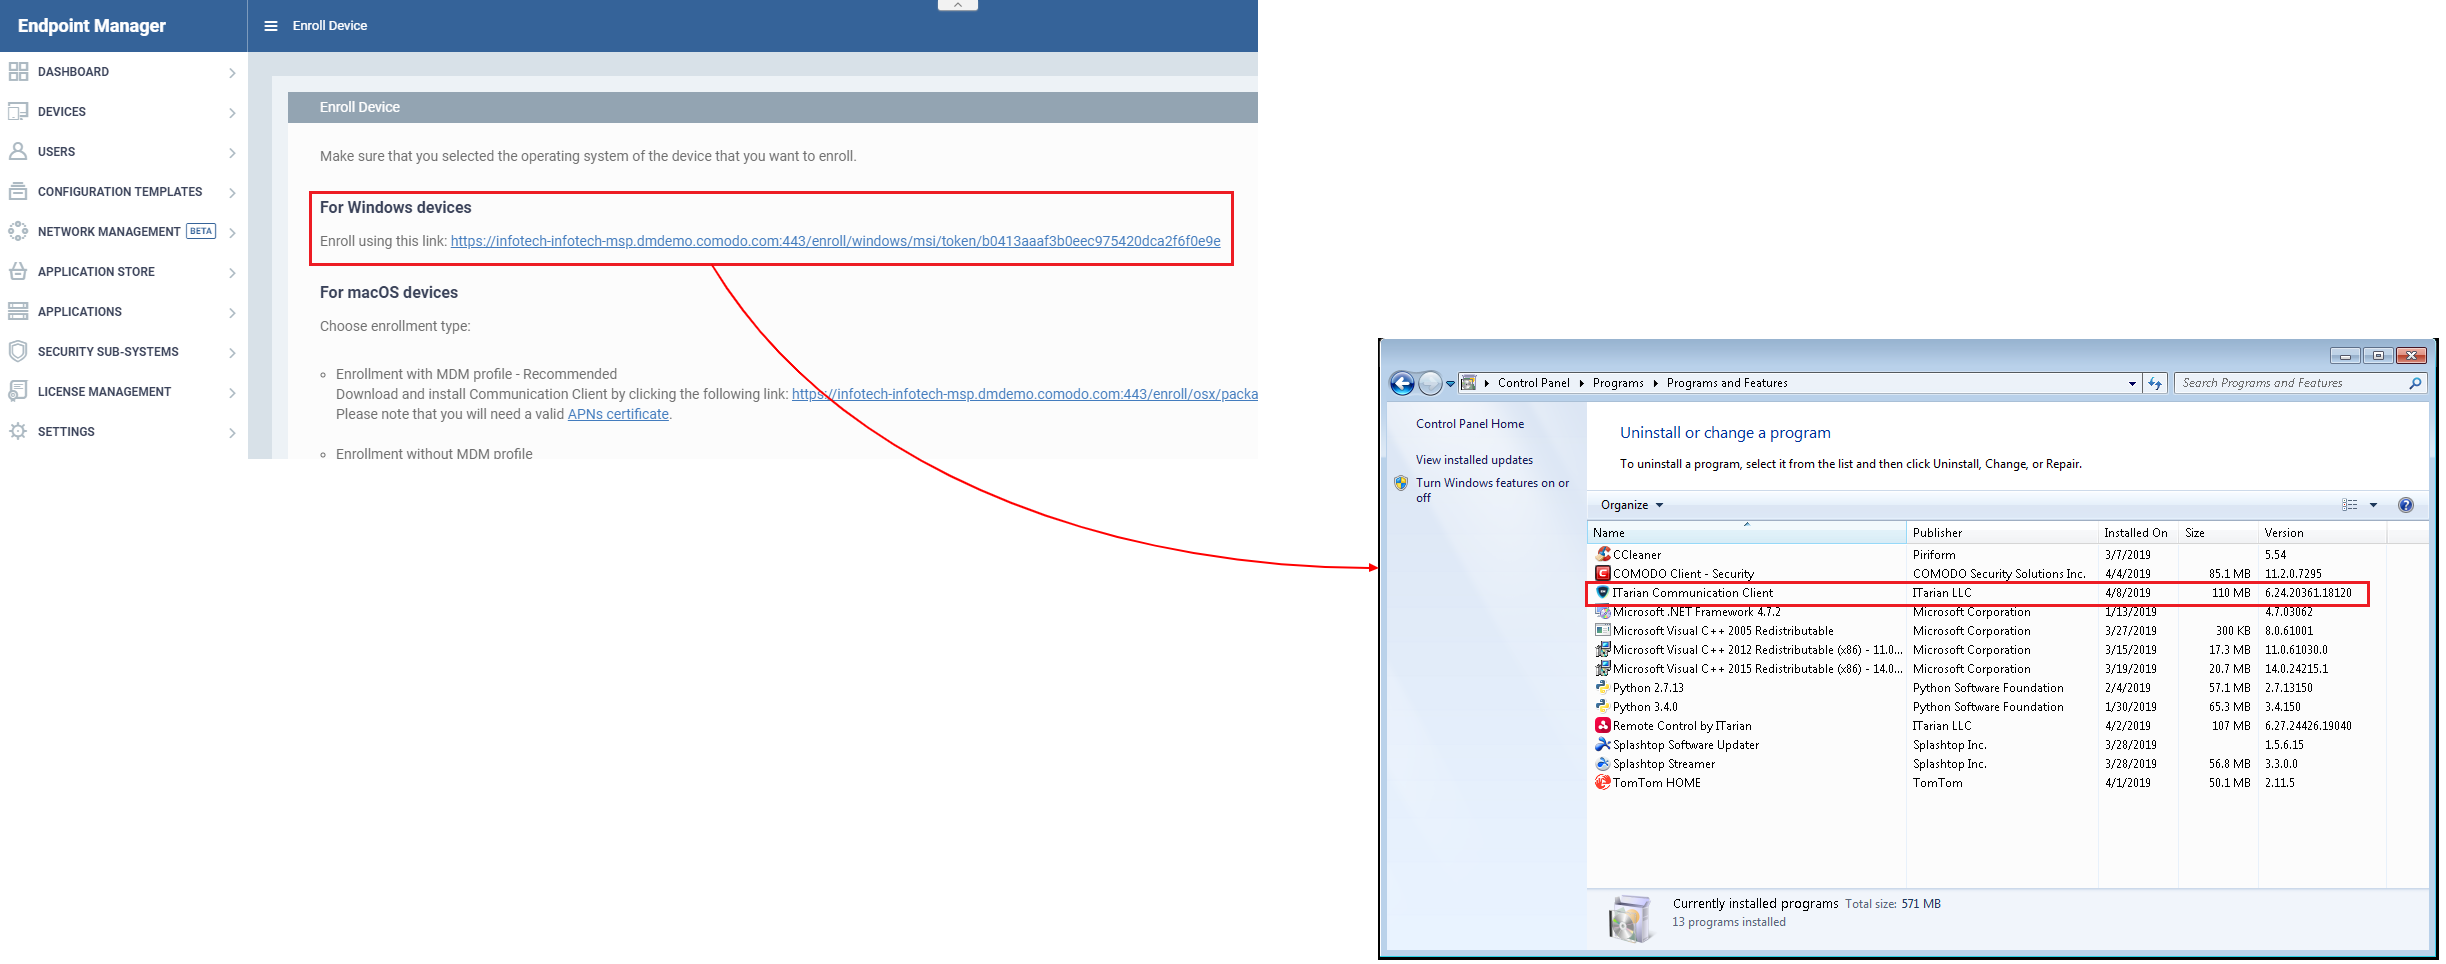
Device Enrollment
- Click 'Devices' > 'Device List' > 'Enroll Device'
- The default client is shown as follows:

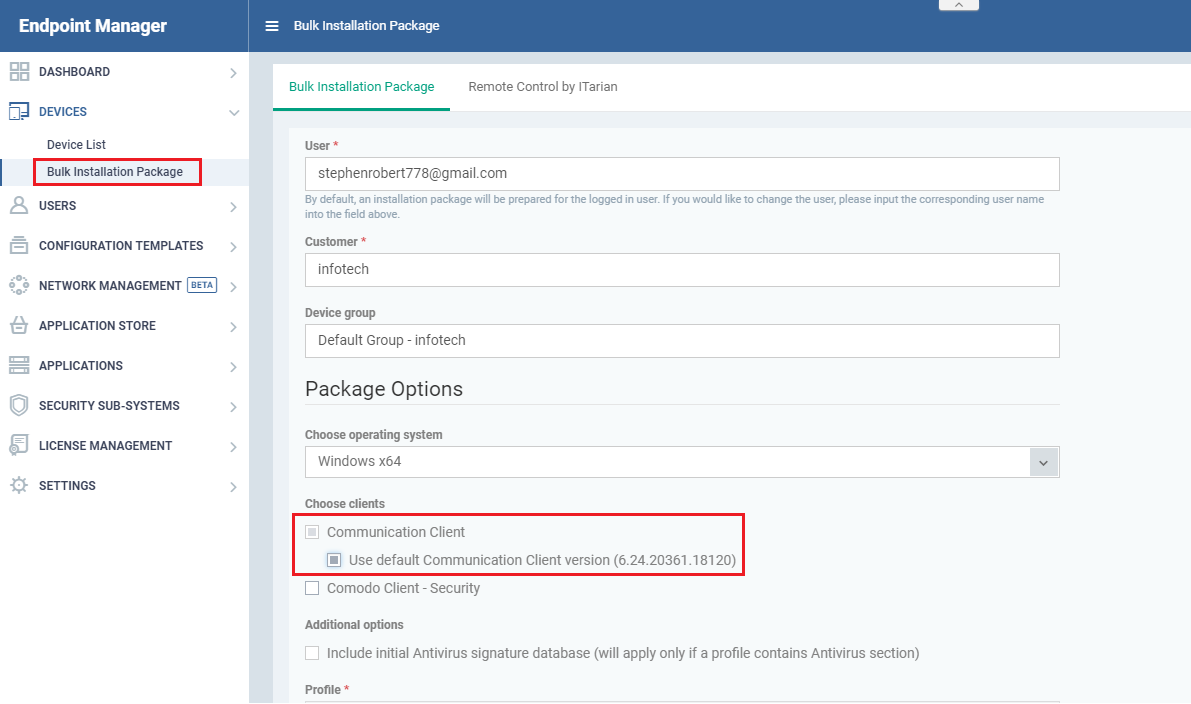
- Click 'Devices' > ‘Bulk Installation Package’
- The default client is shown as follows:
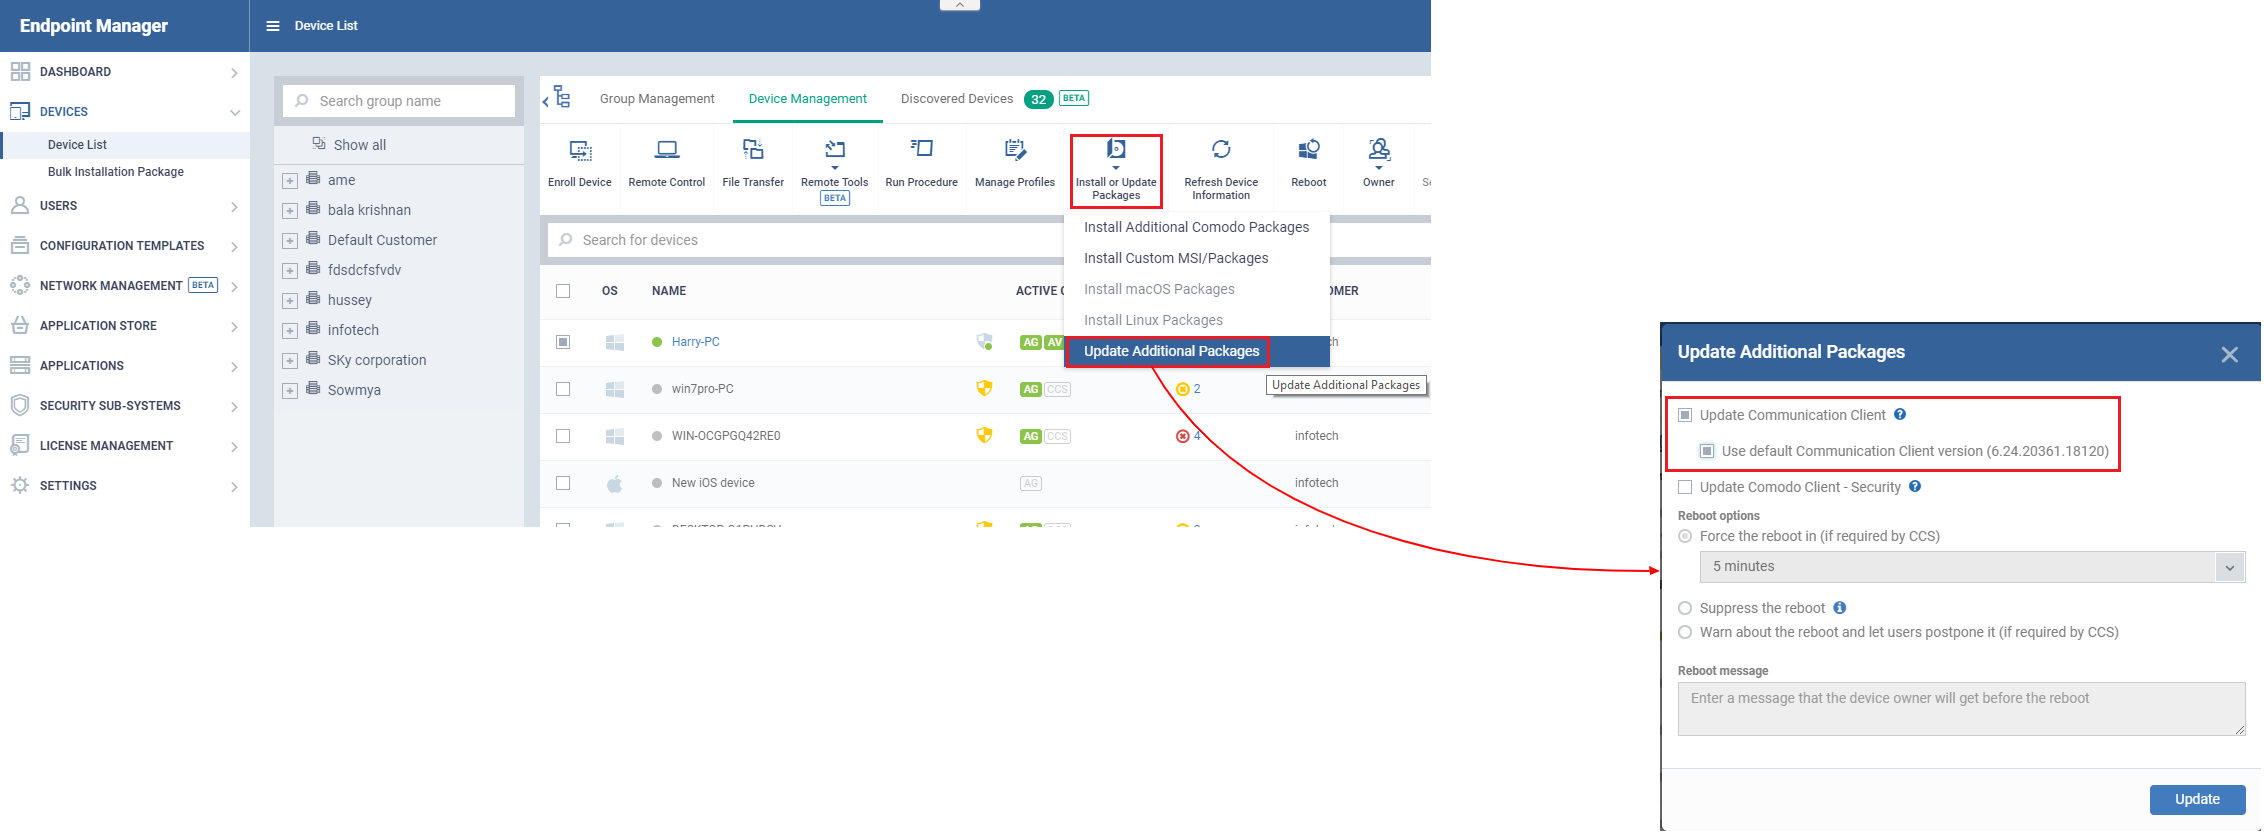
Update additional packages
- 'Devices' > 'Device List' > select a Windows profile > 'Install or Update Packages' > 'Update Additional Packages'
- The default client version is shown as follows:
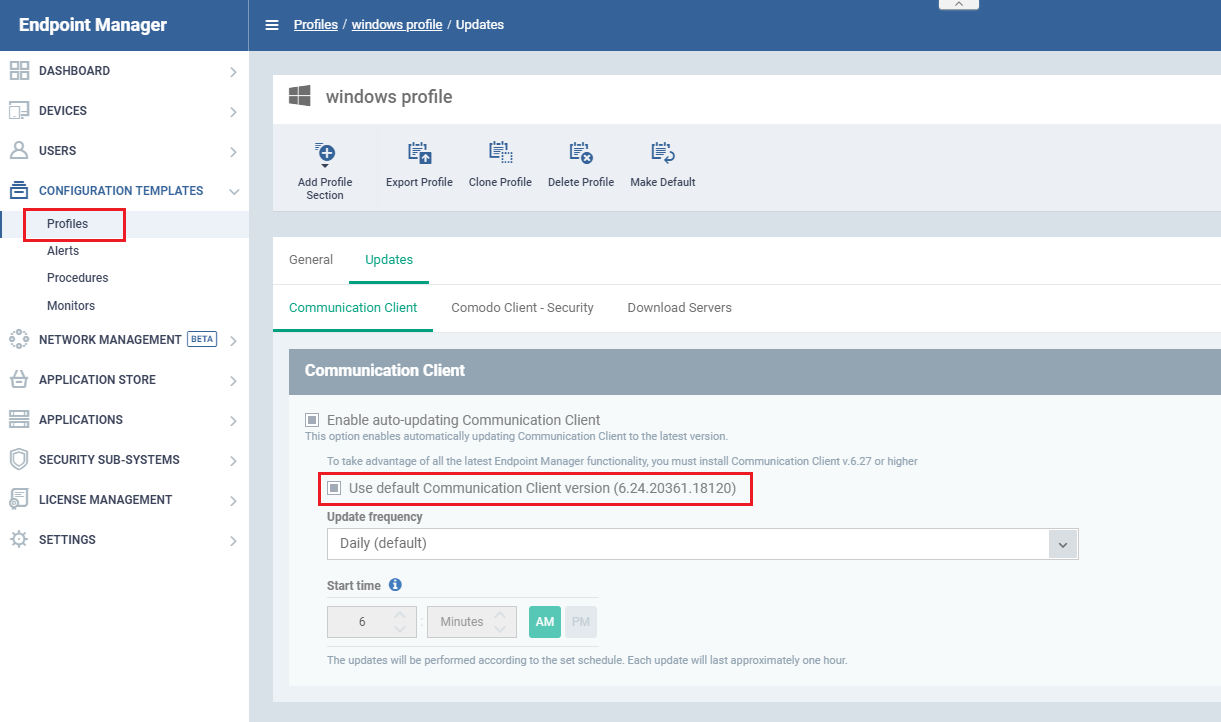
‘Updates’ section of a Windows profile
- Click 'Configuration Templates' > 'Profiles' > open a Windows profile > 'Updates' profile section
- The default client is shown as follows:


CONTACT US
Call now!  (973) 859 4000 ext 3025
---