How to use the service desk calendar
Click 'Staff Panel' > 'Calendars'
This wiki explains how to manage events on your calendar.
- Calendar appointments can be shared with other admins/staff members. This is useful when collaborating on tasks.
- You can also view and manage the calendars of other staff in order to create better and more transparent workflows.
Note. This wiki does not explain how to create a scheduled event from a ticket. See this wiki instead if that’s what you want to do.
Use the following links to jump to the section you need help with:
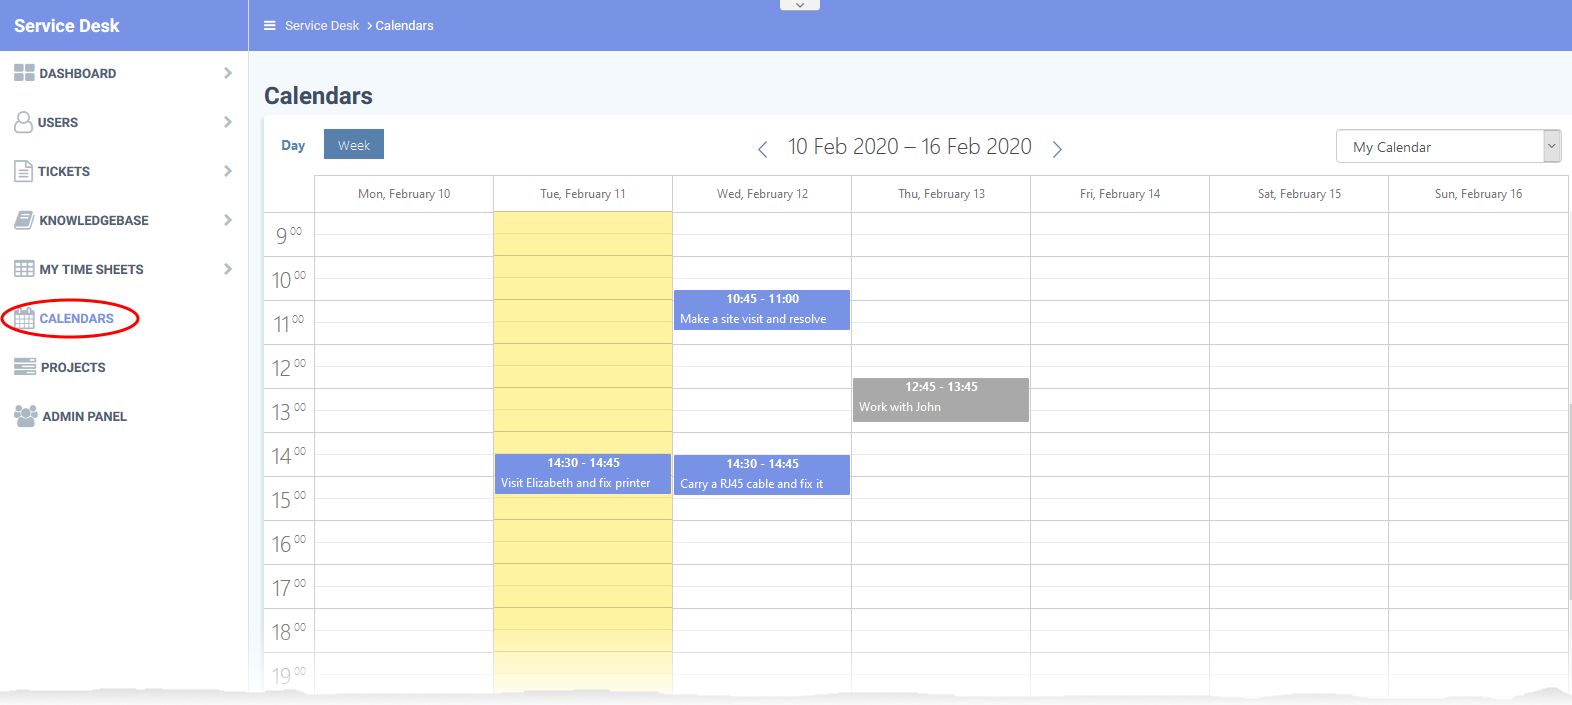
- The 'Calendars' interface
- Create a manual calendar entry for an appointment
- Reschedule or edit an appointment
- Login to Comodo One / Dragon
- Click 'Applications' > 'Service Desk'
- Open the 'Staff' panel (see last link on the left)
- Click 'Calendars' on the left
- By default, the current week is shown.
- Use the Day and Week buttons at the top left to switch between 'Day' and 'Week' views
- Use the '<' and '>' buttons to move to the previous/next week/day.

Click the drop-down at top-right to select the calendar you want to view:
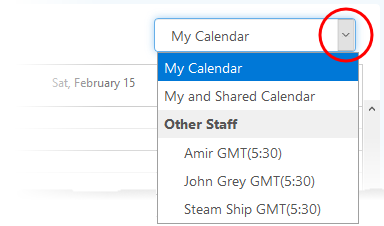

My Calendar - Displays calendar events scheduled for you. The entries include:
- Events you manually added
- Scheduled events created in tickets assigned to you
- Events scheduled for you by admins and other staff members
My and Shared Calendar - Events scheduled for you as above + events marked as shared.
- Blue background - Events scheduled for you
- Gray background - Shared events
Other Staff - Admins only. Choose the staff member whose calendar you want to view.
Create a manual calendar entry for an appointment
- Open the 'Staff' panel (see last link on the left)
- Click 'Calendars' on the left
- Choose 'My Calendar' from the drop-down at top-right to create an event for yourself
- Admins only – Click the drop-down menu and choose a staff member from 'Other Staff'. You can create events for other staff.


- Double-click on the time-slot which you wish to schedule for the ticket
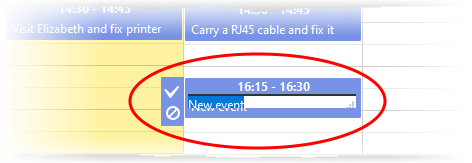

- Enter a short description of the task
- Click the check-mark
to save the entry
Share an event with others:
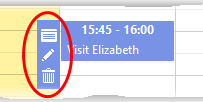
- Click on the event
- Click the 'Edit' icon that appears on the left (the top icon of the three)
- Enable the 'Shared' check-box
- Click 'Save'.
- Click on the event


Reschedule or edit an appointment
You can edit calendar entries to change the description, associate tickets, change the date/time, mark as shared, and more.
View/manage details of a calendar entry
- Open the 'Staff' panel (see last link on the left)
- Click 'Calendars' on the left
- Choose 'My Calendar' or 'My and Shared Calendar' from the drop-down at top-right
- Or choose another staff member from 'Other Staff' (admins only)
- Or choose another staff member from 'Other Staff' (admins only)
- Click on the event you want to view or manage
- Opens the 'Appointment Edit' dialogue. The 'Edit' dialog lets you:
- View and modify event description
- Associate tickets with the event
- Share or unshare the event
- View and change the scheduled time of the event
- View and modify event description


See Edit details of an appointment for more details


Edit details of an appointment
- Click the 'Details' icon
to view and manage details of the ticket.


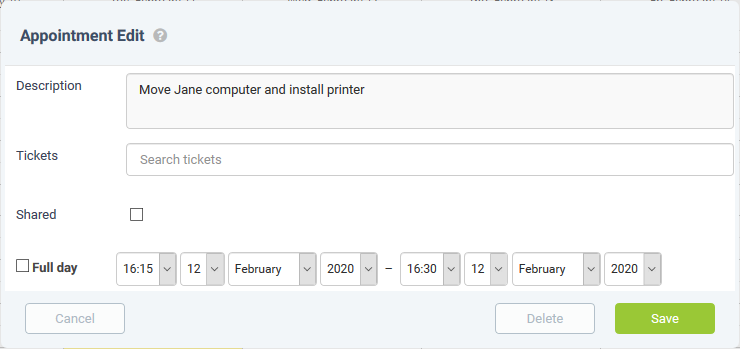
- Description - The description of the event. You can change the description if required.
- Tickets - View tickets associated with the event and add new tickets. This is optional. You can add multiple tickets to a calendar entry.
- Start typing the first few letters of the ticket number, username/email of the user that created the ticket or the subject of the ticket.
- Select the ticket you want to associate with the event from the search results:
- Repeat the process to add more tickets
- Start typing the first few letters of the ticket number, username/email of the user that created the ticket or the subject of the ticket.
- Shared - Makes the event visible to all admins/staff members when they select 'My and Shared Calendar' from the drop-down.
- Time Period - Shows the date/time of the event.
- Simply change the values in the drop-downs to reschedule the event.
- Select 'Full day' if you expect the event to last the full working day.
- Simply change the values in the drop-downs to reschedule the event.
- Click 'Save' after making your changes


---