How to add and manage customer organizations
Click 'Staff Panel' > 'Users' > 'Customers'
- A customer is an organization, usually a company or business from whom you will accept tickets. 'Users' are the people who actually submit the tickets.
- Customers added to your Comodo One / Dragon account are automatically imported to Service Desk. Such 'Managed' customers are universally available in all integrated modules (Endpoint Manager, Quote Manager etc).
- Login to Comodo One / Dragon > Click 'Management' > 'Customer' to add and manage customers in Comodo One / Dragon
- Login to Comodo One / Dragon > Click 'Management' > 'Customer' to add and manage customers in Comodo One / Dragon
- Alternatively, you can create 'standalone' (aka 'unmanaged') customers in Service Desk. Customers added via Service Desk are not available in Comodo One / Dragon or other modules. You can add such standalone customers to Comodo One / Dragon later to convert them to fully managed.
- This article explains how to add and manage stand-alone customers in Service Desk.
Use the links below to jump to the area you need help with:
- The customer interface
- Add a customer
- Manage customer details
- Manage users of a customer
- Manage forms
- Manage tickets
- Manage notes
- View customer contracts
- Remove unmanaged customers
- Export customer list
- Login to Comodo One / Dragon
- Click 'Applications' > 'Service Desk'
- Open the staff panel (See the last link on the left)
- Click 'Users' > 'Customers'

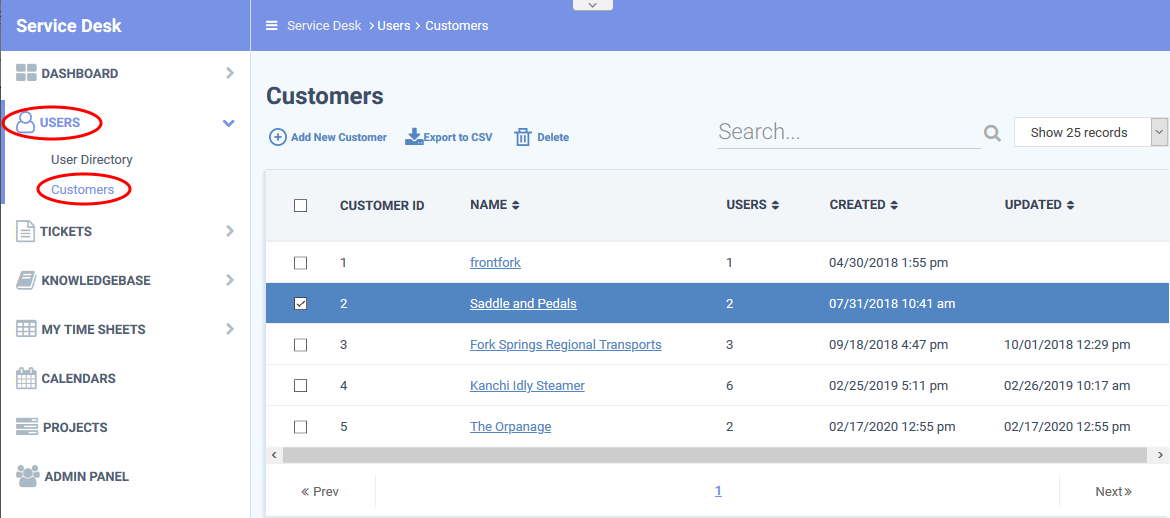
- Customer ID - The identity number assigned to the customer by Service Desk.
- Name - The organization or company that is your customer.
- Click the name of a customer to open their details interface. The customer details interface lets you:
Manage customer details
Add and manage users of the customer
Manage forms for the customer
View and manage tickets
Manage notes
View customer contracts
- Click the name of a customer to open their details interface. The customer details interface lets you:
- Users - Number of Service Desk users belonging to the customer company.
- Created - The date on which the customer was added to Service Desk.
- Updated - Date and time at which the customer details were most recently updated.
- Open the staff panel (see the last link on the left)
- Click 'Users' > 'Customers'
- Click 'Add New Customer' at the top

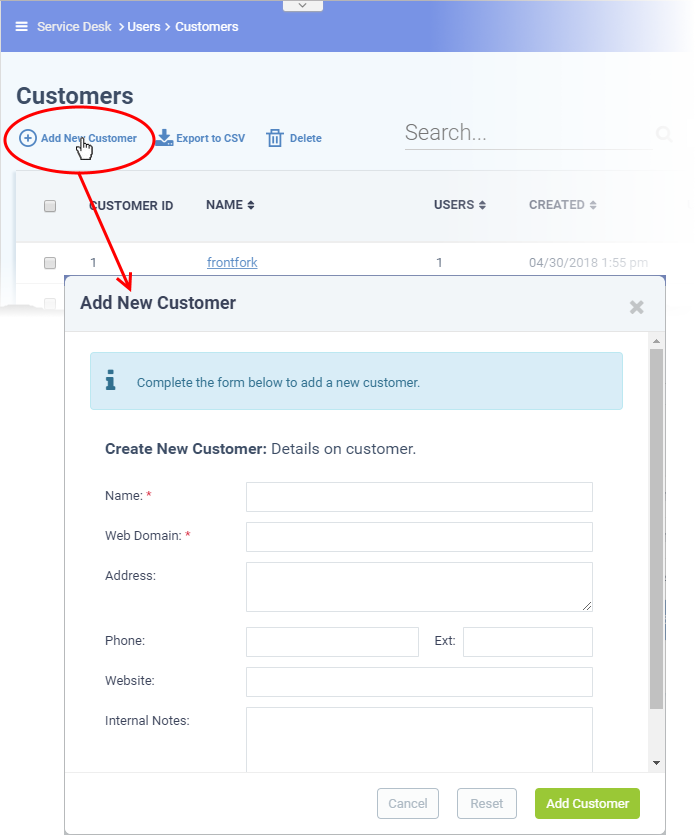
- Name: Enter a label for the customer company.
- Web Domain: Enter the domain that the customer uses for employee email. For example, enter 'example.com' if the customer's employees have email addresses like alice@example.com.
Service Desk creates two new users with email addresses in this domain - 'Monitor Agent' and 'Patch Management Agent'. These accounts are used to receive automatically generated tickets from Endpoint Manager.
They also assign to the customer any guests who submit tickets from an email at their domain.
- Address and Phone: Contact details of the company.
- Website: URL of the customer's public-facing / marketing website.
- Internal Notes: Enter any comments about the customer.
|
|
- Click 'Add Customer'
- The customer is added and their details interface opens:

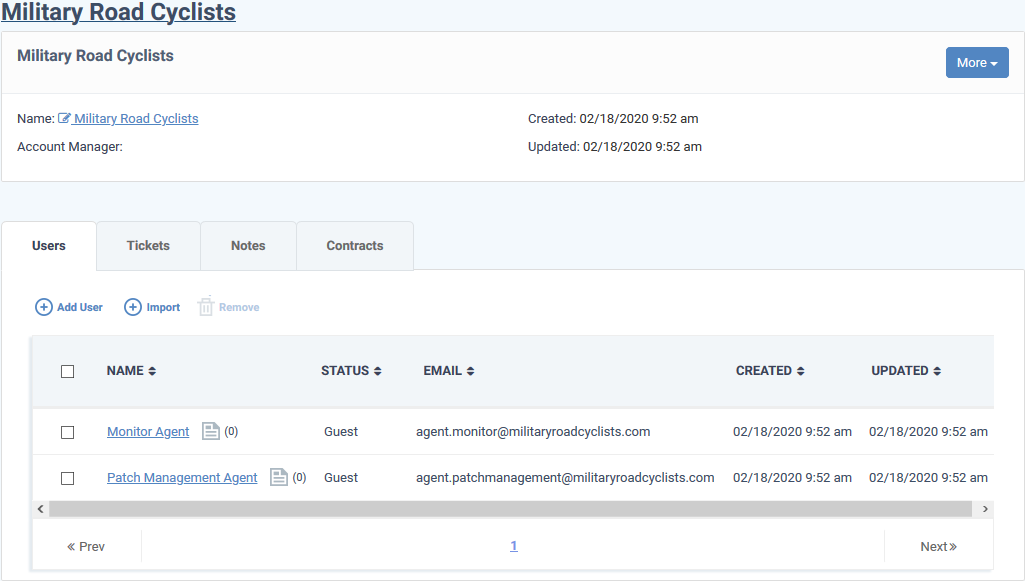
Two new users and email ids are automatically created - the Monitor Agent and the Patch Agent. The email IDs of these two agents are used to collect tickets which have been auto-submitted to service desk by other Comodo One / Dragon modules.
Next: Manage Details of a customer.
|
|
- Click 'Staff Panel' > 'Users' > 'Customers'
- Click the name of the customer to open its details interface.
The details interface lets you view and update both managed and non-managed customers.
- 'Managed' customers - Those added through the Comodo One / Dragon console. Managed customers are available for selection in all Comodo One modules, including Endpoint Manager and CRM.
- 'Non-Managed' customers - Those added directly via the Service Desk interface. These customers are only available in Service Desk.
You can also configure:
- The default email account for outgoing mails sent on behalf of the customer.
- The account manager responsible for the customer
- Ticket auto-assignment rules and more.
View and manage customer details
- Open the staff panel (see the last link on the left)
- Click 'Users' > 'Customers'
- Click the name of the customer company to open its details interface.
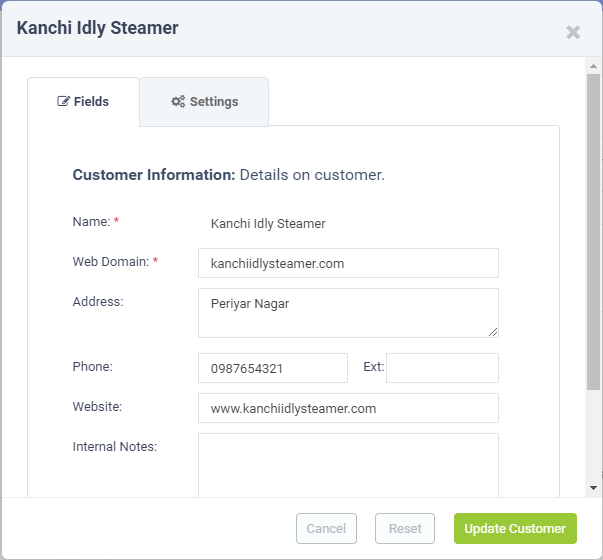
- Click the name of the company in the details interface to open its configuration interface

The configuration interface has two tabs:
- Fields - View and edit general customer details.
- Settings - View and edit advanced details like outgoing email, account admin, auto-assignment rules, and more.
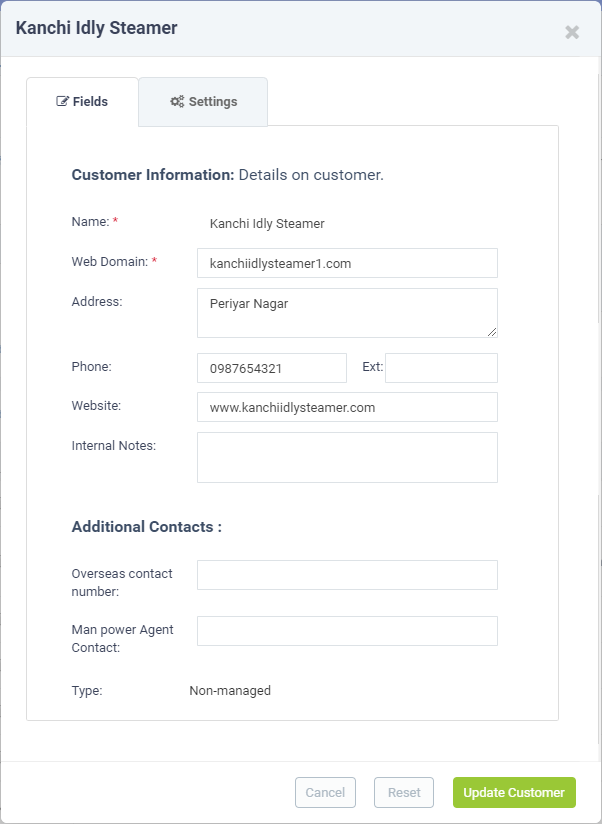
- The fields tab shows general details of the customer and allows you to edit them as required.
- If required, you can create custom form fields for the customer. Click 'Admin Panel' > 'Manage tab' > 'Forms' > 'Add Custom Form' to create a new form
Edit the details as required.
Name - The company added as customer to service desk. You cannot edit the name from here.
Web Domain - The domain used for email by your customer.
- Service Desk creates two new users - 'Monitor Agent' and 'Patch Management Agent' - with email addresses at this domain. These accounts are used to receive automatically generated tickets from Endpoint Manager.
- They are also used to assign to your customer any guests who submit tickets from an email address at this domain.
- You can change the domain name if required
Address and Phone - The contact details of the customer. You can change these details as required.
Website - The URL of the company's website. You can change the website details if required.
Internal Notes - Enter any comments about the customer.
Type - Indicates whether the customer is 'managed' (added through Comodo One / Dragon) or 'non-managed' (stand-alone customer added through Service Desk)
The 'Settings' tab

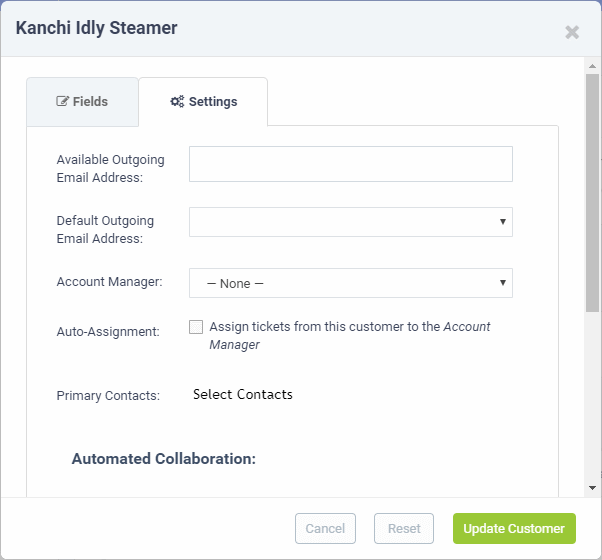
Available Outgoing Email Address - Shows all addresses added which are capable of sending outgoing mail.
- You can configure these email addresses in 'Admin Panel' > 'Emails' > 'Emails'.
Default Outgoing Email Address - Select the address you want to use to send emails (ticket responses) to users who belong to this customer.
Account Manager - The drop-down shows all admins and staff added to service desk. Choose the account manager responsible for the customer.
Auto Assignment - Choose whether or not tickets created by users of the customer are automatically assigned to the account manager.
Primary Contacts - Select the person with whom your staff can liaise on issues.
Automated Collaborations - Collaborators receive copies of all communications between staff and users during the progress of a ticket. Collaborators can respond to communications.
- Primary Contacts – Add collaborators from the contact list.
- Customer Members – Add collaborators from users who belong to the customer.
Main Domain
- Auto Add Members From: Guests are auto-assigned to a customer if the email address they used to submit a ticket matches any domain in this field.
Click 'Update Customer' for your settings to take effect.
Manage users of a customer
Click 'Staff Panel' > 'Users' > 'Customers' > click on a customer name > Open the 'Users' tab
- The users tab lets you add or remove users for customers
Add users to a customer
There are two places you can add users to a customer:
1.The 'User Directory' area
- Click 'Staff Panel' > 'Users' > 'User Directory'
- Click on a user name to open their details
- Click 'Add Customer'
- See this wiki if you need more help with this.
2. The 'Customers' area
- Click 'Staff Panel' > 'Users' > 'Customers'
- Click on a customer name
- Open the 'Users' tab and click 'Add User'
- Alternatively, click 'Import' to import users from a .csv file
The rest of this section explains option 2 above in more detail.
Manually add users to a customer
- Click 'Staff Panel' > 'Users' > 'Customers'
- Click the name of a customer company to open its details interface
- Click the 'Users' tab to view a list of users belonging to the customer
- Click the 'Add User' link:

- Tip. You can configure the fields in the form above in 'Admin Panel' > 'Manage' > 'Forms' > 'Contact Information'.
Complete the details of the new user.
- Email Address: Contact mail address. This doubles-up as their username to login to your support portal.
- Full Name: First name and last name of the user.
- Phone Number: The contact number of the user.
- Internal Notes: Enter any comments about the user.
- Register with Default Settings - Select whether the registration should use the settings in 'Admin Panel' > 'Settings' > 'Users'
Admins can configure how new user accounts are registered in 'Admin Panel' > 'Settings' > 'Users'. See this wiki for more details.
- Leave selected if you want to use the default settings.
- Deselect to choose a different registration method.
- Leave selected if you want to use the default settings.

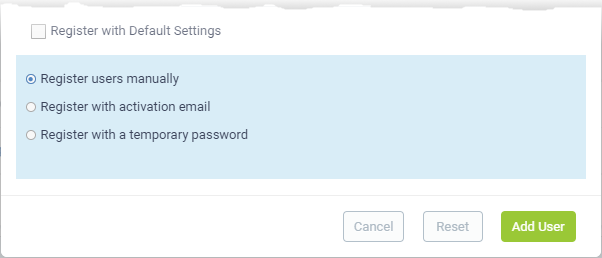
- Register users manually - The user has initially added a guest and needs to be manually registered afterwards. You can register a guest as follows:
- Click ‘Users’ > ‘User Directory’ > click on the name of the guest > Click the ‘Register’ button
- See this wiki if you need help
- Click ‘Users’ > ‘User Directory’ > click on the name of the guest > Click the ‘Register’ button
- Register with activation email - The user is initially added as a guest and sent a mail which contains a link to register their account.
- The link leads to your support web portal where the user will create a password and so register their account. After registration, the user can login and manage/view their tickets.
- The link leads to your support web portal where the user will create a password and so register their account. After registration, the user can login and manage/view their tickets.
- Register with a temporary password - Create a temporary account password which registers the user immediately.
You need to send the password and URL of your support portal to the user. This allows them to login and manage their tickets.
- 'Require password change on first login' - Forces the user to create a new password after logging in for the first time (recommended).
- 'Require password change on first login' - Forces the user to create a new password after logging in for the first time (recommended).
- Default User Timezone - Select the time zone to which the user belongs
Click 'Add User'. The user is added to Service Desk and assigned to the customer company. Repeat the process to add more users.
Import users to a customer
- Click 'Staff Panel' > 'Users' > 'Customers'
- Click the name of a customer company to open its details interface
- Click the 'Users' tab
- Click the 'Import' link at the top:
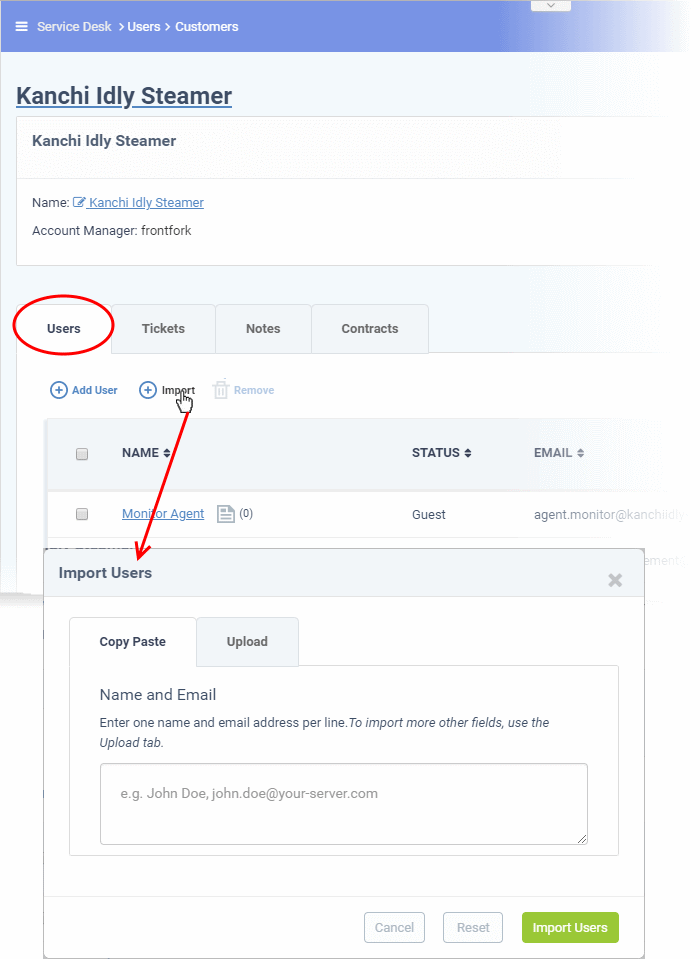
There are two ways to import users:
1. Copy Paste - Import users with name and email address only.
- Enter the user's full name, followed by a comma, then their email address.
- Add more users in subsequent lines.
- Click 'Import Users' to add the users as guests.
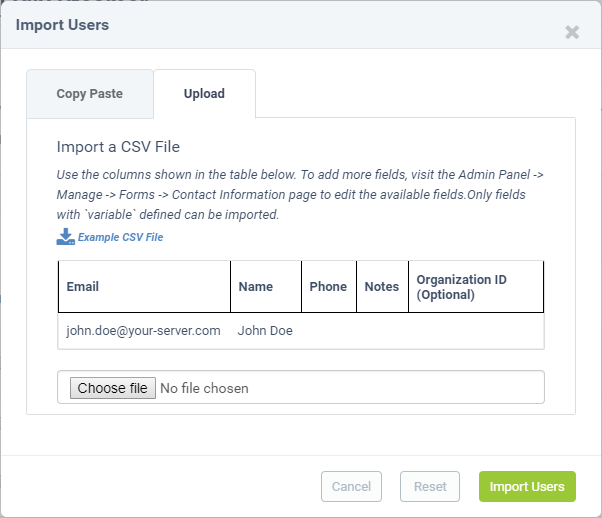
2. Upload - Import users from a .csv file. More details can be added about a user with this method.
- Create a .csv file of users that you want to import. The file should have the following column headers:
Email,Name,Phone,Notes,Customer ID
Note: Customer ID is mandatory to import users to the correct company. You can view the customer’s ID at 'Staff Panel' > 'Users' > 'Customers'.
- Each line should contain the contact information of a single user
- Save the .csv, then click 'Choose file' to upload the file to Service Desk:
- Click 'Import Users'. The users will be added to Service Desk and assigned to the customer company.
- Depending on your settings, imported users will be added as guests, or their account activation started.
You can configure default registration settings in 'Admin Panel' > 'Settings' > 'Users'.
See this wiki if you need help with this

- Click 'Staff Panel' > 'Users' > 'Customers'
- Click the name of a customer company to open its details interface
- Click the 'Users' tab to view users who belong to the customer
- Select the users you want to delete and click the 'Remove' button

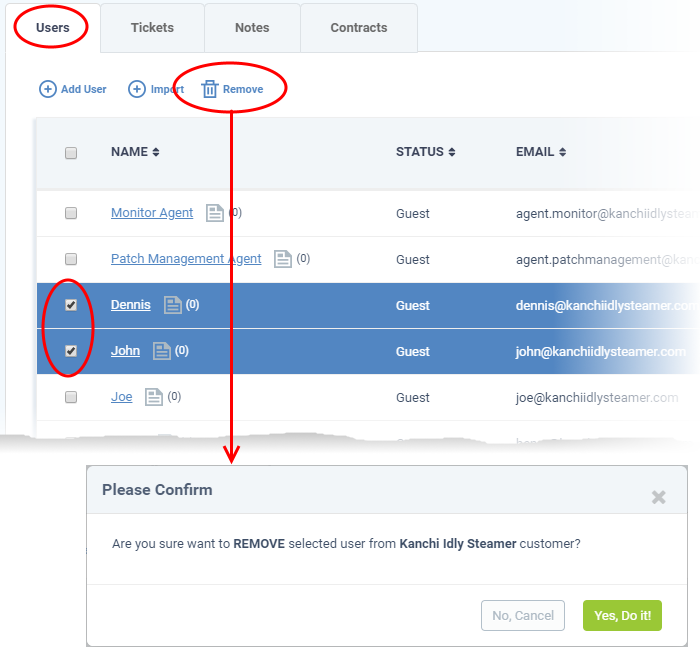
- Click 'Yes, Do it' in the confirmation dialogue to remove the user.
- The user will not be able to login to the web portal and generate tickets.
Manage forms
You can add extra fields to a customer's detail page so you can include more information about them.
- Prerequisite - You must first create a custom form in 'Admin Panel' > 'Manage' > 'Forms' > 'Add New Custom Form'.
- A 'form' can be as little as a single field or can have multiple fields.
- For example, you might create a form for a customer's Tax ID number, or a larger form for each of the company's 'C' level executives.
- Once created, you can add these additional forms to any customer detail page.
Add additional details about a customer
- Click 'Users' > 'Customers'
- Click the name of a customer to open its details interface
- Click the 'More' button at top-right and choose 'Manage Forms'
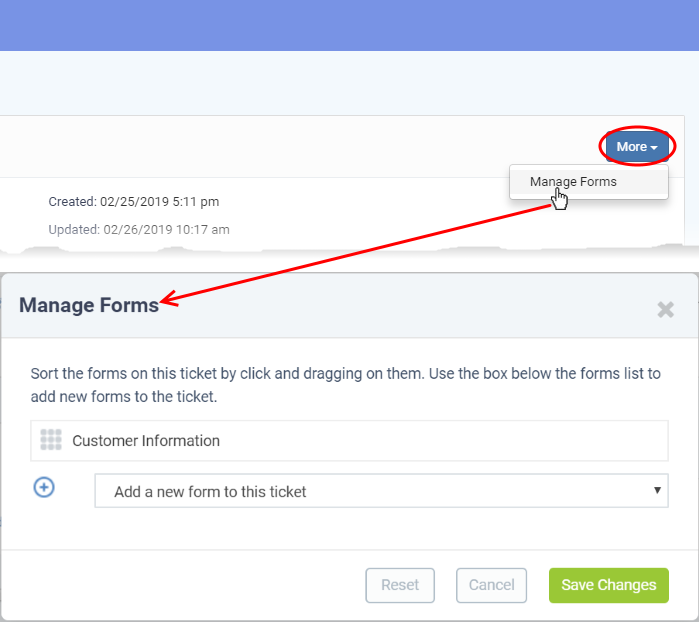
- The drop-down contains all forms created in 'Admin Panel' > 'Manage' > 'Forms'
- Select the form you want to add from the drop-down.


- Repeat the process to add more forms
- Drag-and-drop the forms to choose the order in which they appear on the details page.
- Click the 'Save Changes' button.
Admins and staff can complete the additional fields at any time:
- Click 'Users' > 'Customers'
- Click the name of the customer to open its details page
- The new forms appear as configured:

- Complete the form and click the 'Update Customer' button at the bottom.
- Click 'Staff Panel' > 'Users' > 'Customers'
- Click the name of a customer company to open its details interface
- Click the 'Tickets' tab to view a list of tickets generated by users belonging to the customer
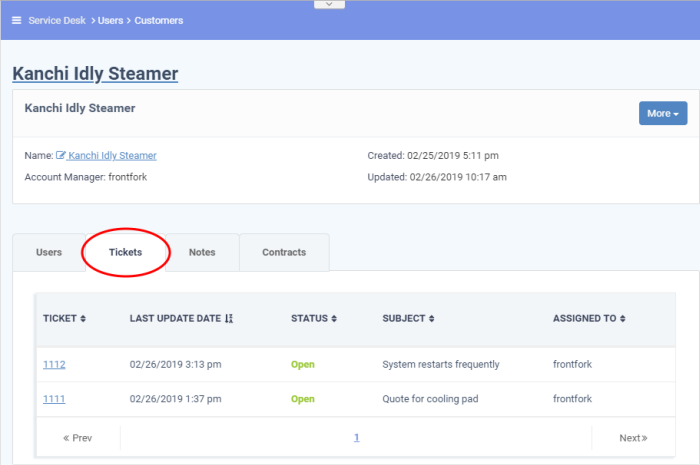
- Ticket: The number assigned to the ticket.
- Click the ticket number to open its details screen. See this wiki for help with ticket actions.
- Place your mouse over a ticket number to see a preview of the ticket
- Click the ticket number to open its details screen. See this wiki for help with ticket actions.
- Last Update Date: The date and time of the most recent activity on the ticket.
- Status: Whether the ticket is open, closed, overdue or paused.
- Subject: An outline of the issue. This is entered in the 'Issue Summary' field in the web portal by the user.
- Assigned To: The name of the staff member to whom the ticket is allotted.
Manage notes
The 'Notes' feature lets you add general comments about a customer. Notes are internal, so they are only visible to staff members.
- Click 'Staff Panel' > 'Users' > 'Customers'
- Click the name of a customer company to open its details interface
- Click the 'Notes' tab
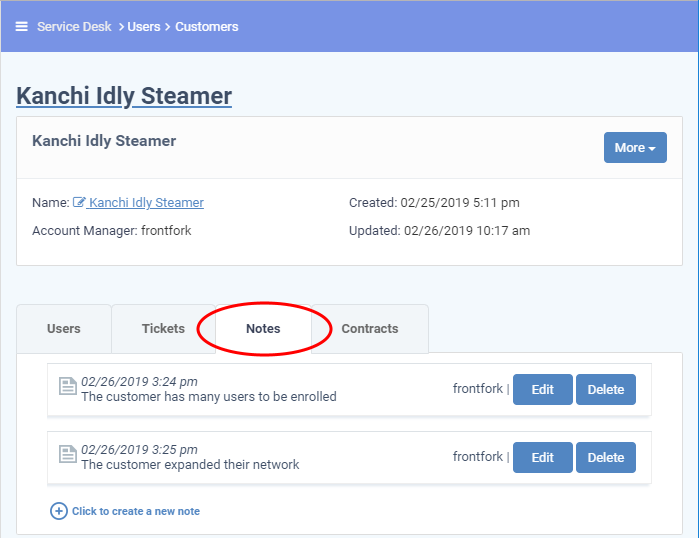
- Click the 'Click to create a new note' link, enter the required content and then click the 'Create' button at the bottom to add a new note.
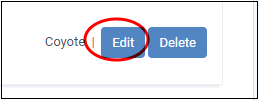
- Click the 'Edit' button at the far end. to view/edit a note.

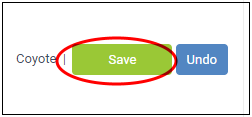
- Click the 'Save' button to save an edited note. Click 'Undo' to revert your changes.

|
A service contract between you and a customer can include:
|
- Click 'Staff Panel' > 'Users' > 'Customers'
- Click the name of a customer company to open its details interface
- Click the 'Contracts' tab

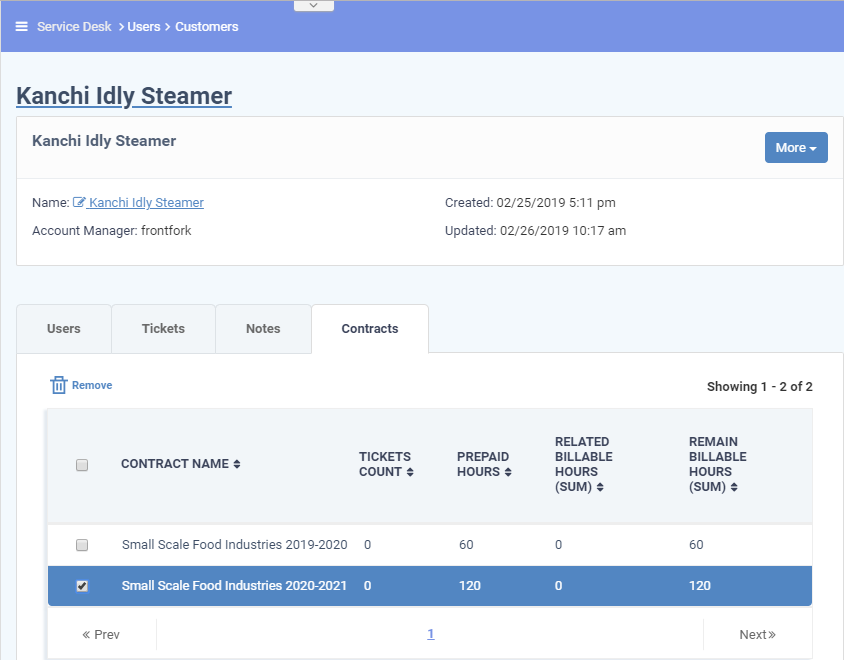
- Contract Name: The label of the contract created for the customer.
- Ticket Count: Number of tickets associated with the customer.
- Pre-paid Hours: The number of hours covered by the fee mentioned in the contract.
- Related Billable Hours (Sum): Total chargeable hours spent by staff working on tickets for the customer on all three service types (Onsite, Remote and Telephone).
- Remaining Billable Hours (Sum): Amount of hours left of the customer's total pre-paid hours.
- Customers added via Comodo One / Dragon are known as 'Managed' customers. They are automatically imported into Service Desk and cannot be removed. This is because they also appear in other products like Endpoint Manager.
- Customers added via the Service Desk interface are known as 'Unmanaged' customers. You can remove unmanaged customers because they only exist in Service Desk and not in other products.
- You can only remove unmanaged customers that have no enrolled users. You need to delete all users from the customer before you can remove the customer itself.
Remove customers
- Click 'Staff Panel' > 'Users' > 'Customers'
- Select the customer you want to remove
|
|
- Click 'Delete' at the top.

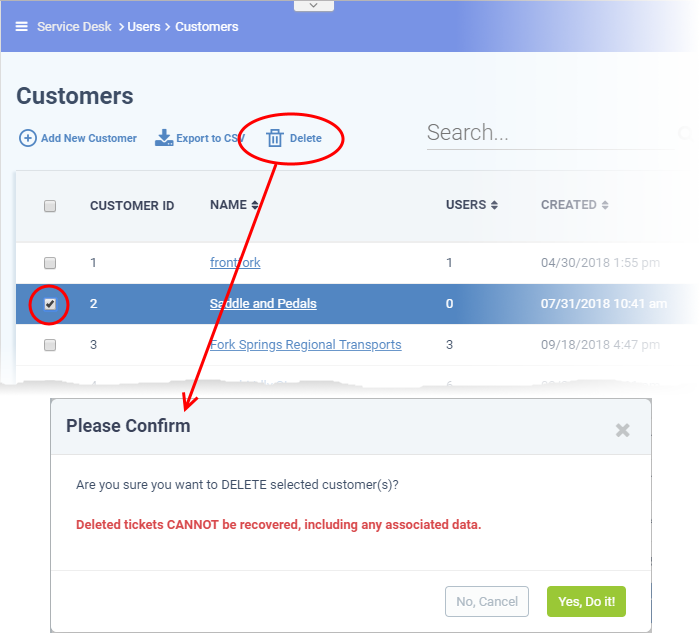
- Click 'Yes, Do it!' in the confirmation dialog
Export customer list
You can generate a report on customers (managed and unmanaged) as follows:
- Open the staff panel (See the last link on the left
- Click 'Users' > 'Customers'
- Click 'Export to CSV':

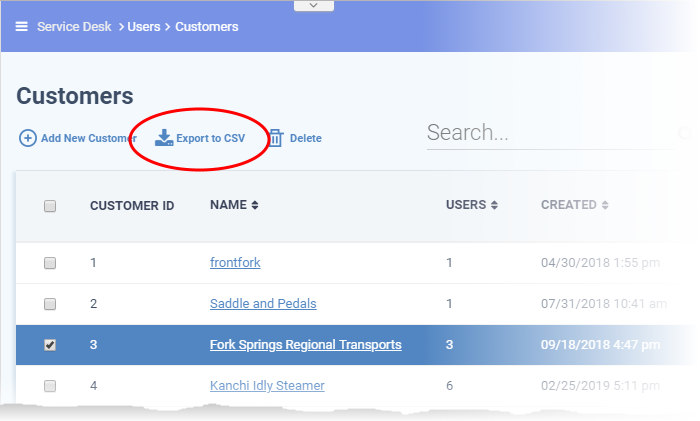
.csv files are best viewed in spreadsheet applications like Microsoft Excel and OpenOffice Calc.


---