How to add staff and assign or reassign them to roles
Click 'Users' > 'User List'
- Admins and staff are the personnel who access Endpoint Manager (EM) to manage devices and resolve issues. You can convert a user to a staff member by assigning them the appropriate role.
- The role determines their permissions in the Endpoint Manager interface. Xcitium One ships with a number of predefined roles and you can create custom roles as required.
- Admins and staff created in Xcitium are automatically imported to EM with the same role they have in Xcitium.
- Staff you directly create in EM are only available in EM. They are not available to other Xcitium modules like Service Desk and Secure Internet Gateway.
Use the links below to jump to the task you need help with:
Admin and staff added to Xcitium are available in all Xcitium modules, including Service Desk, Secure Web Gateway, CRM, cWatch and more.
- Login to Xcitium
- Click 'Management' > 'Staff'
- Click 'New Staff'
- Complete the new staff form:

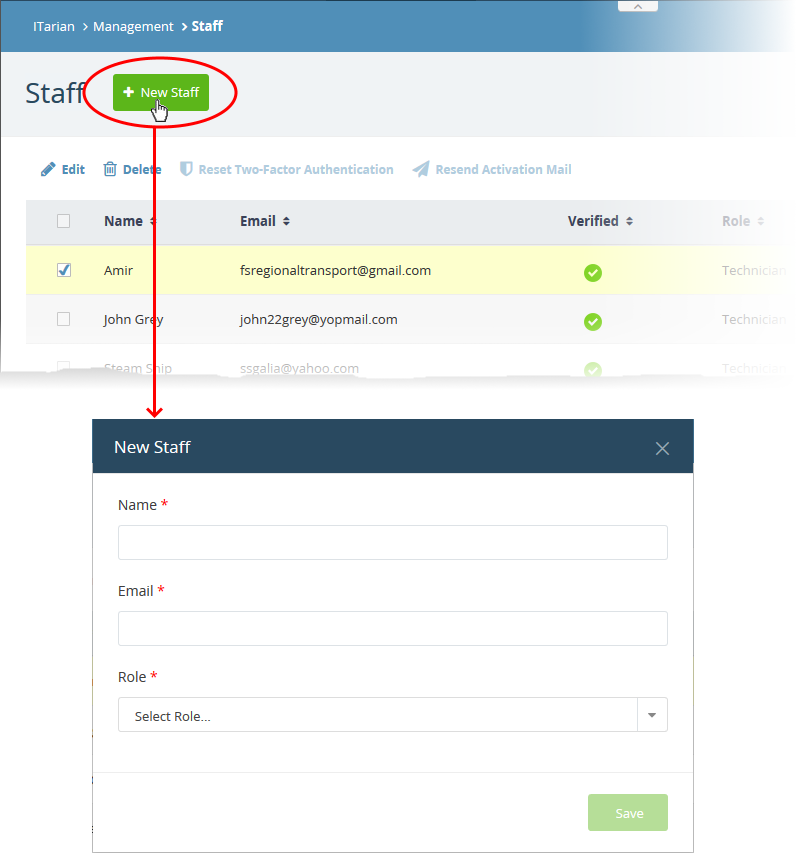
- Name - First and last name of the admin/staff member.
- Email - Contact email address of the admin/staff member.
- The account activation mail is sent to this address.
- The email address doubles-up as their username to login to Xcitium
- The account activation mail is sent to this address.
- Role - Select the role of the admin/ staff from the drop down. You can always change this later if required.
- Click the 'Save' button.

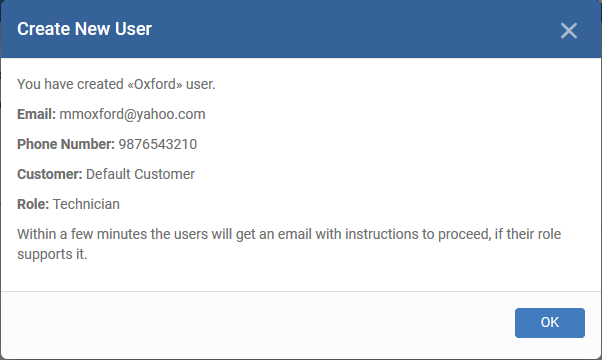
- Click 'OK'
A confirmation mail is sent to the user containing an account verification link. The user should click the link to verify their account then create an Xcitium password.
- Once verified, the staff member is enrolled as a user in Endpoint Manager. You can view all users at 'Users' > 'User List'.
- You can now assign a role with admin or staff privileges to the user.
Next: Assign role to users / staff
Staff you add directly to EM are available only in EM. They are not available in other Xcitium modules like Service Desk. Once added, you can assign roles with different permissions to the staff member.
There are two ways you can add users:
1. Manually. Add individual users to EM
- Click 'Users' > 'User List' > 'Create User' to start this process.
- You need to specify their name, email address, the company they belong to, and their EM role.
- See Manually Add Users if you need help with this.
2. Import from .csv. Import a list of users from a comma separated values file.
- Click 'Users' > 'User Import' to start the process
- The file should contain the following, separated values: 'Username' (mandatory), 'Email address' (mandatory) and 'Phone number' (optional).
- The file should not contain column headers and each line should contain a single user.
- Users are assigned the role you specify in the import dialog.
- See Import Users from CSV if you need help with this
Users assigned with a role with admin privileges will receive an account activation email.
- Login to 'Xcitium
' - Click 'Applications' > 'Endpoint Manager'
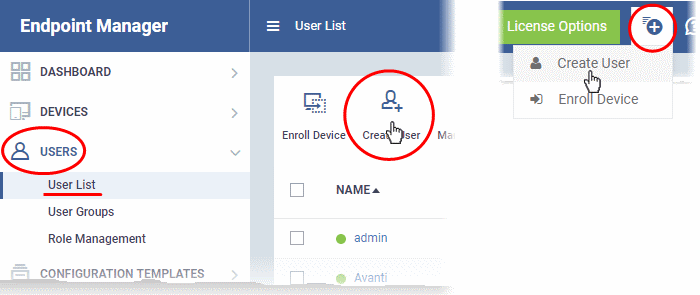
- Click 'Users' > 'User List'
- Click the 'Create User' button
or
- Click the 'Add' button
on the menu bar and choose 'Create User':

Username - Enter the login username for the user.
Email - Account activation and device enrollment mails are sent to this address. The email address doubles-up as the username for the staff to login to EM.
Phone Number (optional) - The contact number of the user.
Customer - Choose the company to which the user belongs.
- MSP customers can add users from any company they have added to their account.
- Enterprise customers can only add users to the default company.
Assign role - Select the role you want to assign to the new user:

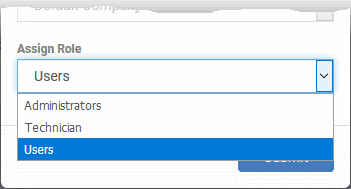
EM ships with three default roles:
- Administrators - Can login to EM and access all management interfaces. This role can be edited as required.
- Technician - Can login to EM and access all management interfaces. The technician role has fewer privileges than the administrator role. This role can be edited as required.
- Users - Cannot login to EM. If required, you can change role permissions to have access to the admin console.
- You can create custom roles which grant access to selected areas of EM. These roles can be assigned to users as required.
- All roles created in EM appear in the 'Assign Role' drop-down when adding a new user. See this wiki to learn more about creating new roles in EM.
- You can create custom roles which grant access to selected areas of EM. These roles can be assigned to users as required.
- Click 'Submit' to create the user.

- Repeat the process to add more users.
Account activation mails are sent to users that have with roles with admin privileges. They can activate their account and set their login password by clicking the link in the email. An example mail is shown below:
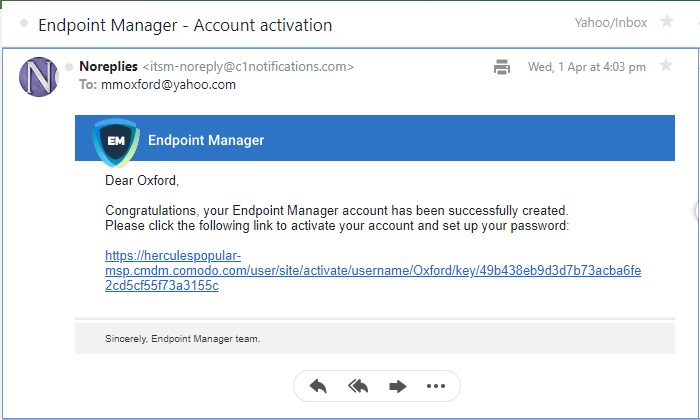
- After activation, the user can login to EM with their user-name and password. Login at: https://<your company name>-msp.cmdm.Xcitium.com/ as shown in the mail link.
- The user may also have to setup two factor authentication if this feature has been enabled by the account admin.
You bulk-import users from a .csv file to accelerate the user-creation process. You can create .csv files in spreadsheet applications like Microsoft Excel or OpenOffice Calc.
- Open Excel or Open Office Calc.
- Each row of the spreadsheet represents one user.
- You need to enter user information in the first three columns of each row:
- Username (mandatory)
- Email address (mandatory)
- Phone number (optional)
- Username (mandatory)
- For example, "james", "james@ditherscons.com", "9876543210"
- The .csv should not contain column headers
- Click ‘Save as...’ then select .csv from the options.
Import users from .csv
- Click 'Users' > 'User List'
- Click 'Import User' in top-menu:
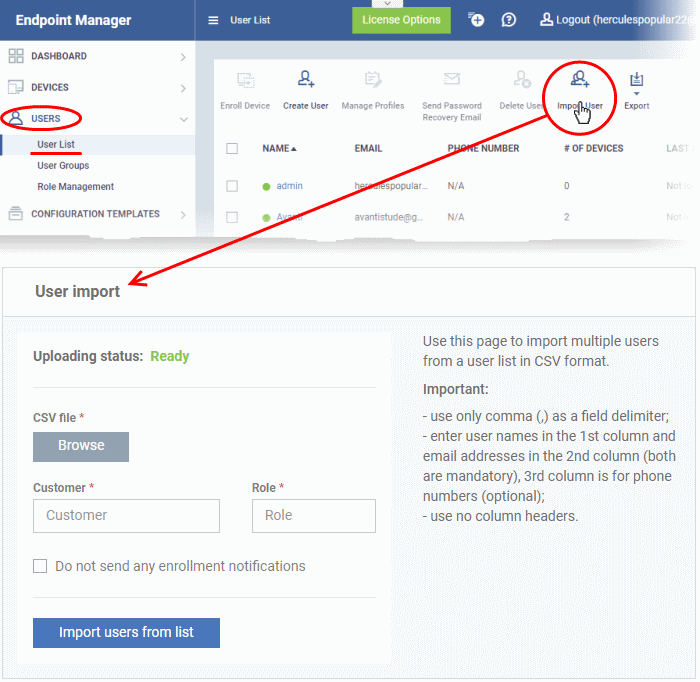

CSV File - Click 'Browse' and navigate to your saved .csv.
Customer - The company to which you want to add the user.
- MSPs can add users to any customer they have added to their account. Type the first few letters of the company name and select from the suggestions.
- Enterprises can only add users to the default company. Enter 'Default Company' in the ‘Company’ field.
Role – Choose the role you want to assign to all users in the list. Type the first few letters of the role and select from the suggestions.
EM ships with three default roles:
- Administrators - Can login to EM and access all management interfaces. This role can be edited as required.
- Technician - Can login to EM and access all management interfaces. The technician role has fewer privileges than the administrator role. This role can be edited as required.
- Users - Cannot login to EM. If required, you can change role permissions to have access to the admin console.
- You can create custom roles which grant access to selected areas of EM. These roles can be assigned to users as required.
- All roles created in EM appear in the 'Role' suggestions. See this wiki to learn more about creating new roles in EM.
- You can create custom roles which grant access to selected areas of EM. These roles can be assigned to users as required.
Do not send any enrollment notifications - Choose whether account creation and account activation emails are sent to imported users. Note: Notification mails are not sent if you select the 'Users' role.
Click 'Import users from List' when you are ready.
- You can view all imported users at ‘Users’ > ‘User List’.
- Account activation mails are sent to users that have with roles with admin privileges. This includes the standard ' Administrator' and 'Technician' roles. They can activate their account and set their login password by clicking the link in the mail.
- You can assign staff to a ‘standard’ Endpoint Manager role, or to a custom role that you create.
- You can assign multiple roles to a single user.
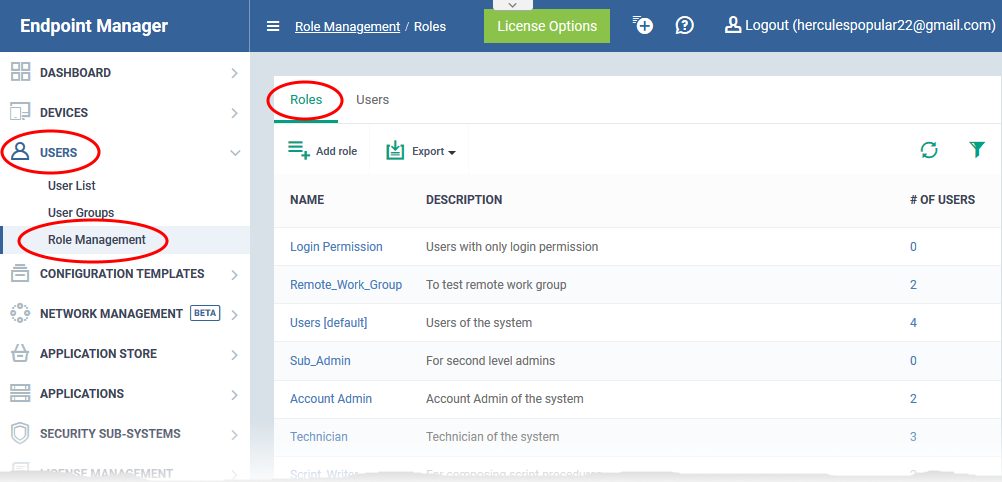
- Click 'Users' > 'Role Management' > 'Roles' to view, add and manage roles.
- See this wiki if you want help to create a custom role.
There are two ways to assign roles to staff:
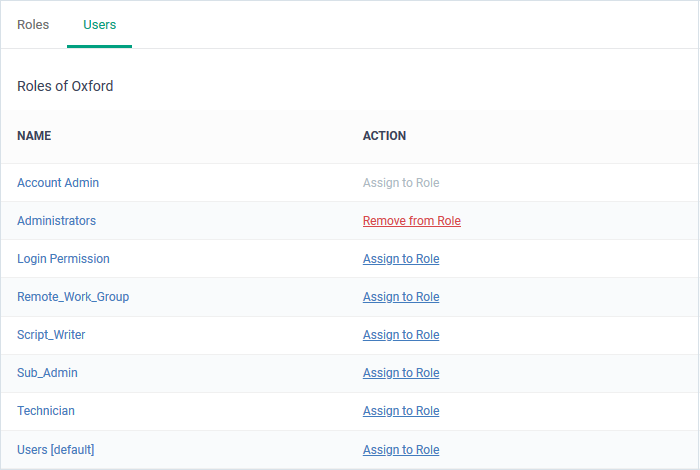
The 'Users' tab lets you view the roles assigned to each user. A role governs a users permissions within Endpoint Manager. You can add new roles to a user, or remove roles from a user.
- Click 'Users' > 'Role Management'.
- Select the 'Users' tab.

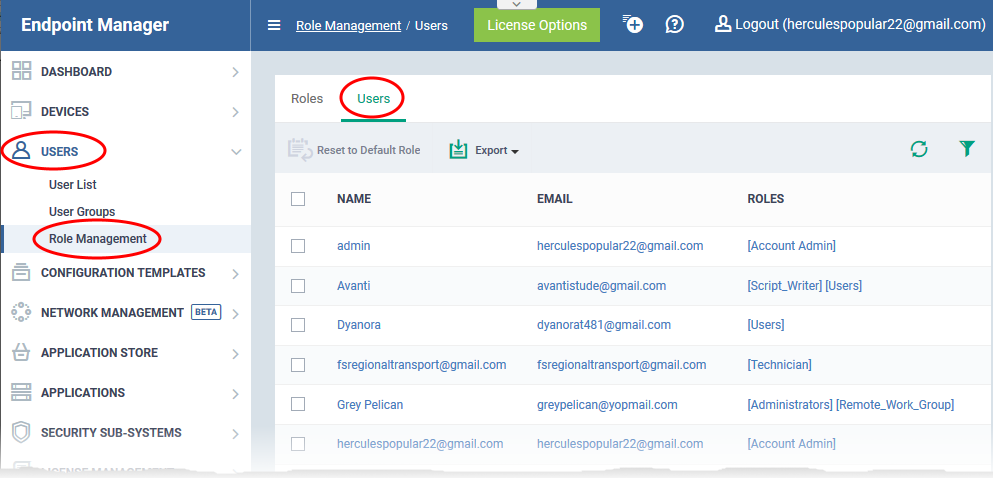
- Click the name of the user whose roles you want to manage.
- The interface shows all roles you can assign to the user.
- Click 'Assign to Role' to delegate a new role to the user .
- Click 'Remove from Role' to withdraw membership of a role from a user.
See this wiki if you want help to create a custom role.
- Click 'Users' > 'Role Management'.
- Select the 'Roles' tab.

- Click on a role name then click the 'Assign Users' tab:

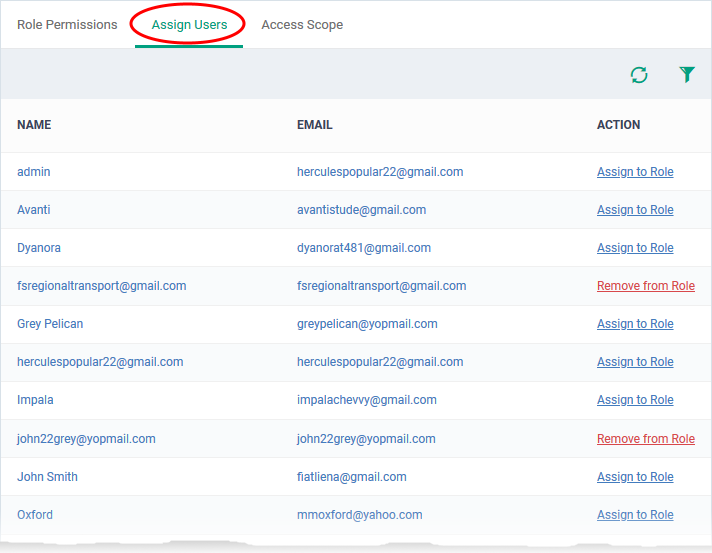
The ‘Name’ column shows all available users, The links in the 'Action' column indicate whether they are currently assigned the role.
- Click 'Assign to Role' to place a user in the role.
- Click 'Remove from Role' to unassign a user from the role.
How to create a new role with custom permissions and assign it to users


---