North America
How to configure antivirus settings on Linux profile
- Linux profiles let you configure virus scans and general settings of Xcitium Client Security (CCS) on managed devices.
- This tutorial explains how configure the real-time virus monitor, on-demand scans, custom scans and scheduled scans.
Process in brief
- Log into ITarian then click ‘Applications’ > ‘Endpoint Manager’.
- Click 'Configuration Templates' > 'Profiles'
- Click on the name of an existing Linux OS profile
- You cannot modify the Xcitium-supplied 'Linux – Security Level 1' profile
- If you haven't created any other profiles yet, you can make one from scratch or clone then edit an existing profile
- Click here for help to clone then edit a Linux profile
- In the profile details screen:
- Click 'Add Profile Section' then 'Antivirus' (if you haven't yet added the AV section)
- OR
- Open the 'Antivirus' tab if it was already added.
- The section has three tabs:
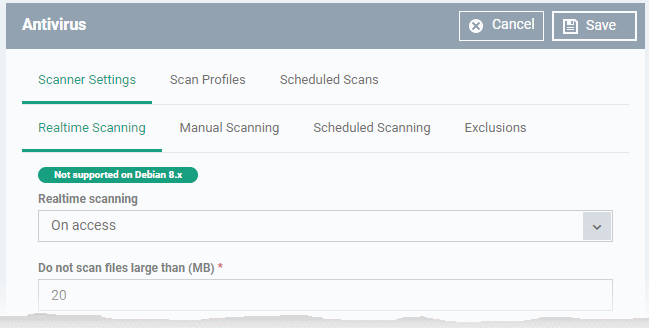
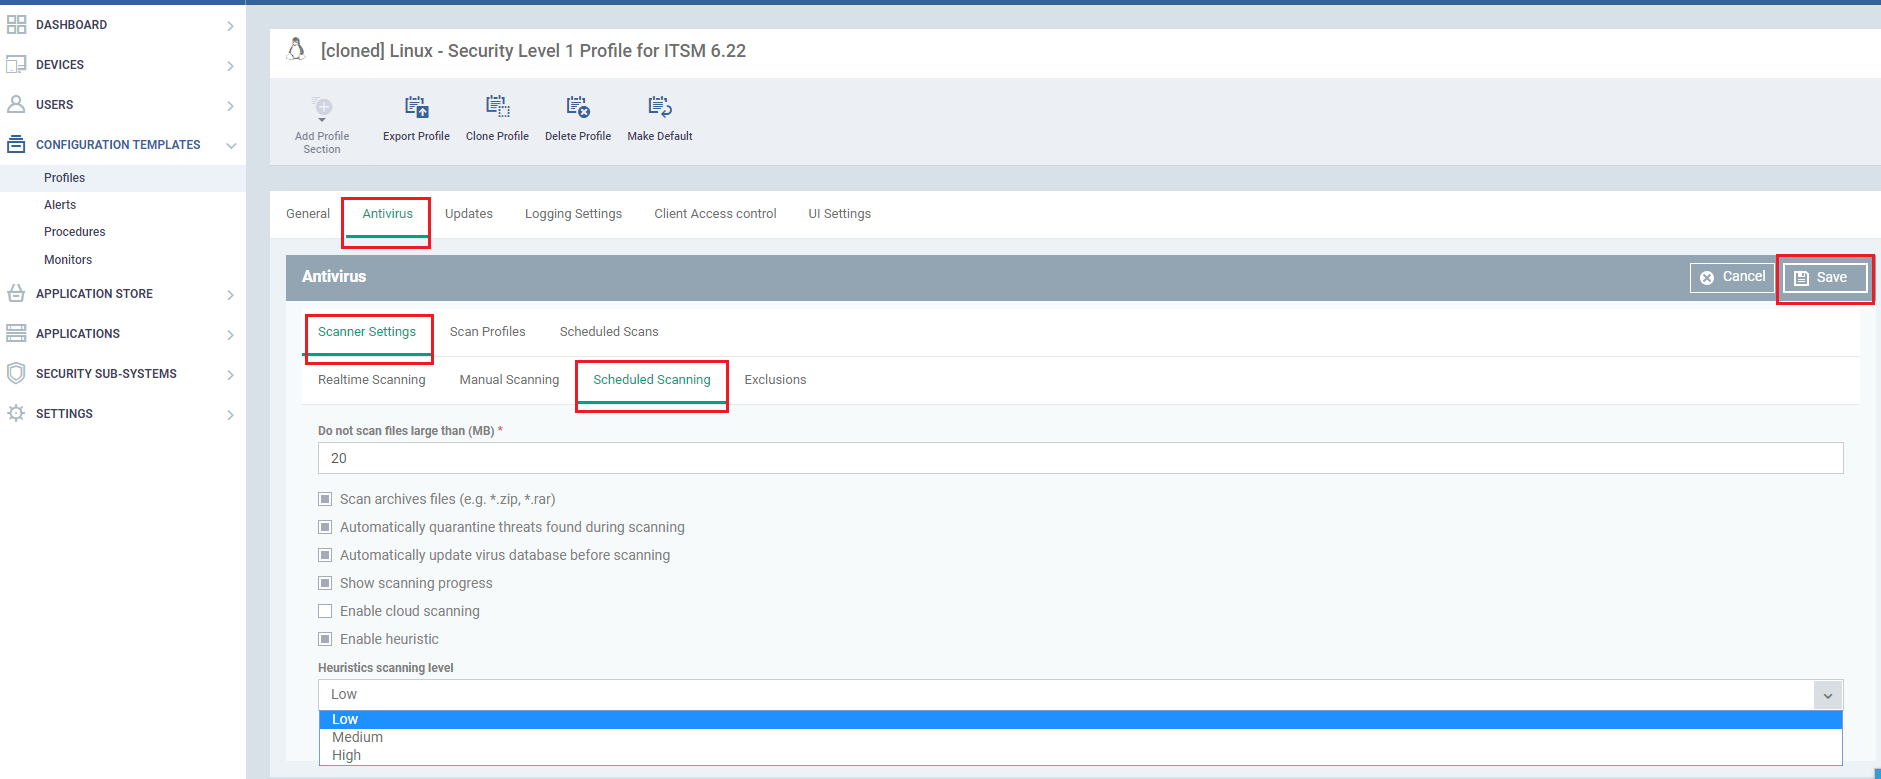
- Scanner Settings - Configure the antivirus scanners:
- Real time Scans – Configure the background virus monitor
- Manual Scans – Configure on-demand virus scans
- Scheduled Scans – Configure settings that will apply to all scheduled scans
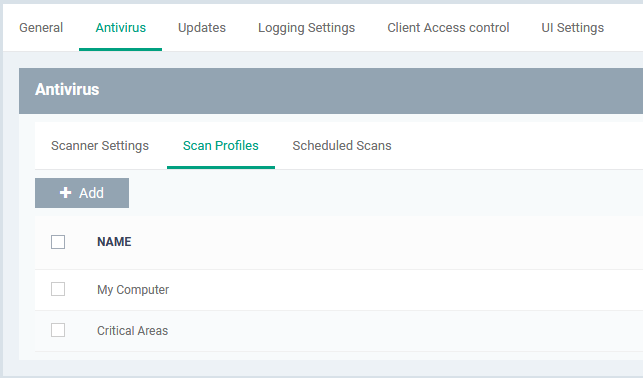
- Scan Profiles - Choose specific folders, drives or areas to scan. The profile can then be used in a scheduled or on-demand scan.
- Scheduled Scans – Set up recurring scans to run at regular intervals.
- Scanner Settings - Configure the antivirus scanners:
- Click 'Save'
Process in detail
- Login to Endpoint Manager > Click 'Configuration Templates' > 'Profiles'
- Click on the name of the Linux profile you want to configure
- Click here if you need help to create a new profile
- In the profile details screen:
- Click 'Add Profile Section' then 'Antivirus' (if you haven't yet added the AV section)
- (OR)
- Open the 'Antivirus' tab if it was already added.
The 'Antivirus' section has three tabs:
- Scanner Settings - Configure settings that will apply to future real-time/manual/scheduled scans, and to exclusions.
- Scan Profiles - Scan profiles let you define specific folders, drives or areas to scan. Once created, you can apply a scan profile to scheduled scans. This area lists all existing profiles and lets you create new profiles.
- Scheduled Scans - Timetable scans to run on managed devices according to a chosen scan profile.
Scanner Settings
- Real time Scan: Any file opened on the device is scanned before it is run. Threats are detected before they get a chance to execute.
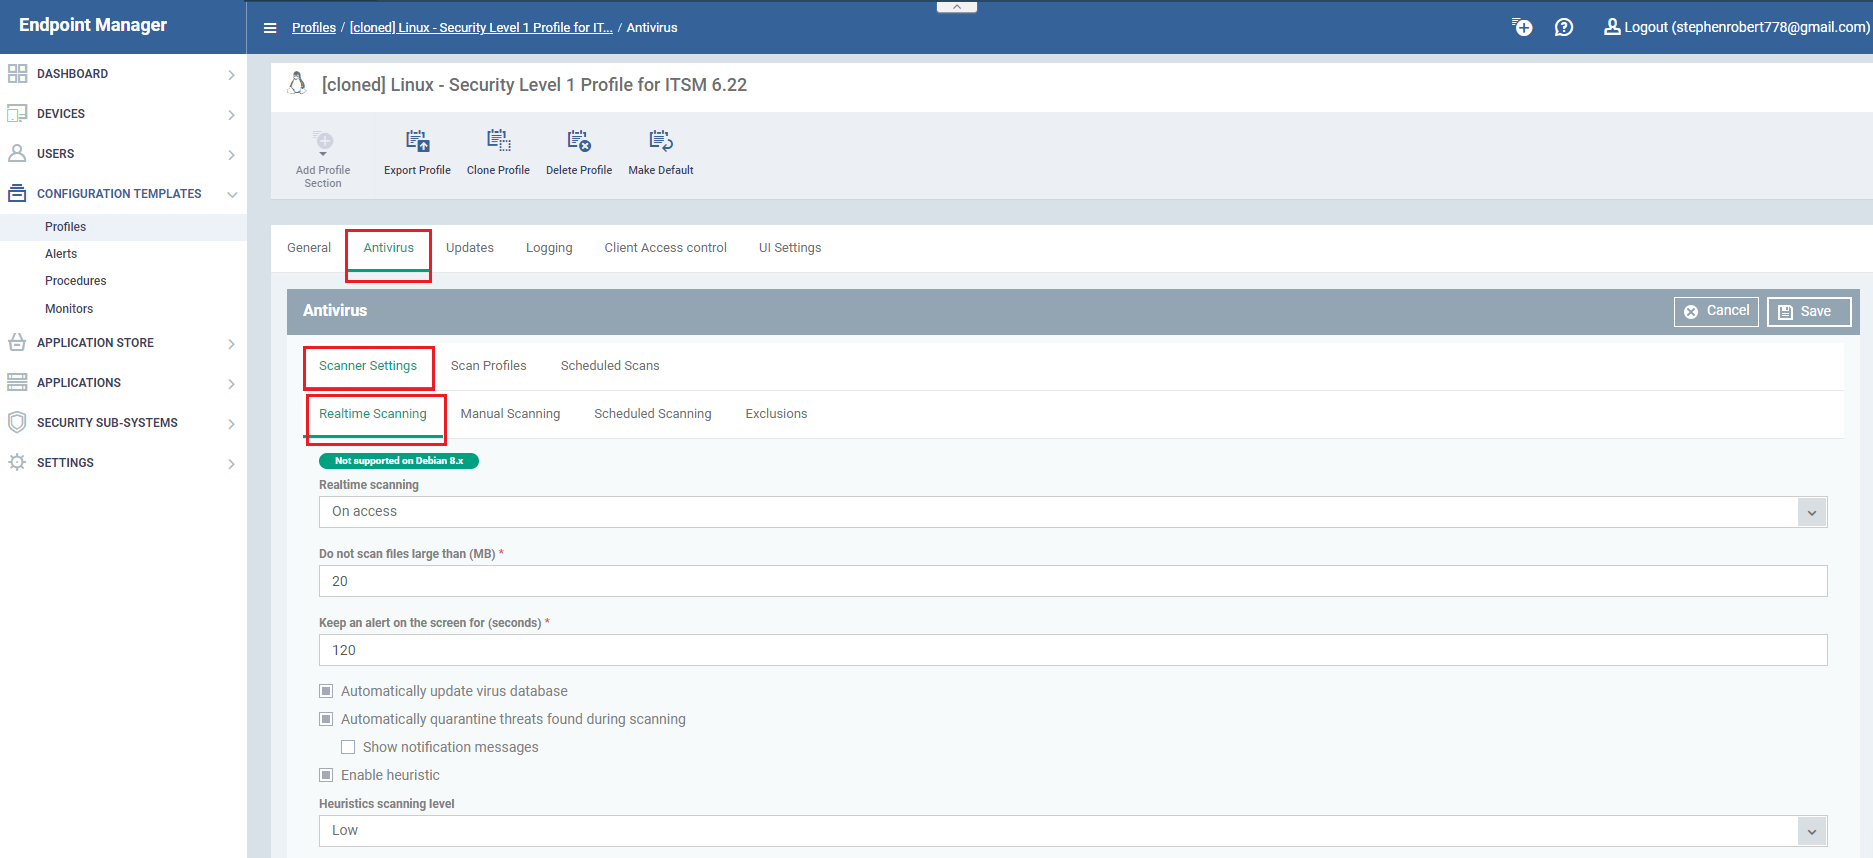
- Click here for help with all the settings in this area .
- Manual scan: A manual scan is one that you run 'on-demand' on a file, folder or drive of your choice
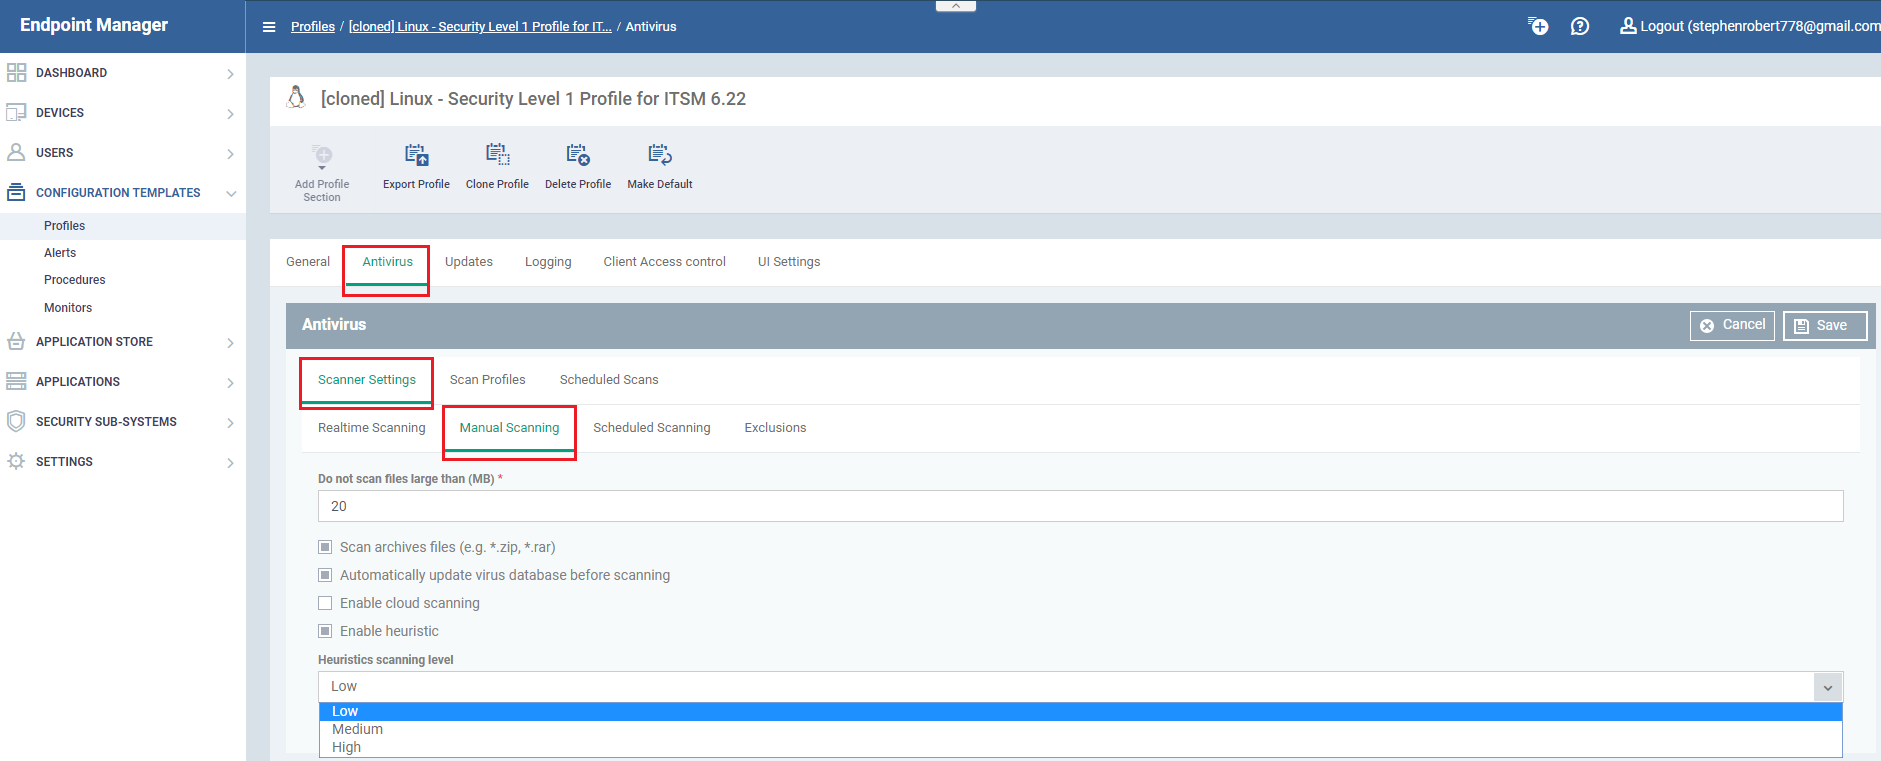
- Click here for help with all the settings in this area.
- Scheduled scan: A scheduled scan is one that runs automatically at regular intervals
- Click here for help with all the settings in this area.
- Exclusions: Exclusions are items that you want to the AV scanner to skip during a realtime, manual or scheduled scan.
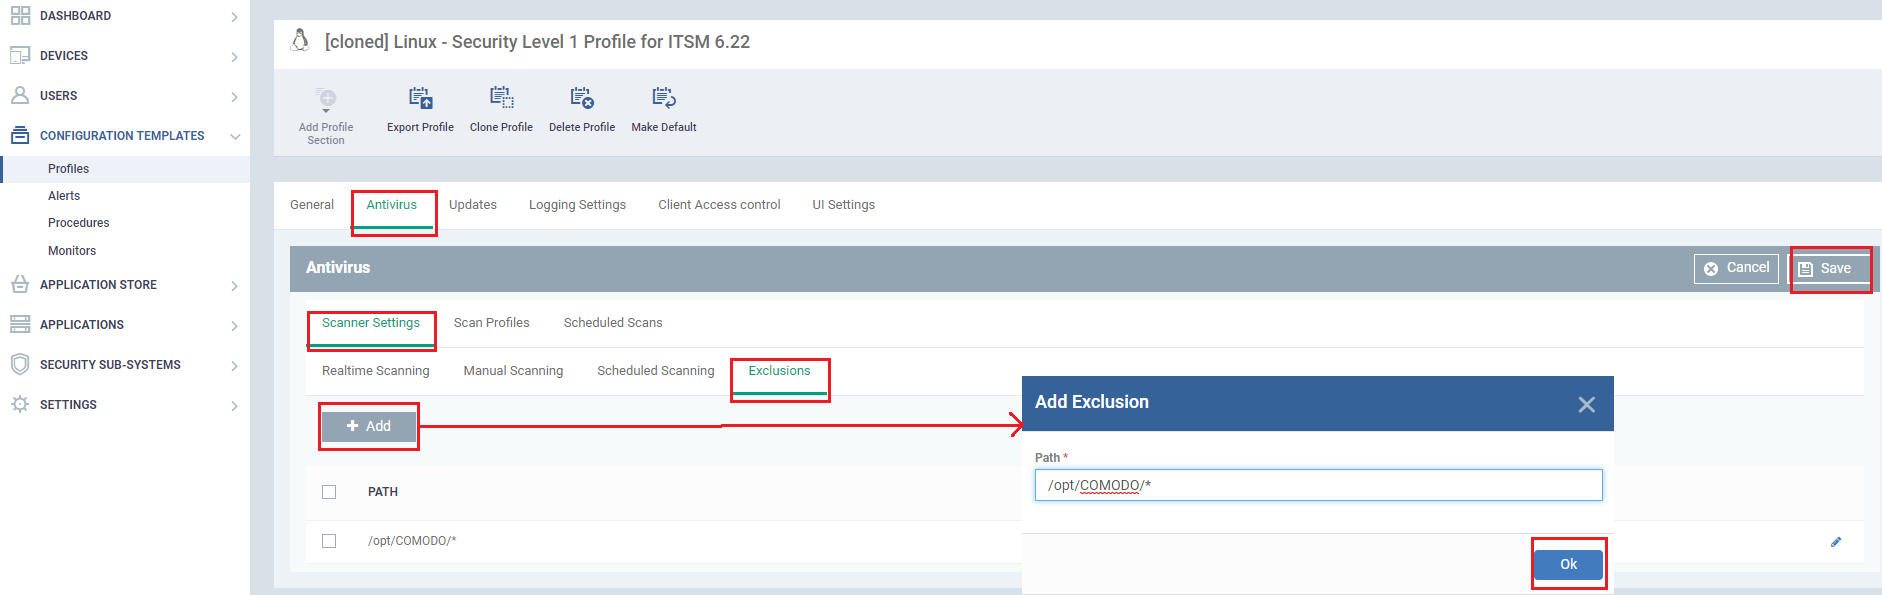
- Click here for help with all the settings in this area.
Scan profiles
- Each scan profile contains a list of items that you want to scan
- CCS ships with two default profiles – 'My Computer' and 'Critical Areas'
- You can also create custom profiles which consist of specific items
- Once saved, you can add a profile any scheduled scan that you create
To create a scan profile:
- Log into ITarian then click ‘Applications’ > ‘Endpoint Manager’.
- Click 'Configuration Templates' > 'Profiles'
- Open the profile you want to configure
- Click the 'Antivirus' tab
- Click 'Scan Profiles' > 'Add Scan Profile':
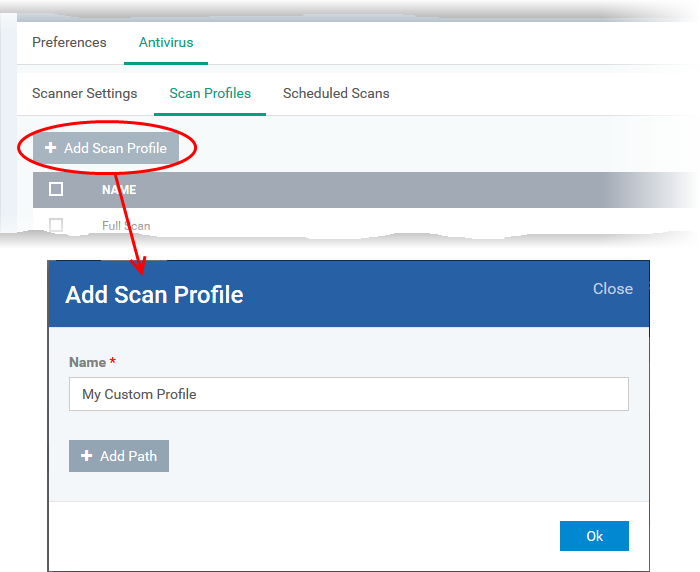
- Enter a label for the scan profile
- Click 'Add Path' to add the location you want to scan. This can be a directory, drive, file or area
- Click 'Add Path' to save the location
- Repeat the process to add more paths
- Click 'Ok'
The profile will be added to the list and can be selected as part of a scheduled scan.
Scheduled Scans
- Scheduled scans run at a time and date set by you
- You choose the timing of the schedule and pick the profile you want to use
- The scan profile determines which items are scanned
- Click here if you want to learn more about scan profiles
To create a scheduled scan:
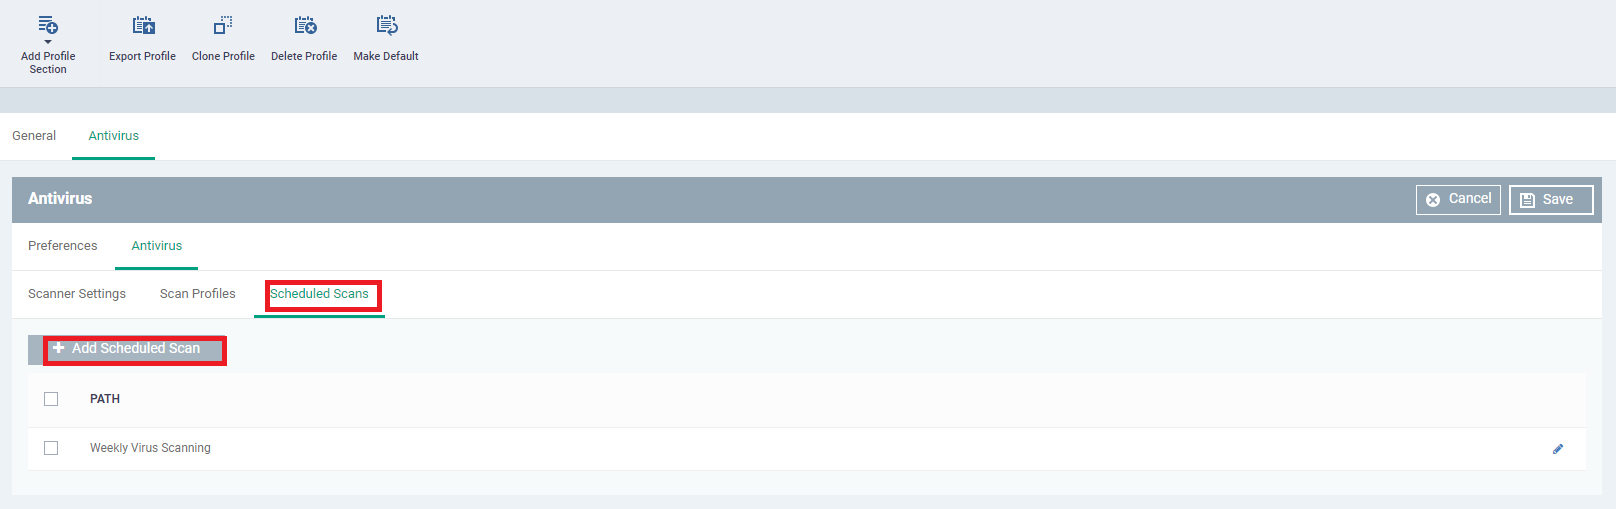
- Click 'Configuration Templates' > 'Profiles'
- Click 'Profiles' > open the profile you want to configure
- Click the 'Antivirus' tab
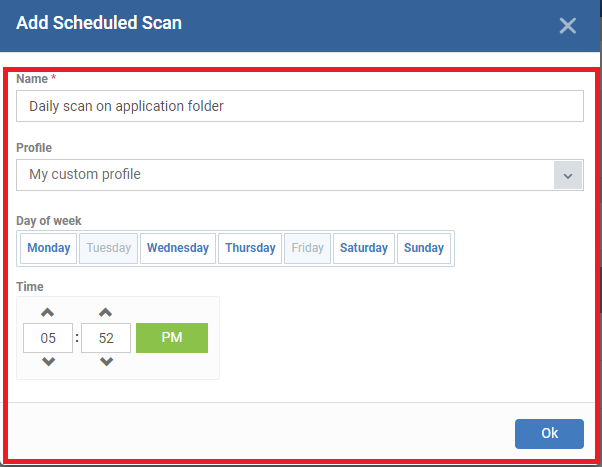
- Click 'Scheduled Scan' > 'Add Scheduled Scan':
- Type label for the scan. For example, 'Daily scan of entire drive'.
- Choose the profile that will be used in the scheduled scan.
- The scan profile determines which items are scanned
- Click here if you want to learn more about scan profiles
- Choose the time and days of the week on which you want the scan to run.
- Click 'OK'. The schedule will run on all devices which use this profile


CONTACT US
Call now!  (973) 859 4000 ext 3025
---