North America
How to configure 'Linux - Security level 1 Profile'
Views
1932 times
- Configuration profiles let you specify a device's network access rights, overall security policy, scan schedule and other general settings.
- You can use a Xcitium-provided 'Default' profile, or configure your own custom profile. Any profile designated as 'Default' is automatically applied to new devices.
- You cannot edit the Xcitium default Linux profiles, but you can clone it and edit the copy. This article explains how to do that.
Clone 'Linux – Security Level 1 Profile'
- Login to Xcitium at https://one.xcitium.com
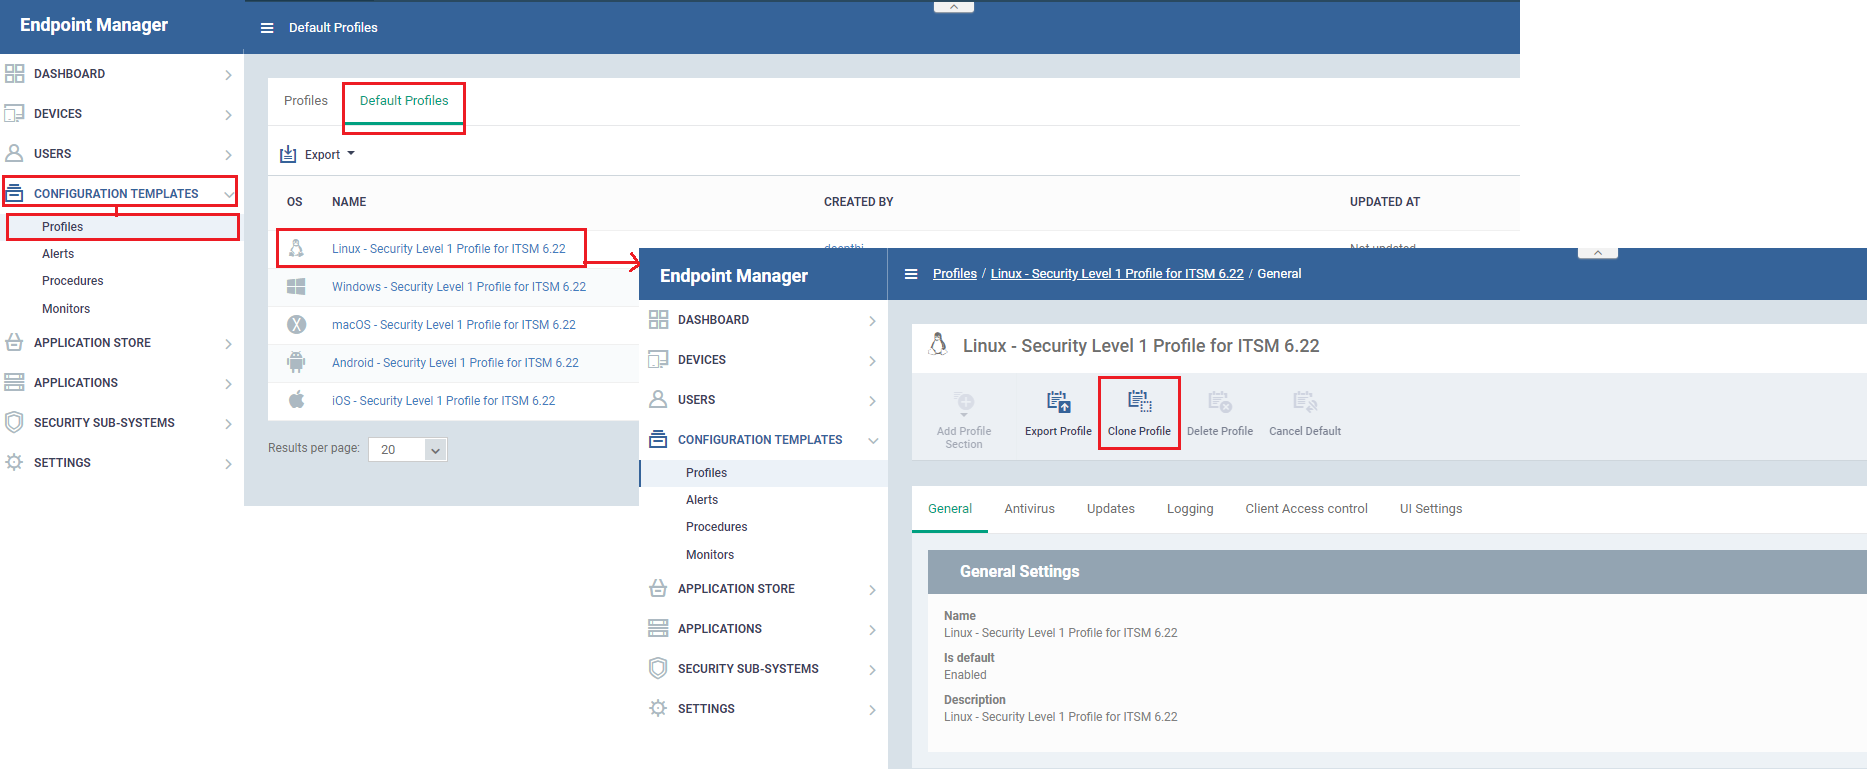
- Click 'Applications' > 'ITSM'
- Click 'Configuration Templates' > 'Profiles'
- Click the 'Default Profiles' tab
- Click on 'Linux – Security Level 1 profile for ITSM'
- Click the 'Clone Profile' button:
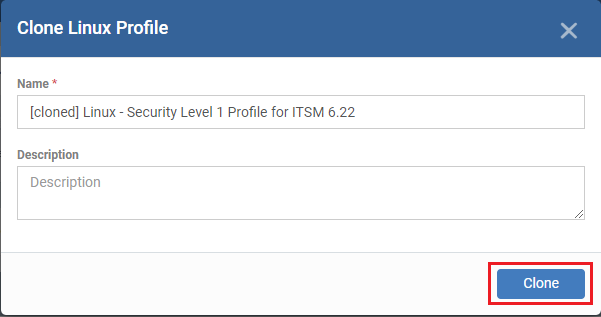
- Provide a name and description for the profile then click 'Clone':
- Your new profile is now ready for customization and deployment.
Customize the cloned profile
- Click 'Configuration Templates' > 'Profiles'
- Click the name of the Linux profile you just cloned. This will open the profile configuration screen:
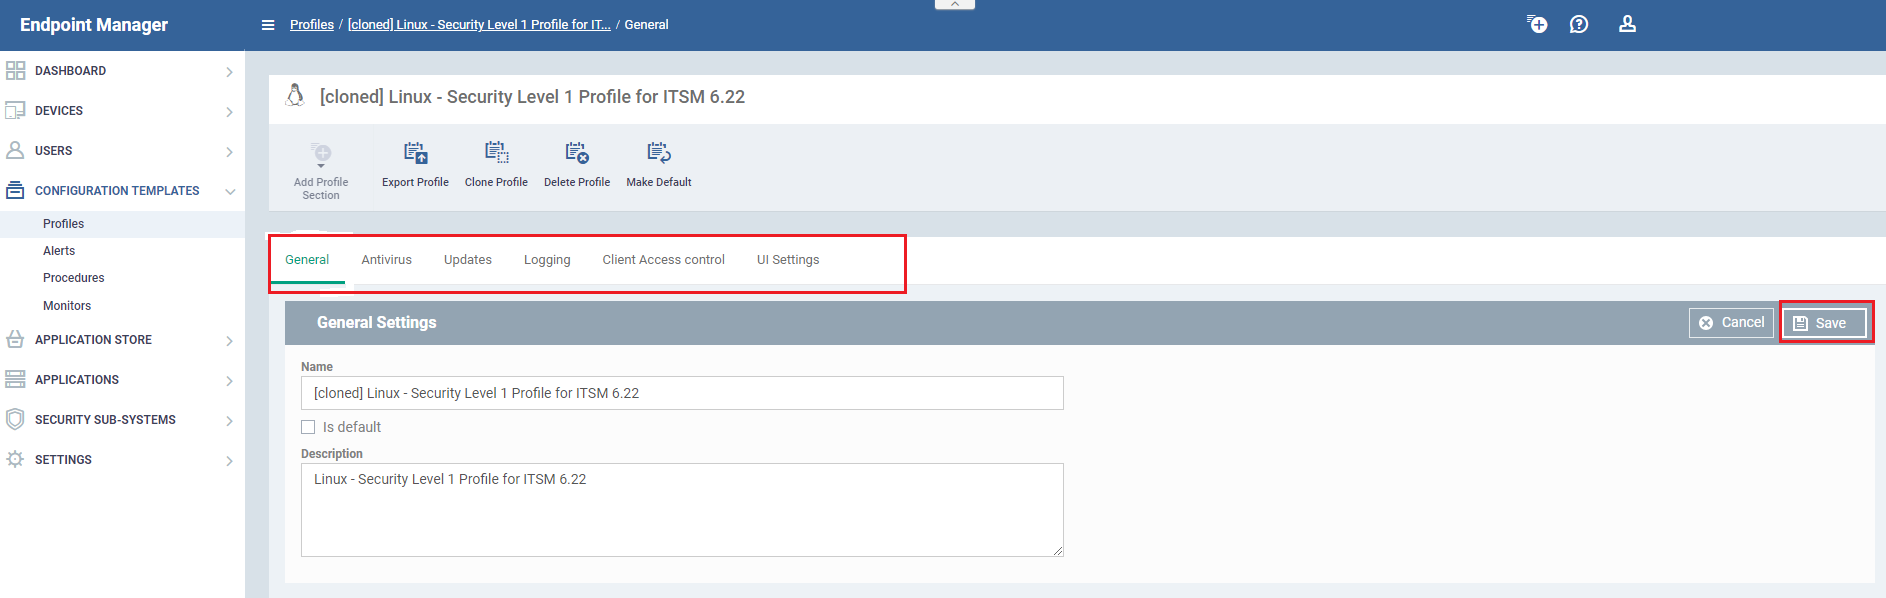
There are 5 tabs you can configure. Click the tab you require then the 'Edit' button as required:
- General - Basic details such as the name and description of the profile. 'Is Default' – if selected then the profile will be applied to all new Linux devices that are added to ITSM.
- Antivirus - Configure per-scanner settings, scan profiles and create a scan schedule. See https://help.xcitium.com/topic-399-1-786-13024-Antivirus-Settings-for-Linux-Profile.html if you need help to configure the AV
- Updates - Enable or disable automatic updates and specify an alternate host from which endpoints should collect updates. See https://help.xcitium.com/topic-399-1-786-13025-CCC-and-CCS-Application-Update-Settings-for-Linux-Profile.html if you need help with this.
- Logging - Specify how logs should be collected in CCS. For example, you can choose max. log size, log format, location, and extended log options. See https://help.xcitium.com/topic-399-1-786-13027-Logging-Settings-for-Linux-Profile.html if you need help with this.
- Client Access Control - Password-protect access to Xcitium Client Security (CCS) on managed endpoints. See https://help.xcitiuim.com/topic-399-1-786-13028-Clients-Access-Control-Settings-for-Linux-Profile.html if you need help.
- UI Settings - Choose the language used in the CCS interface on the endpoint.
Deploy the cloned profile
-
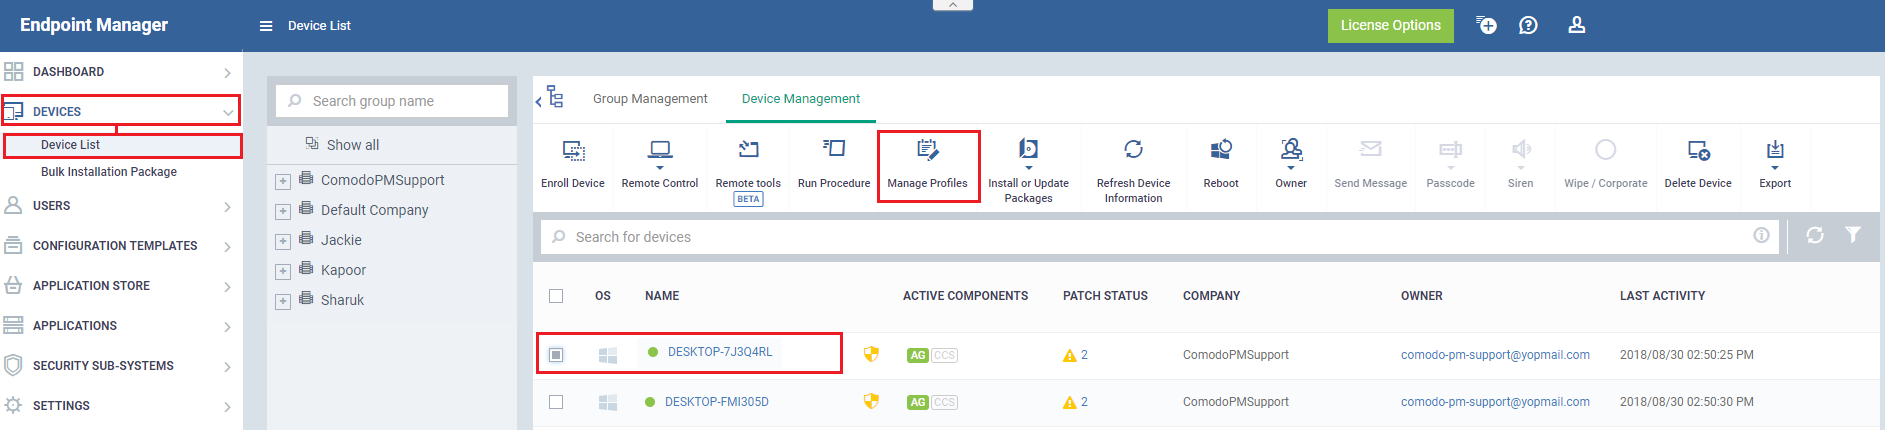
If you did not set the profile as a 'Default' then you will need to apply it to target Linux endpoints. The following screenshots show a Windows profile, but the process applies equally to Linux.
-
Click 'Devices' > 'Device List' > 'Device Management'
- Select the devices to which you want assign your new profile
- OR click 'Group Management' and select a device group
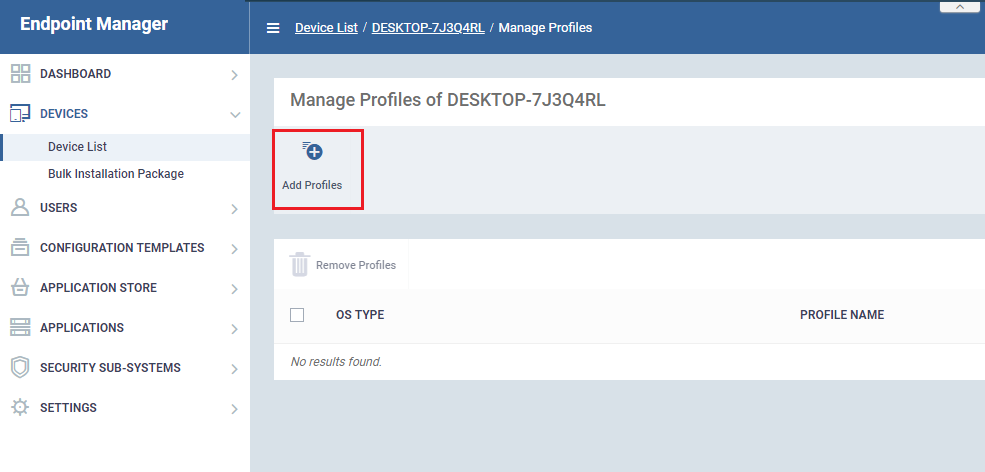
- Click the 'Manage Profiles' button:
- Click the 'Add Profiles' button:
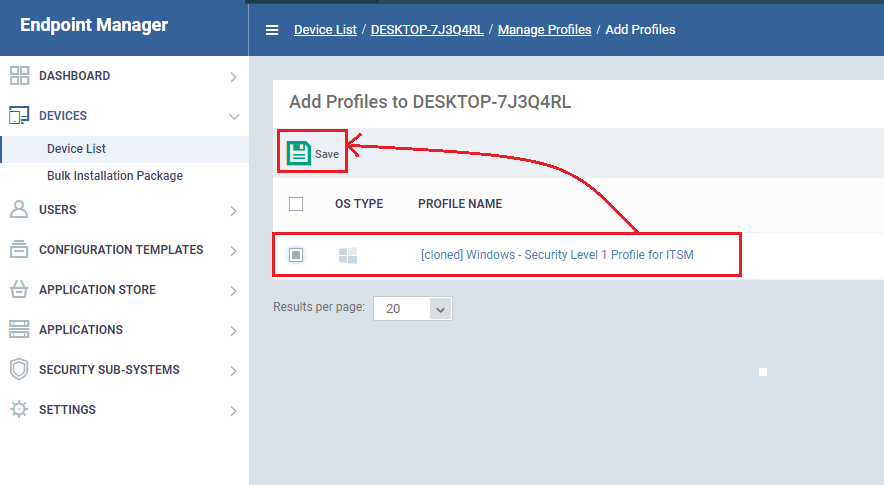
- Select your new profile from the list:

- Click 'Save' to apply the profile to the target devices/groups:
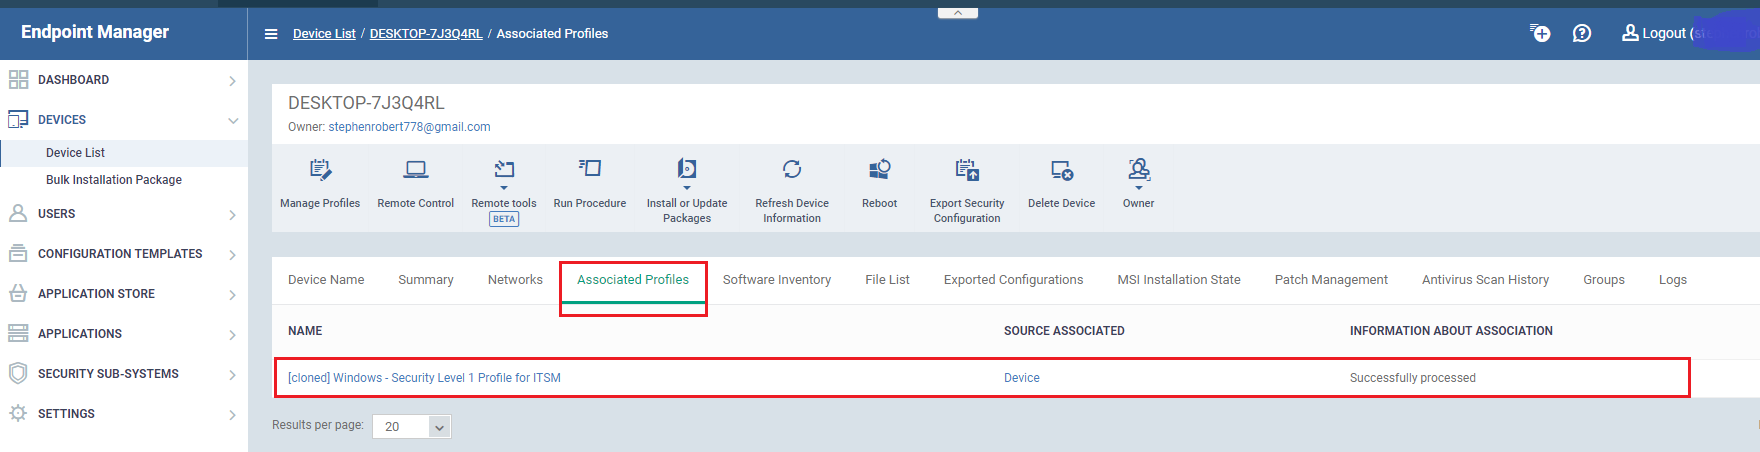
- The profile will be applied to the targets on the next sync
- The profile will be listed in the device or group's 'Associated Profiles' area:
More about profiles
How to configure Antivirus settings in a MAC profile
How to clone and customize a profile
How to configure virus scope in a profile
How to set remote control options in a profile
How to use the new ITSM profiles


CONTACT US
Call now!  (973) 859 4000 ext 3025
---