How to create a new Service Desk ticket on behalf of a user
Click 'Staff Panel' > 'Tickets' > 'New Ticket'
- Staff and admins can create tickets on behalf of users from the 'Tickets' interface. You might want to do this if, for example, a customer described their issue over a phone call.
- Staff can also create tickets for issues that they resolved, but which had no ticket. This is useful to record time spent/materials used and bill accordingly.
- Select 'Work done in the past' to enable this option.
- Tickets for completed tasks are given a status of 'Closed'.
- Select 'Work done in the past' to enable this option.
Click the following links for help with each task:
Create a ticket by selecting a user from the directory
Create ticket for a new user from the 'Tickets' interface
Ticket information and options
Create a ticket by selecting a user from the directory
- Open the staff panel
- Click 'Users' > 'User Directory'
- Click on the user for whom you want to create a ticket
- This opens the user details page:


- Click 'Create ticket'
- The new ticket form opens:
Next: Ticket information and options
Create ticket for a new user from the 'Tickets' interface
- Open the 'Staff' panel (see last link on the left)
- Click 'Tickets' then select 'New Ticket'

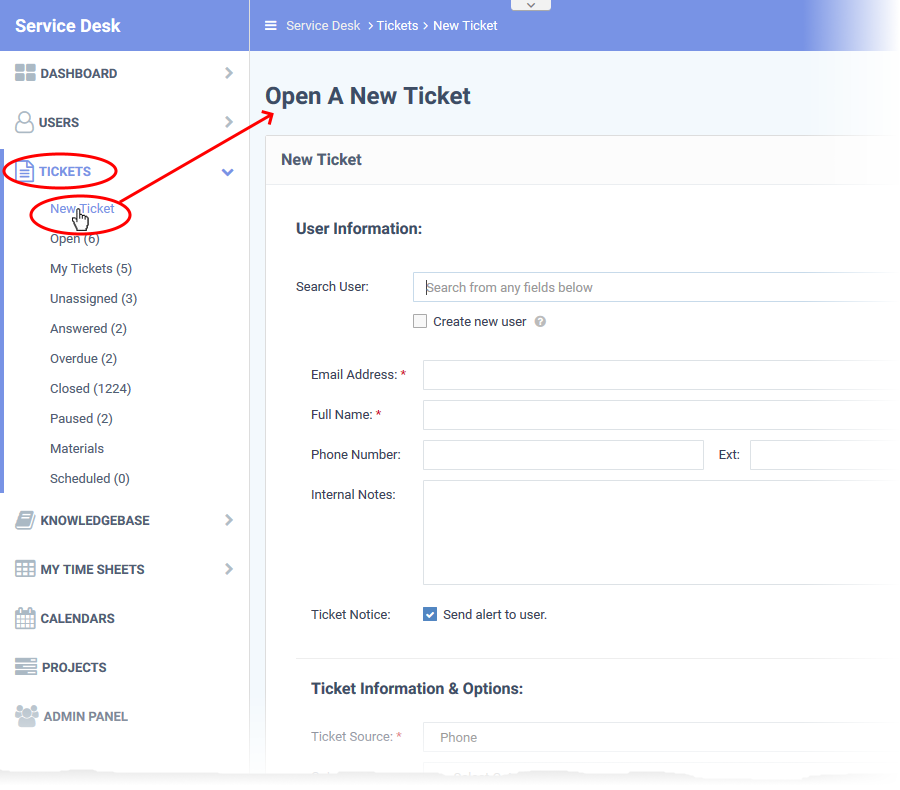
The new ticket form contains the following sections:
- User information - Details about the user on whose behalf of you are creating the ticket
- Ticket information and options - Ticket category, SLA plan, due date, assigned staff member, and more.
- Backdated ticket- Specify whether the work is already complete.
- Ticket details - Issue description, priority, asset type, and more
- Response - Initial reply sent to the user
- Internal note - Notes regarding the issue for internal reference
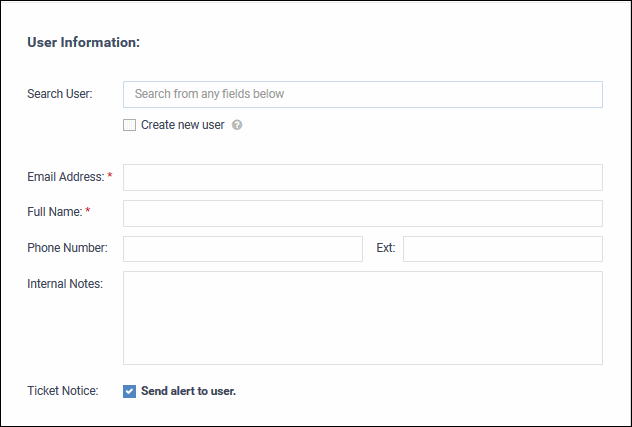

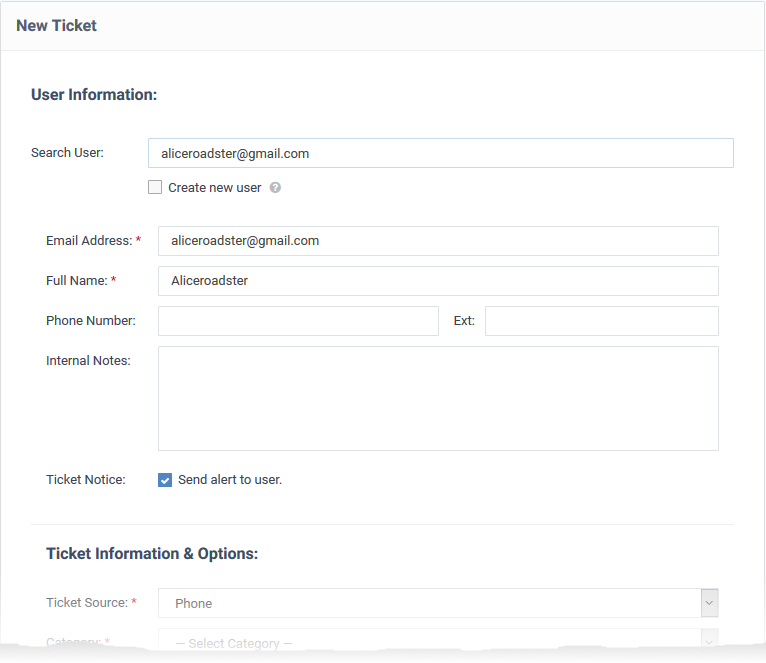
Search user - Create ticket for an existing user. Start typing their user name or email. Choose the user from the suggestions.
Create new user - Create a new user. The ticket will be associated with this new user.
- Enter the email address, full name and phone number of the user. Add any notes about the user in the respective fields. The internal notes are only visible to admins/staff.
- New users are added as guests. You can associate users with customers in the 'User Directory' interface.
- See 'How to add, register and manage users in Service Desk' if you need help with this.
Ticket Notice - Sends an email to the user which informs them that the ticket has been created.
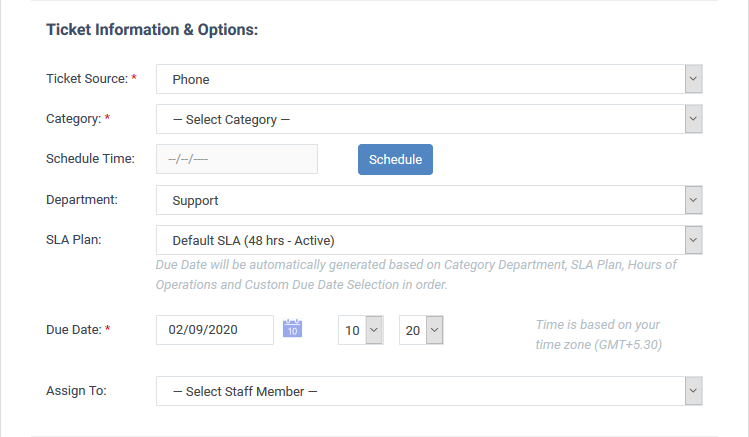
- Ticket Source - Select the channel through which you received the request from the user. The options are 'Phone', 'Email' and 'Other'.
- Category - Select the help topic under which the ticket falls. Some categories might add additional fields to the ticket in order to collect more information.
- Schedule Time - (Optional). Choose a date in the future when work on the ticket should begin. The schedule will be added to your calendar.
- Department - The department is auto-selected when you choose the ticket category. You can choose a different department if you want.
- SLA Plan - Service level plan associated with the ticket. This is determined by the ticket category. Use the drop-down menu to change the plan if required.
- Due Date - The date and time by which the ticket should be closed. A default due date is auto-generated based on the ticket category, department and SLA. You can change the date and time as required. This will override the date generated by default.
- Assign to - Choose the staff member to whom you want to assign the ticket. This assignee stands even if the 'Agent' for the category is different.


- Work done in the past - Enable this if the ticket is for work that has already completed. The ticket is automatically given a status of ‘Closed'.
- Enter the task start and end dates in the spaces provided.
- Make sure the end date is before the 'Due Date' entered elsewhere on the form.
- Enter the task start and end dates in the spaces provided.
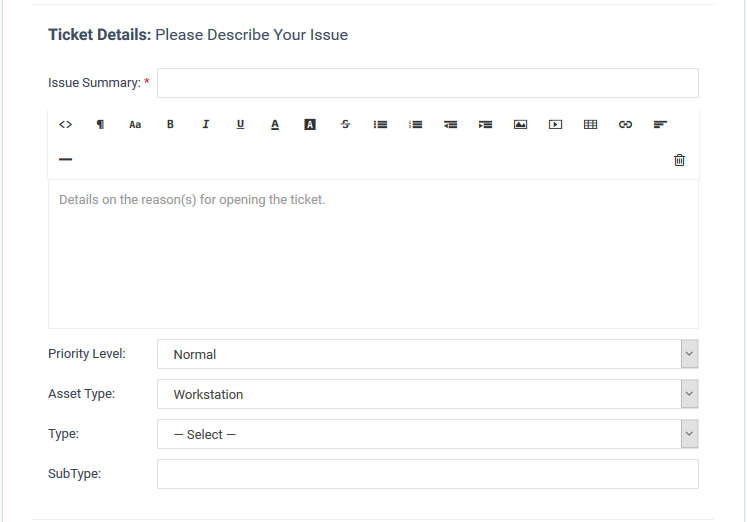

- Issue Summary - Create a one-line description of the issue.
- Issue Details - Enter a more detailed description of the issue.
- Priority Level - Ticket criticality. This is determined by the ticket category. Change the priority if required.
- Asset Type - The type of item that the ticket concerns. For example, 'Workstation', 'Server', 'Printer', 'Mobile'.
- Type - The broad issue category. The options are 'Alert', 'Order' and 'Problem'.
- Sub type - Type a sub-set if you wish to further refine the 'Type'. Sub-types can be used to add more details about the category and asset type. For example, 'Overheating' may be a sub-category of a 'Problem' with a ‘Server’.
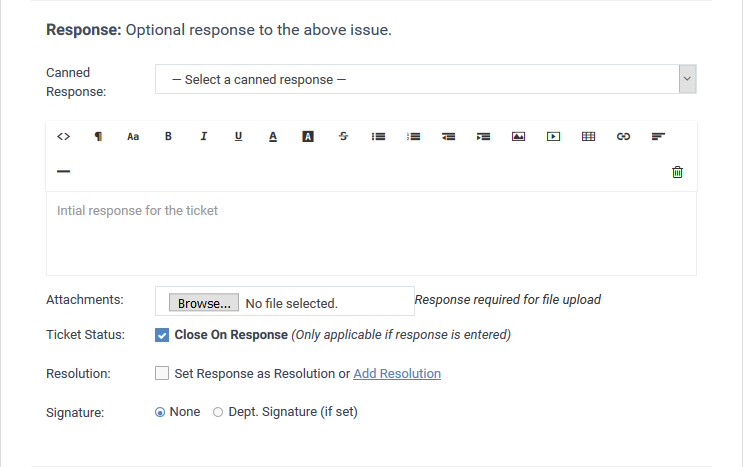
- It is optional to create a response. Any response you specify is automatically sent to the user after you click 'Open'.
- Canned Response: Select if you want to send a pre-defined response to the ticket.
Any canned responses you select are added to the 'Response' text field. You are free to edit and/or add text to complement the canned response.
You can add multiple canned responses to build a more complete answer. For example, you might add the following 3 canned responses to a single response -
'Acknowledgment', 'Ticket has been queued', 'Contact details'. Please enter a line space between each canned response for formatting reasons.
- See How to manage canned responses in Service Desk for more details.
- See How to manage canned responses in Service Desk for more details.
- Attachments - Click the 'Browse' button to add relevant attachments to the ticket.
- Ticket Status - If enabled, the ticket is closed immediately after saving. You must have entered a response for this to work (see the descriptions above).
- Resolution:
- Enabled - The answer/response is considered as resolving the issue.
Or
- Click 'Add Resolution', if you want to specify a different resolution statement.
- Enabled - The answer/response is considered as resolving the issue.
- Signature:
- None - Means you can either send with no signature OR type a custom signature in the editor
- 'Dept. Signature' – Use the signature of the department to which the ticket is assigned.
- None - Means you can either send with no signature OR type a custom signature in the editor
- Enter comments, reminders and remarks to staff who might work on the ticket. Internal notes are only visible to admins/staff, and not to the user.
- Click 'Open' to create the ticket on behalf of a user.
- The ticket is added to the 'Tickets' interface. You or the staff member to whom the ticket is assigned can view/update the ticket by clicking the subject or ticket number.
Further reading:
How to view and take actions on a ticket


---