North America
How to configure internet access rights for applications via Endpoint Manager
Views
3758 times
Category
profiles
Tags
Click ‘Configuration Templates’ > ‘Profiles’ > click the name of a Windows profile > 'Add Profile Section' > 'Firewall'
- The 'Firewall' section of a Windows profile lets you create rules to manage internet access rights for Endpoint applications.
- You can create simple allow/block rules, or more complex rules based on traffic direction, traffic protocol, source/destination port, and more.
- This tutorial shows you how to create a file group of your target applications, then configure internet access rules for the group in a profile.
Click the links below to jump to the task you need help with:
- Step 1 - Create a file group of the applications you want to manage
- Step 2 - Configure firewall rules for the group in a profile
Step 1 - Create a file group of the applications you want to manage
- File groups are collections of one or more files. You can select a file group as the target of firewall rules.
- Endpoint Manager ships with predefined groups of popular file types. For example, there are groups for ‘Windows updater applications’, ‘Web browsers’, ‘Email clients’ and ‘Metro Apps’.
- If none of the predefined groups cover your needs, you can create a custom file group that contains specific applications. You can then apply firewall rules to the group to control their internet access rights.
Create a file group
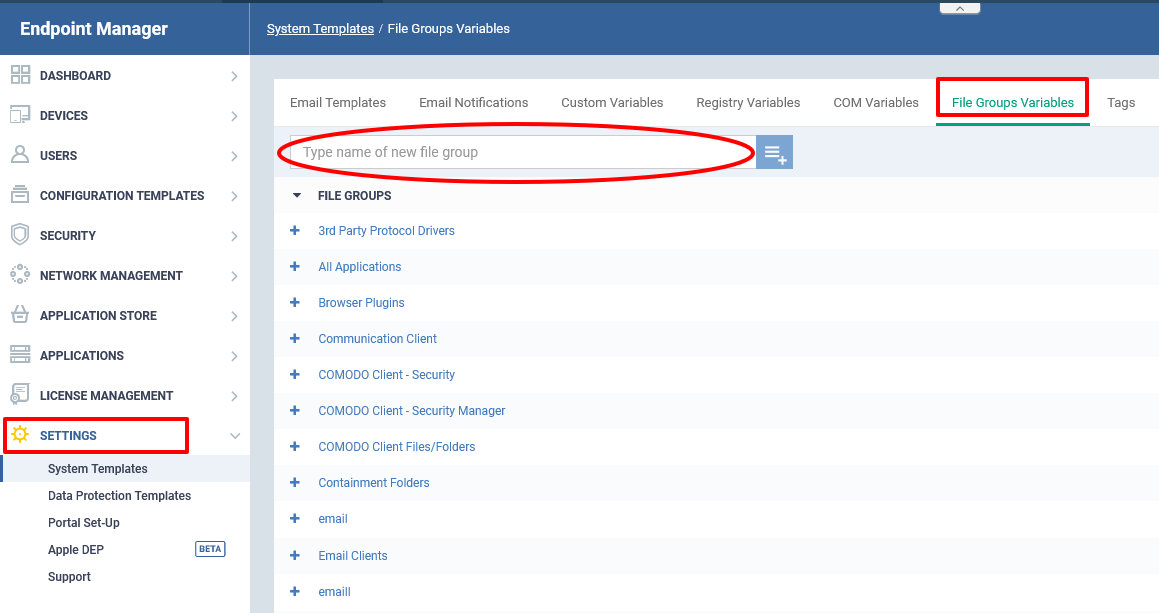
- Login to Xcitium
- Click 'Applications' > 'Endpoint Manager'
- Click 'Settings' > 'System Templates'
- Select the 'File Groups Variables' tab
- Create a name for the file group then click the
button
- The group name should ideally identify the members of the group. For example, 'Custom Allowed Applications' or 'Custom Blocked Applications.'
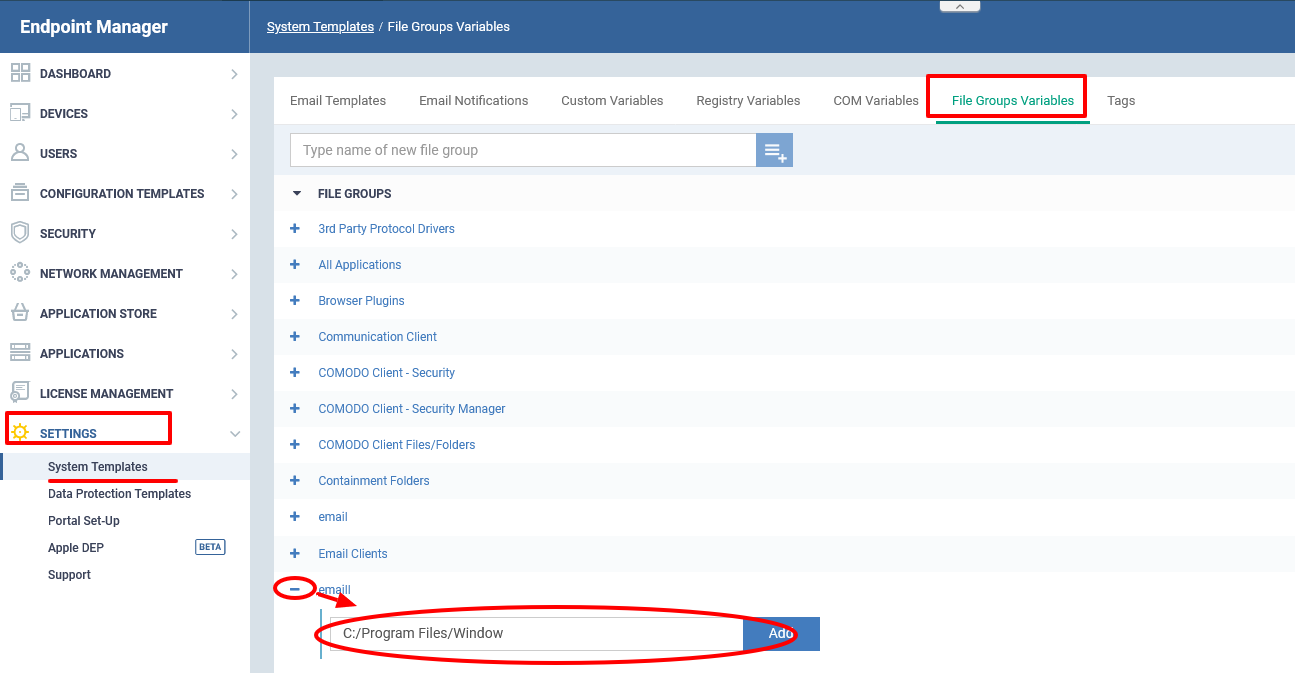
The file group will be added to the list. The next step is to add files to the group.
- Click the '+' button at the left of the group name
- Enter the full path of the file/folder containing your target files. Click ‘Add’
- To include all files in a folder, place a wildcard ‘*’ character after the folder name.
For example - C:\My Files\*
- To include all files in a folder, place a wildcard ‘*’ character after the folder name.
- Repeat the process to add more files to the group.
- The group name should ideally identify the members of the group. For example, 'Custom Allowed Applications' or 'Custom Blocked Applications.'


Step 2 - Configure firewall rules for the group in a profile
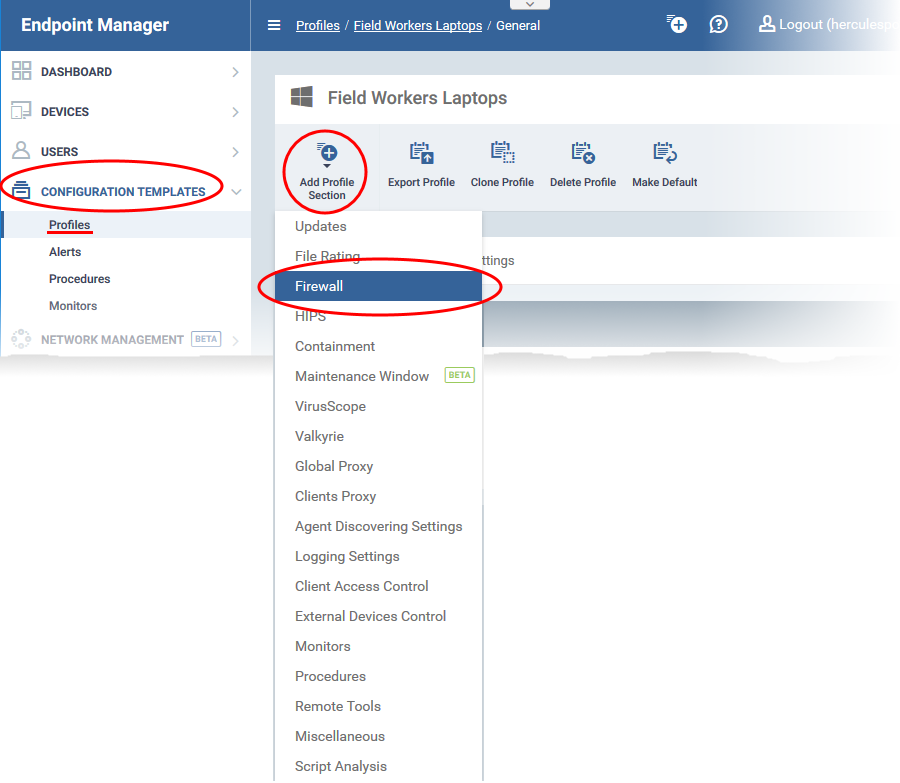
- Click ‘Configuration Templates’ > ‘Profiles’
- Open the Windows profile applied to your target devices
OR
- Click 'Create' > 'Windows Profile' if you want to add a new profile
- Open the Windows profile applied to your target devices
- Open the 'Firewall' tab if it has already been added to the profile
OR
- Click 'Add Profile Section' > 'Firewall' if it hasn't yet been added:
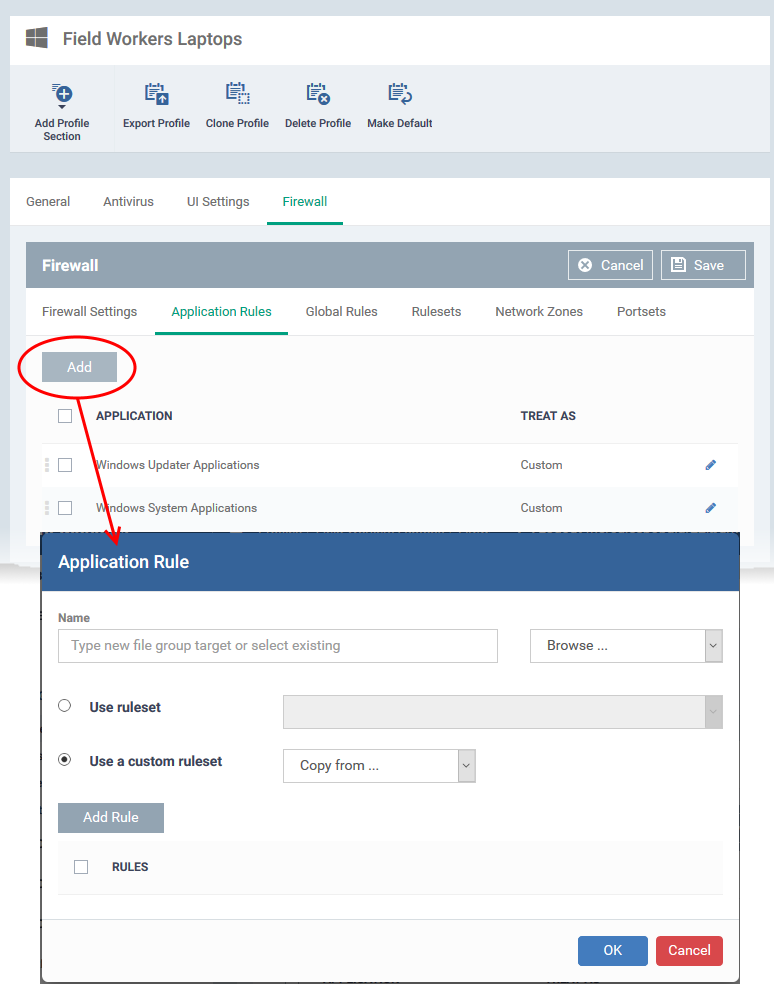
- Click the 'Application Rules' tab.
- EM ships with two pre-defined rules. You will now add some custom rules for the files in your file group.
- Click 'Add' to create a custom firewall rule
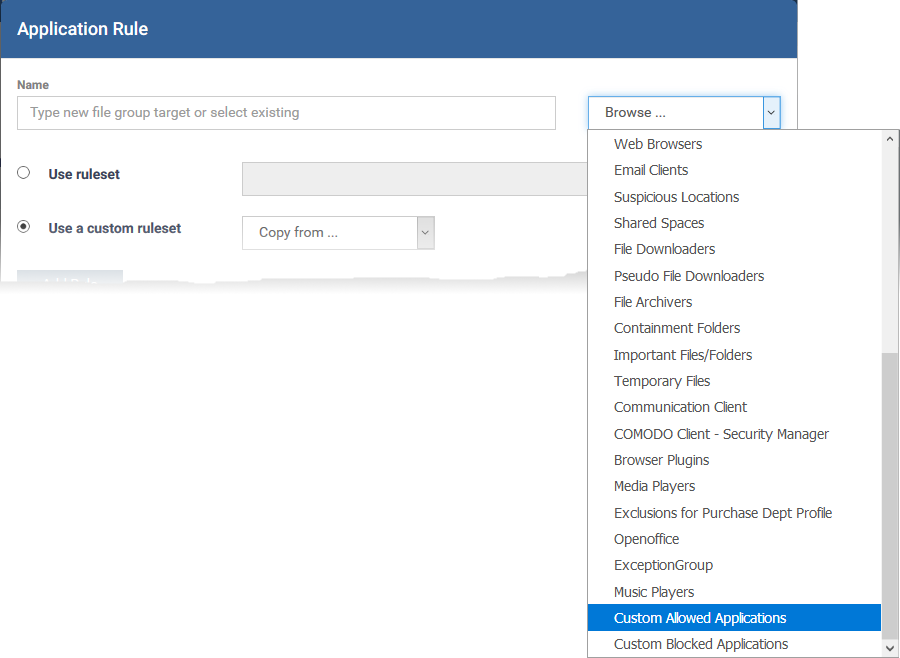
- Click 'Browse' on the right, then choose the application group you just created:
- The 'Name' field is auto-populated with the group you chose:
The next step is to choose the firewall rules for the applications in the group. This can be done in two ways:
- Use a pre-defined ruleset
- Use a custom ruleset (advanced users)


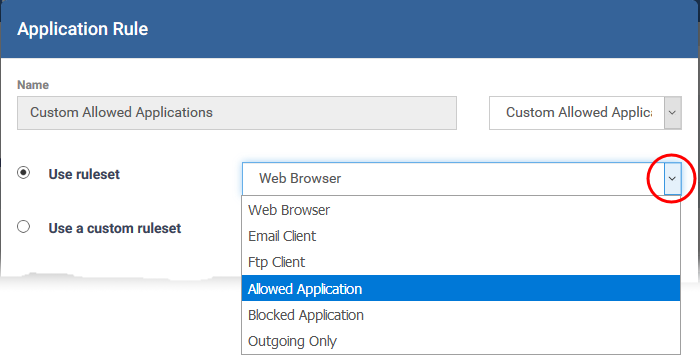
- Pre-defined rulesets contain ‘already-configured’ rules that achieve specific aims, or are suited to specific application types. For example, there are rulesets for ‘Allowed applications’, ‘Blocked applications’, ‘Web browsers’ and ‘Email clients’.
- Open the ‘Ruleset’ tab of a firewall profile to view/manage the rules in each set.
- Open the ‘Ruleset’ tab of a firewall profile to view/manage the rules in each set.
- You can use an existing ruleset on your target applications if it meets your needs.
- Select 'Use ruleset':
- Choose 'Allowed Application' or 'Blocked Application' as required. Or choose another ruleset if you want to implement more specific rules.
- Click 'OK'

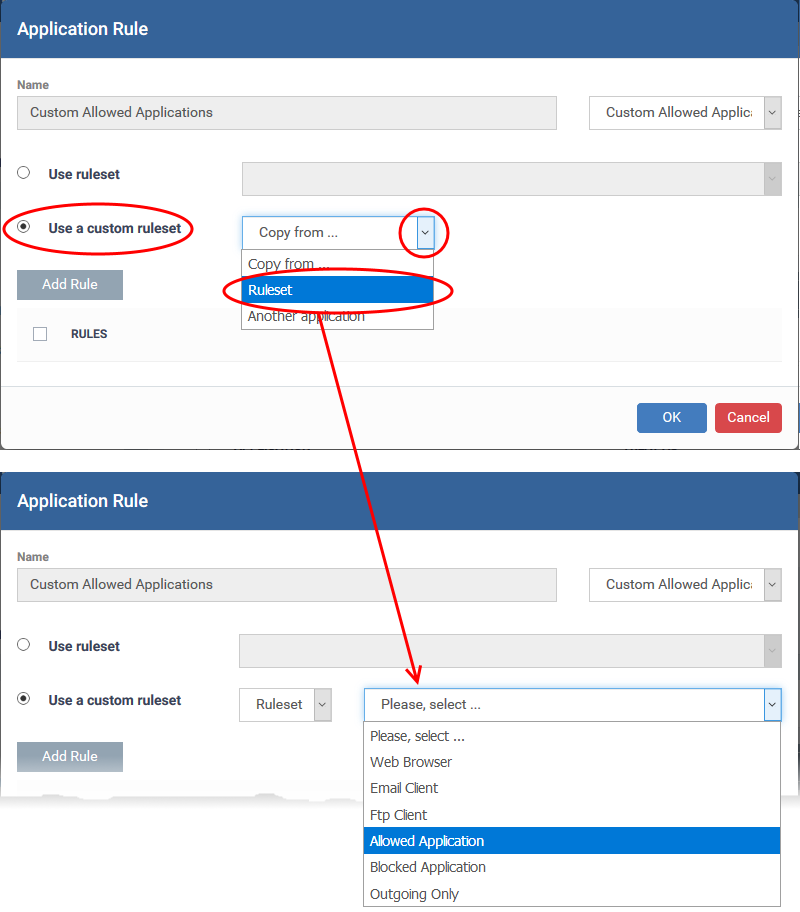
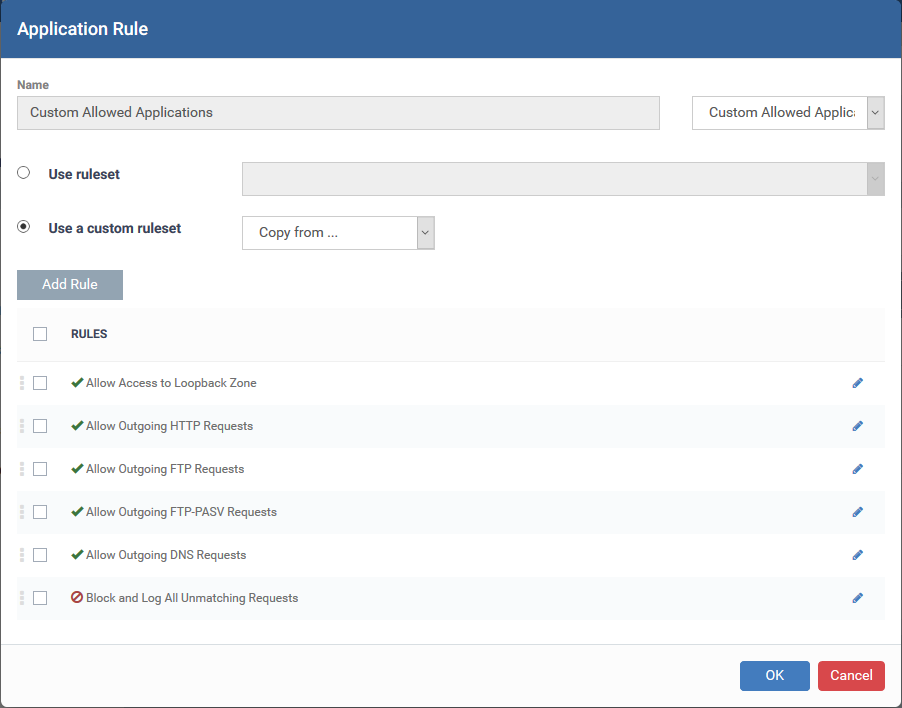
- Select 'Use a custom ruleset' in the rule dialog
- You can now manually create individual rules, or use the ‘Copy from...’ feature to import rules as a starting point.
- Click ‘Add Rule’ to configure a new rule from scratch
- Select ‘ruleset’ in the ‘copy from’ drop-down to import existing rules as a starting point
- See How to create a custom firewall rule set in a Windows profile for help to create custom firewall rule sets.
- Click ‘Add Rule’ to configure a new rule from scratch
- Click the pencil icon on the right to edit it as required
- Use the checkboxes on the left to enable or disable specific rules
- Click ‘OK’
- Click 'Save' in the firewall settings pane for your changes to take effect

Further reading:
How to configure general firewall settings in a Windows profile
How to add global rules to firewall in a Windows profile
How to create a custom firewall rule set in a Windows profile


CONTACT US
Call now!  (973) 859 4000 ext 3025
---