How to configure general firewall settings in a Windows profile
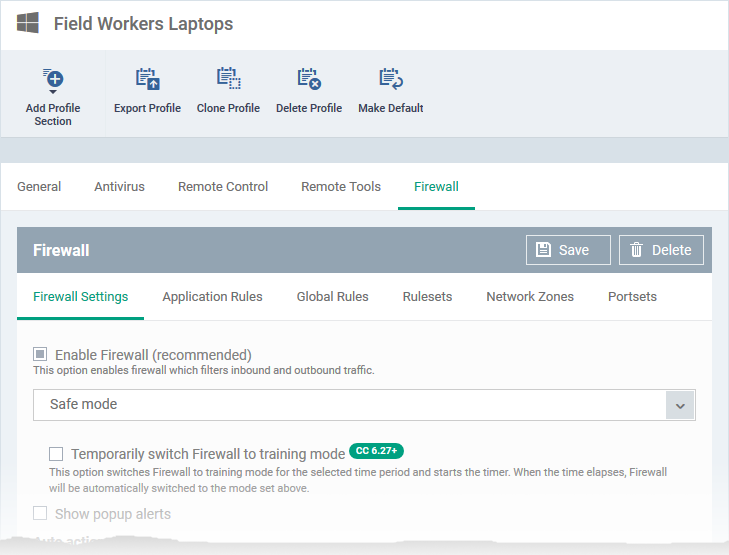
Click ‘Configuration Templates’ > ‘Profiles’ > click the name of a Windows profile > 'Add Profile Section' > 'Firewall' > 'Firewall Settings'
- The 'Firewall Settings' tab lets you configure overall behaviour of CCS firewall on managed devices to which the profile is applied
- You can enable/disable firewall, choose the firewall protection level, configure alerts, traffic to be monitored and more.
Configure firewall settings
- Login to Xcitium|
- Click 'Applications' > 'Endpoint Manager'
- Click ‘Configuration Templates’ > ‘Profiles’
- Open the Windows profile applied to your target devices
- Open the 'Firewall' tab if it has already been added to the profile
OR
- Click 'Add Profile Section' > 'Firewall' if it hasn't yet been added
- Open the 'Firewall' tab if it has already been added to the profile

- Open the 'Firewall Settings' tab if it is not already open
Enable Firewall - Enable or disable Firewall protection at the endpoint. If enabled, you can choose the mode at which the firewall should run. The following modes are available:
- Custom ruleset
- Safe mode
- Training mode
- Custom ruleset
- See 'Firewall and HIPS modes explained' to read more about the firewall modes
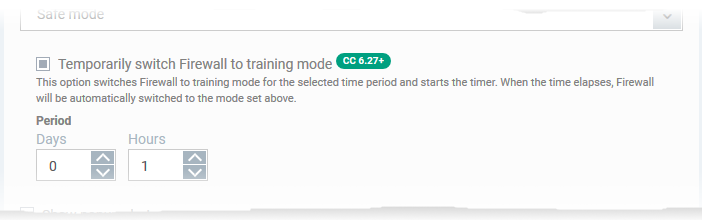
Temporarily switch Firewall to training mode
- Place the firewall in training mode for a specific length of time. CCS will automatically revert to the mode in the drop-down when the training period is over.
- Note - Make sure you select ‘Safe Mode’ or ‘Custom Ruleset’ in the drop-down.
- Place the firewall in training mode for a specific length of time. CCS will automatically revert to the mode in the drop-down when the training period is over.

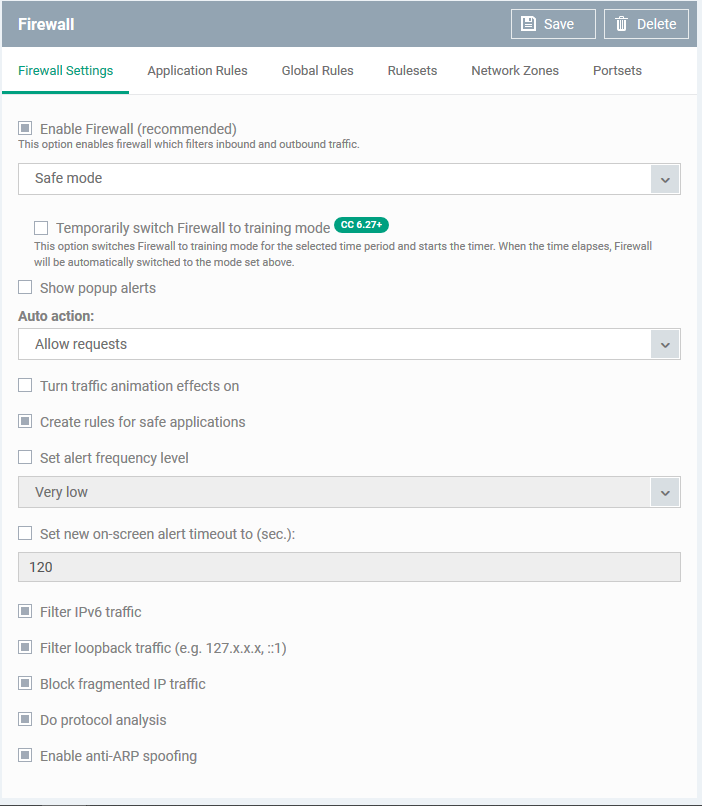

Show popup alerts - Whether or not firewall alerts are to be displayed at the endpoint whenever the firewall encounters a request for network access, for the user to respond.
- If you choose not to show the alerts, you can select the default responses from the 'Auto Action' drop-down. The available options are:
- Block Requests
- Allow Requests
- Block Requests
Turn traffic animation effects on - The CCS tray icon can display a small animation whenever traffic moves to or from your computer.

- You can enable or disable the animation to be displayed at the endpoint.
Create rules for safe applications - Xcitium Firewall trusts the application if:
- The app is from a vendor who has a 'Trusted' status in the local vendor list in CCS
- The app is trusted in the online file database (aka, it is whitelisted)
- The app is trusted in the local CCS 'File List'
- You can learn more about the specifics of file ratings in this wiki.
- You can learn more about the specifics of file ratings in this wiki.
- By default, CCS does not automatically create 'allow' rules for safe applications. This saves resource usage and simplifies the rules interface by reducing the number of rules created.
- Enabling this option instructs CCS to learn the behaviour of safe applications so it can auto-create 'Allow' rules for them. These rules are listed in 'Settings' > 'Firewall Settings' > 'Application Rules' interface in CCS. Advanced users can edit/modify the rules as they wish. (Default = Disabled).
Set alert frequency level - Enabling this option allows you to configure the amount of alerts that Xcitium Firewall generates, from the drop-down at the endpoint. It should be noted that this does not affect your security, which is determined by the rules you have configured (for example, in 'Application Rules' and 'Global Rules'). For the majority of users, the default setting of 'Low' is the perfect level - ensuring you are kept informed of connection attempts and suspicious behaviours whilst not overwhelming you with alert messages. (Default=Disabled)
The options available are:
- Very High: The firewall shows separate alerts for outgoing and incoming connection requests for both TCP and UDP protocols on specific ports and for specific IP addresses, for an application. This setting provides the highest degree of visibility to inbound and outbound connection attempts but leads to a proliferation of firewall alerts. For example, using a browser to connect to your Internet home-page may generate as many as 5 separate alerts for an outgoing TCP connection alone.
- High: The firewall shows separate alerts for outgoing and incoming connection requests for both TCP and UDP protocols on specific ports for an application.
- Medium: The firewall shows alerts for outgoing and incoming connection requests for both TCP and UDP protocols for an application.
- Low: The firewall shows alerts for outgoing and incoming connection requests for an application. This is the setting recommended by Xcitium and is suitable for the majority of users.
- Very Low: The firewall shows only one alert for an application.
The Alert Frequency settings refer only to connection attempts by applications or from IP addresses that you have not (yet) decided to trust.
Set new on-screen alert timeout to - How long the Firewall shows an alert for, without any user intervention at the endpoint. By default, the timeout is set at 120 seconds. You may adjust this setting to your own preference by selecting this option and choosing the period from the drop-down combo-box.
Filter IPv6 traffic - If enabled, the firewall component of CCS at the endpoint will filter IPv6 network traffic in addition to IPv4 traffic.
Background Note: IPv6 stands for Internet Protocol Version 6 and is intended to replace Internet Protocol Version 4 (IPv4). The move is primarily driven by the anticipated exhaustion of available IP addresses. IPv4 was developed in 1981 and is still the most widely deployed version - accounting for almost all of today's Internet traffic. However, because IPv4 uses 32 bits for IP addresses, there is a physical upper limit of around 4.3 billion possible IP addresses - a figure widely viewed as inadequate to cope with the further expansion of the Internet. In simple terms, the number of devices requiring IP addresses is in danger of exceeding the number of IP addresses that are available. This hard limit has already led to the development of 'work-around' solutions such as Network Address Translation (NAT), which enable multiple hosts on private networks to access the Internet using a single IP address.
IPv6, on the other hand, uses 128 bits per address (delivering 3.4×1038 unique addresses) and is viewed as the only realistic, long term solution to IP address exhaustion. IPv6 also implements numerous enhancements that are not present in IPv4 - including greater security, improved support for mobile devices and more efficient routing of data packets.
Filter loopback traffic - Loopback connections refer to the internal communications within your PC. Any data transmitted by your computer through a loopback connection is immediately received by it. This involves no connection outside your computer to the Internet or a local network. The IP address of the loopback network is 127.0.0.1, which you might have heard referred to, under its domain name of 'http://localhost', i.e. the address of your computer.
Loopback channel attacks can be used to flood your computer with TCP and/or UDP requests which can smash your IP stack or crash your computer. Leaving this option enabled means the firewall will filter traffic sent through this channel at the endpoints. (Default = Enabled).
Block fragmented IP traffic - When a connection is opened between two computers, they must agree on a Maximum Transmission Unit (MTU). IP Datagram fragmentation occurs when data passes through a router with an MTU less than the MTU you are using i.e when a datagram is larger than the MTU of the network over which it must be sent, it is divided into smaller 'fragments' which are each sent separately.
Fragmented IP packets can create threats similar to a DOS attack. Moreover, these fragmentations can double the amount of time it takes to send a single packet and slow down your download time.
- Enable this option if you want the firewall component of CCS at the endpoint to block the fragmented datagrams. (Default = Enabled).
Do Protocol Analysis - Protocol Analysis is key to the detection of fake packets used in denial of service (DOS) attacks.
- Select this option if you want firewall at the endpoint to check whether every packet conforms to that protocols standards, If not, then the packets are blocked (Default = Enabled).
Enable anti-ARP spoofing - A gratuitous Address Resolution Protocol (ARP) frame is an ARP Reply that is broadcast to all machines in a network and is not in response to any ARP Request. When an ARP Reply is broadcast, all hosts are required to update their local ARP caches, whether or not the ARP Reply was in response to an ARP Request they had issued. Gratuitous ARP frames are important as they update the machine's ARP cache whenever there is a change to another machine on the network (for example, if a network card is replaced in another machine on the network, then a gratuitous ARP frame informs your machine of this change and requests to update its ARP cache so that data can be correctly routed). However, while ARP calls might be relevant to an ever shifting office network comprising many machines that need to keep each other updated, it is of far less relevance to, say, a single computer in a small network. Enabling this setting helps to block such requests at the endpoints to which the profile is applied - protecting the ARP cache from potentially malicious updates (Default = Enabled).
- Click 'Save' in the 'Firewall' pane for your settings to take effect on the endpoints to which the profile is applied.
Further reading:
How to configure internet access rights for applications via Endpoint Manager
How to add global rules for firewall in a Windows profile
How to create a custom firewall rule set in a Windows profile
How to configure network zones in a Windows profile
How to configure port sets in a Windows profile


---