How to configure network zones in a Windows profile
Click ‘Configuration Templates’ > ‘Profiles’ > click the name of a Windows profile > 'Add Profile Section' > 'Firewall' > 'Network Zones'
-
A network zone is a list of addresses or host names that you create in the ‘Firewall’ section of a Windows profile. You can add multiple addresses and hosts to each named zone.
-
Once created, you can specify the zone as the target of a firewall ruleset, a global firewall rule or an application firewall rule. Firewall rulesets let you control traffic to and from the network zone at a very granular level.
-
You can also block a zone completely in the ‘Network Zones’ tab.
-
This article explains how to create and configure a network zone in a Windows profile.
Use the links below to jump to the task you need help with:
-
Login to Xcitium
-
Click 'Applications' > 'Endpoint Manager'
-
Click ‘Configuration Templates’ > ‘Profiles’
-
Open the Windows profile applied to your target devices
-
Open the 'Firewall' tab if it has already been added to the profile
OR -
Click 'Add Profile Section' > 'Firewall' if it hasn't yet been added:
-
-
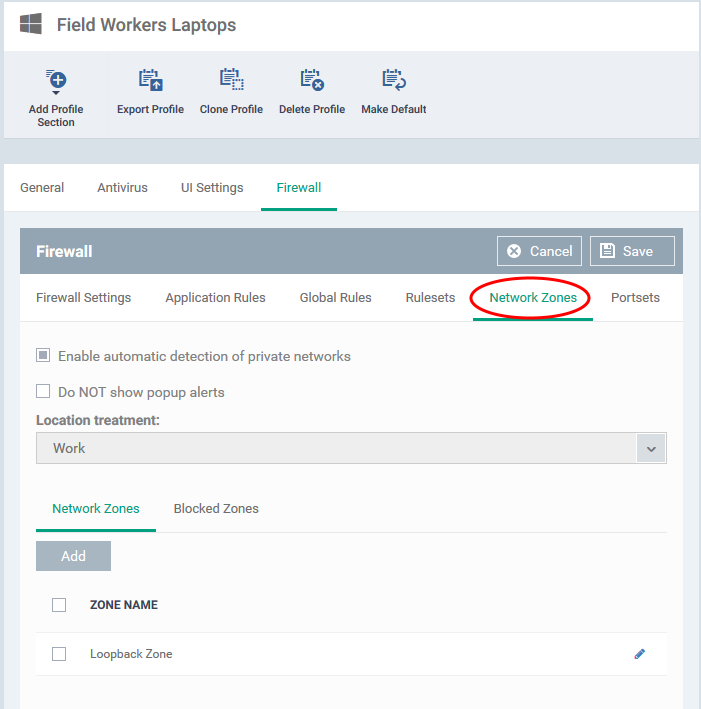
Open the 'Network Zones' tab:
- The 'Network Zones' interface has a general settings area to configure network monitoring settings and two tabs. See the following sections for help to configure the network zones section of a profile:
-
Click 'Save' for your settings to take effect on the devices to which the profile is applied.
The two settings at the top determine how Xcitium Client Security (CCS) should handle new networks:
-
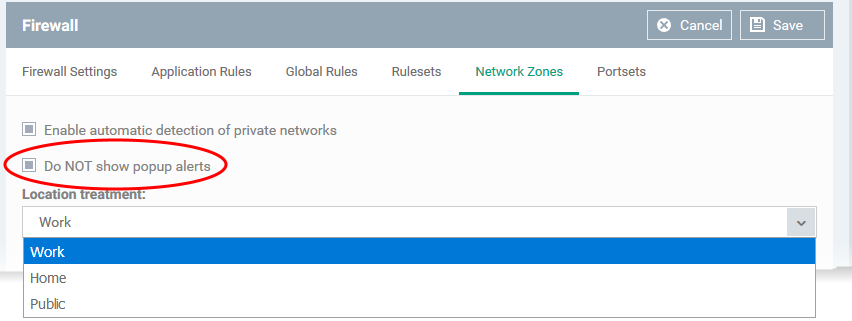
Enable automatic detection of private networks - The CCS firewall monitors attempted connections to any new wired or wireless networks. This is enabled by default. The next settings lets you choose how the firewall behaves if it detects a new network.
-
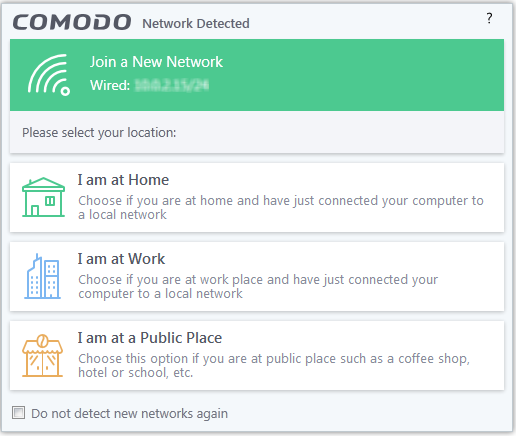
Do Not show popup alerts - By default, CCS shows the following notification to users when it detects a new network:
The user is asked to specify their location so CCS can implement the appropriate rules for the network.
Enable ‘Do not show...’ to eliminate these pop-ups. You then need to pick a default location that CCS should always implement:
A network zone is a collection of addresses to which you want to control access via the Xcitium Client Security firewall.
-
You can specify a zone as the source or destination address in a firewall ruleset, which inturn, is used in an application rule.
-
You can specify a zone as the source or destination address in a global rule
-
You can block a zone entirely in the ‘Network Zones’ tab
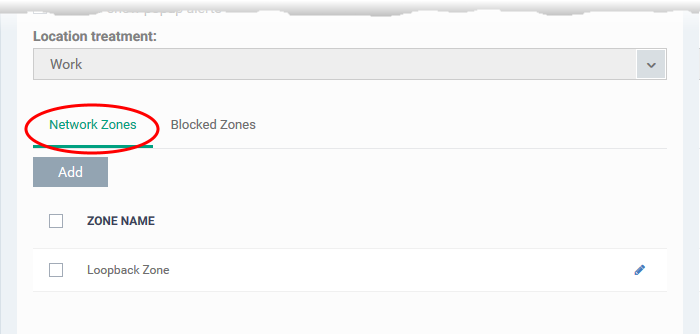
Click the 'Network Zones' tab to get started:
-
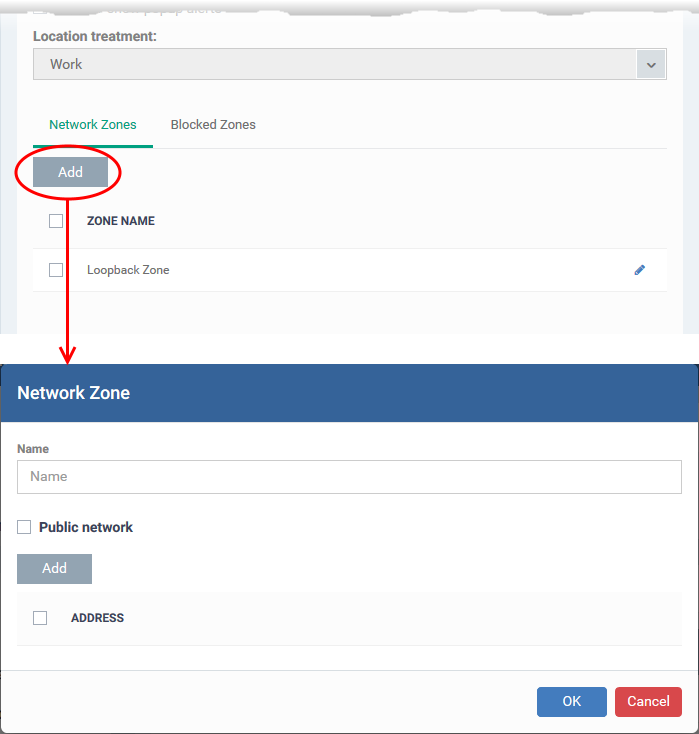
Click 'Add' to create a new zone:
-
Name - Create label for the zone. After saving, the zone name will be available for selection when creating a firewall ruleset/global rule.
-
Public network- Public networks are ‘open’ networks that offer very little security. Examples include public WiFi at cafes, airports, libraries and so forth. Enable this option if you want the CCS firewall to treat this zone as a public network. The firewall will implement the appropriate permissions.
-
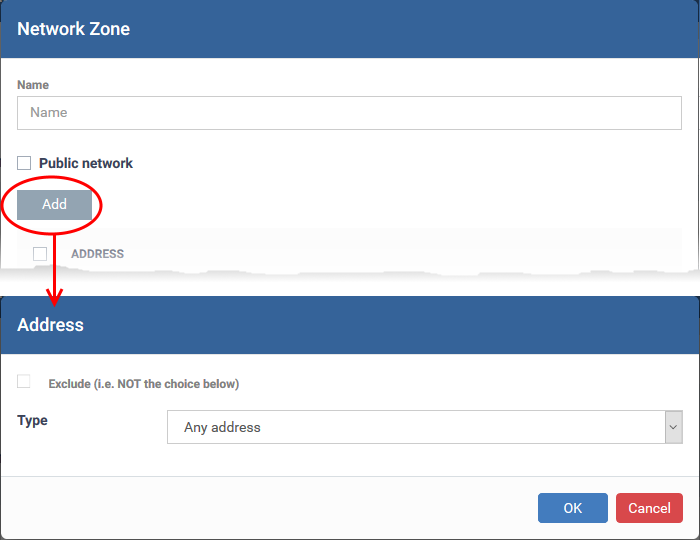
Click 'Add' to add the computers in the new network zone
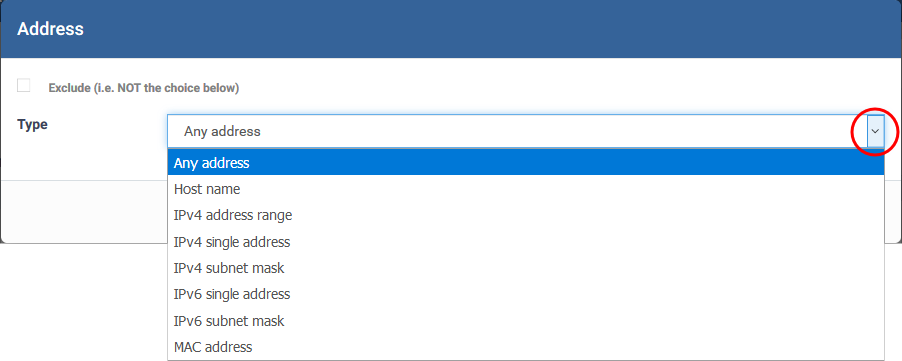
You can select any of the following address types:
Any Address - Adds all the IP addresses (0.0.0.0- 255.255.255.255) to the zone.
Host Name- Enter a named host which denotes an address on your network.
IPv4 Range - Includes all the IPv4 addresses between the values you specify in the 'Start Range' and 'End Range' text boxes.
IPv4 Single Address - Enter a single IP address to be added to the zone - e.g. 198.51.100.2.
IPv4 Subnet Mask - A subnet mask allows administrators to divide a network into two or more networks by splitting the host part of an IP address into subnet and host numbers.
-
Enter the IP address and Mask of the network you wish to add to the defined zone.
IPv6 Single Address -Enter a single address to be added to the zone - e.g. 3ffe:1900:4545:3:200:f8ff:fe21:67cf.
IPv6 Subnet Mask - IPv6 networks can be divided into smaller networks called sub-networks (or subnets). An IP address/ Mask is a subnet defined by IP address and mask of the network.
-
Enter the IP address and Mask of the network.
MAC Address - Enter a specific MAC address to be added to the zone.
Exclude – Adds every address to the zone except the ones you specify here.
Click 'OK' to add the address to the zone. You can add more addresses, and more address types, to the zone by repeating the process above.
Click ‘OK’ in the main zone config window to add your zone to Endpoint Manager.
The zone will be available when you choose 'Network Zone' as the source / destination address in a firewall rule.
- See How to configure internet access rights for applications via Endpoint Manager if you need details on constructing firewall rulesets for applications / file groups
- See How to create a custom firewall rule set in a Windows profile if you need details on creating firewall rules for a custom ruleset.
- See How to add global rules to firewall in a Windows profile for help to create global rules
-
Click the pencil icon beside a network zone to edit its details.
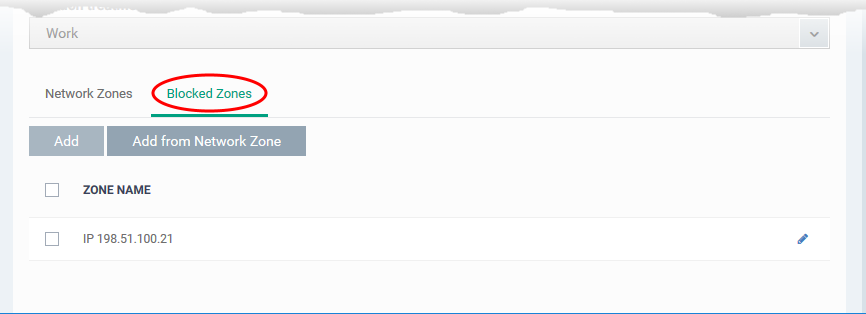
The 'Blocked Zones' tab lets you completely prevent access to and from zones you do not trust.
-
Click the 'Blocked Zones' tab
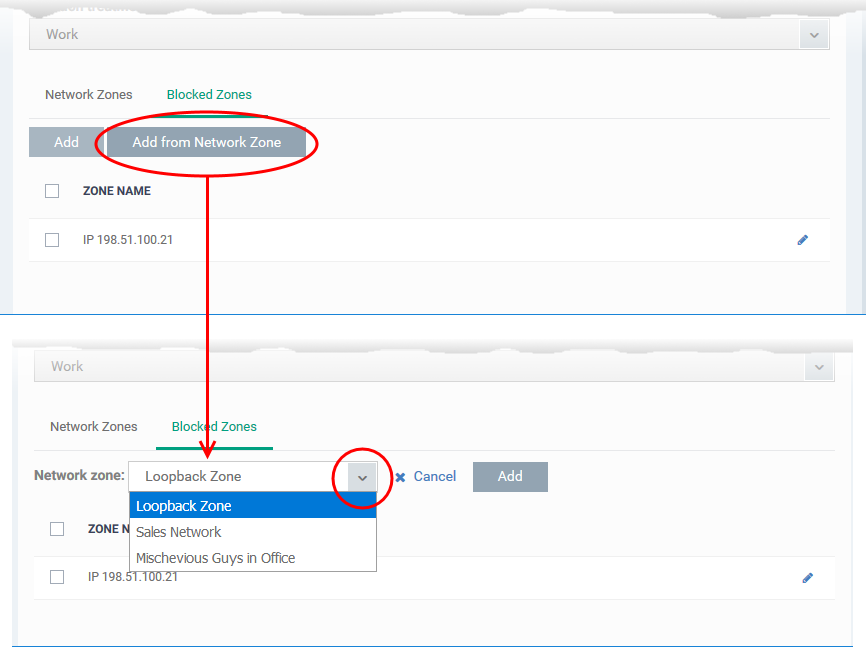
You can add network zones to be blocked in two ways:
Add an existing network zone to be blocked
-
Click 'Add from Network Zone'
The 'Network Zone' drop-down shows all network zones added to the profile, under the 'Network Zones' tab, as explained above.
-
Choose the zone you wish to block from the 'Network Zone' drop-down and click 'Add'.
-
The network zone is added to the blocked zones.
-
Repeat the process to add more blocked network zones for the profile
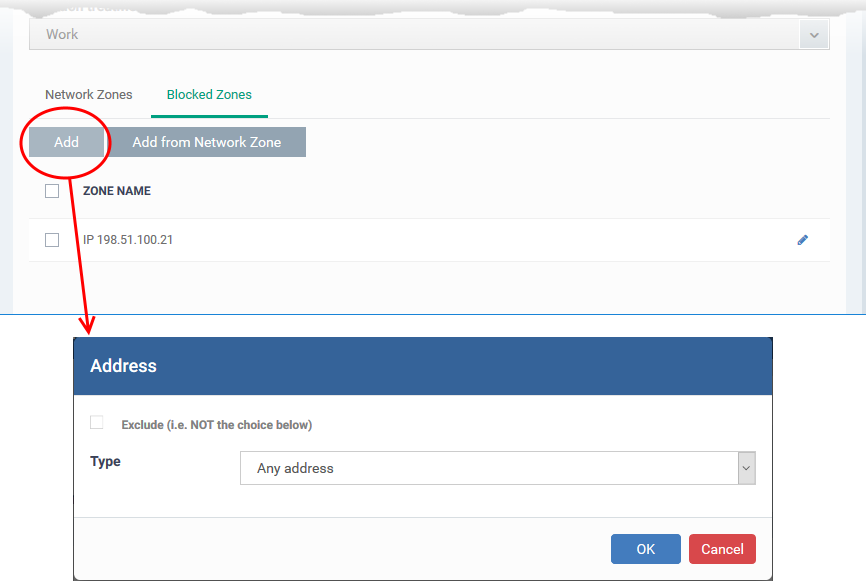
Add a new network zone to be blocked
-
Click 'Add' in the 'Blocked Zones' interface
-
Add the address of the network zone to be blocked as explained above.
-
Click 'OK' to save the blocked network zone
-
Click 'Save' in the Firewall settings pane for your changes to take effect.
Further Reading
How to configure general firewall settings in a Windows profile
How to configure internet access rights for applications via Endpoint Manager
How to add global rules to firewall in a Windows profile
How to create a custom firewall rule set in a Windows profile
How to configure port sets in a Windows profile
